


12
Note: The connecting lines of adjacent points are at right angles.
B. Drill four holes with a depth of 32 mm by using your drill with a 6 mm drill bit on the positions you
marked previously on the wall.
C. Insert four wall plugs into the holes respectively.
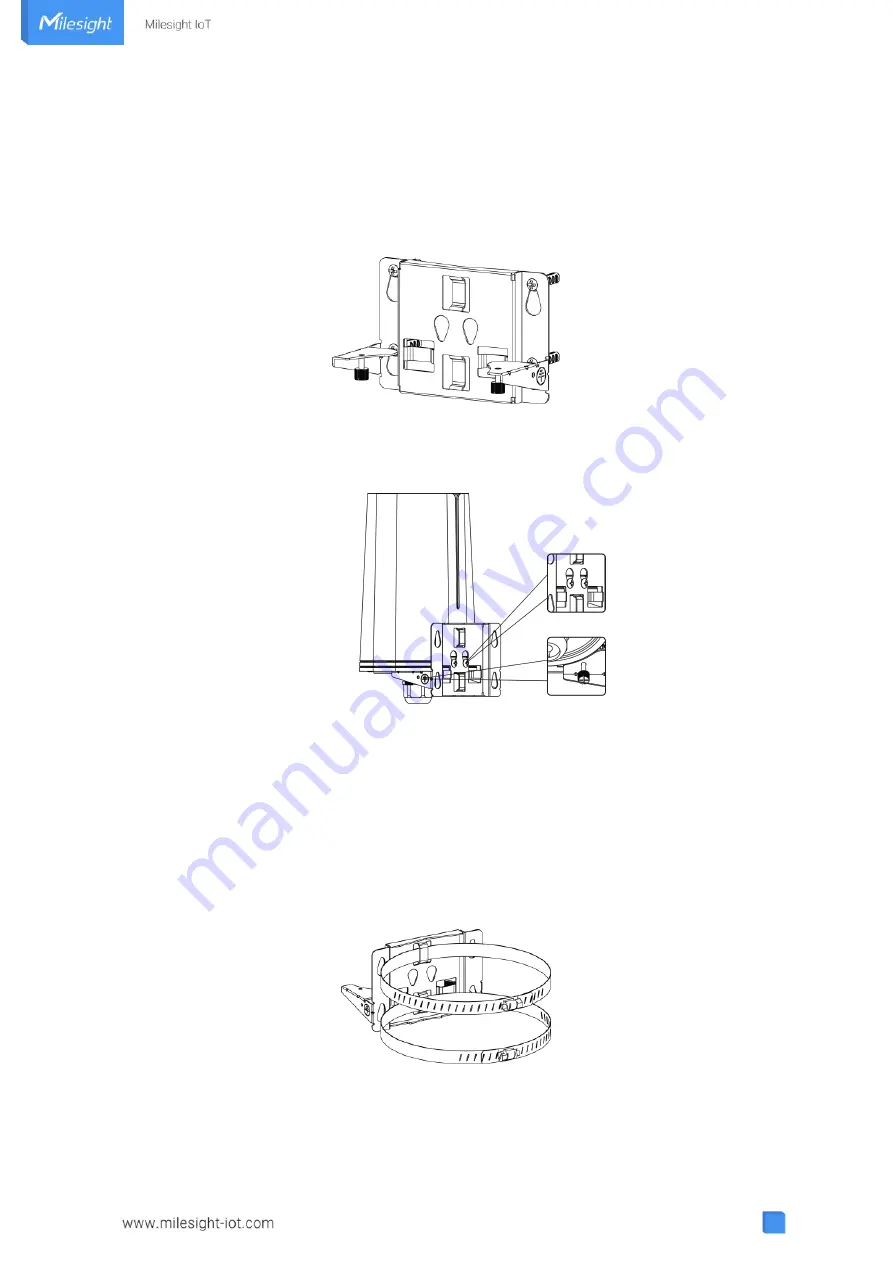
D. Mount the mounting bracket horizontally to the wall by fixing the wall mounting screws into the wall
plugs.
E. Hang the device to the mounting bracket via bracket mounting screws on the back of device, then
screw the 2 bracket screws to the bottom of the device.
4.3.3 Pole Mounting
Preparation: mounting bracket(with 2 screws), hose clamps and other required tools.
A. Loosen the hose clamp by turning the locking mechanism counter-clockwise.
B. Straighten out the hose clamp and slide it through the rectangular rings in the mounting bracket, wrap
the hose clamp around the pole.
C. Use a screwdriver to tighten the locking mechanism by turning it clockwise.
D. Hang the device to the mounting bracket via bracket mounting screws on the back of device, then
screw the 2 bracket screws to the bottom of the device.
Содержание UF51
Страница 1: ...1 5G CPE UF51 Quick Start Guide...
Страница 13: ...13...
Страница 17: ...17 F After you login the Web GUI you can view system information and perform configuration on the device...


