background image

I. Hardware Installation

1.

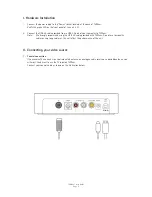
Connect the power supply to the “Power” socket located at the back of TVMax+.
Verify the green LED on the front panel of the unit is lit.

2.

Connect the USB 2.0 cable provided from a USB 2.0 port of your computer to TVMax+.
Note: 

We strongly recommend using the USB 2.0 cable provided with TVMax+. Do not use low quality 
cables or very long cables as this will affect the performance of the unit.

II. Connecting your video source

1.

Coaxial connection

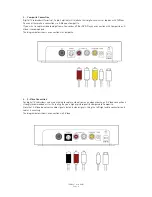
If you receive TV channels via a roof-mounted antenna, an analogue cable service or a portableantenna, you 
will most likely want to use the TV input on TVMax+.
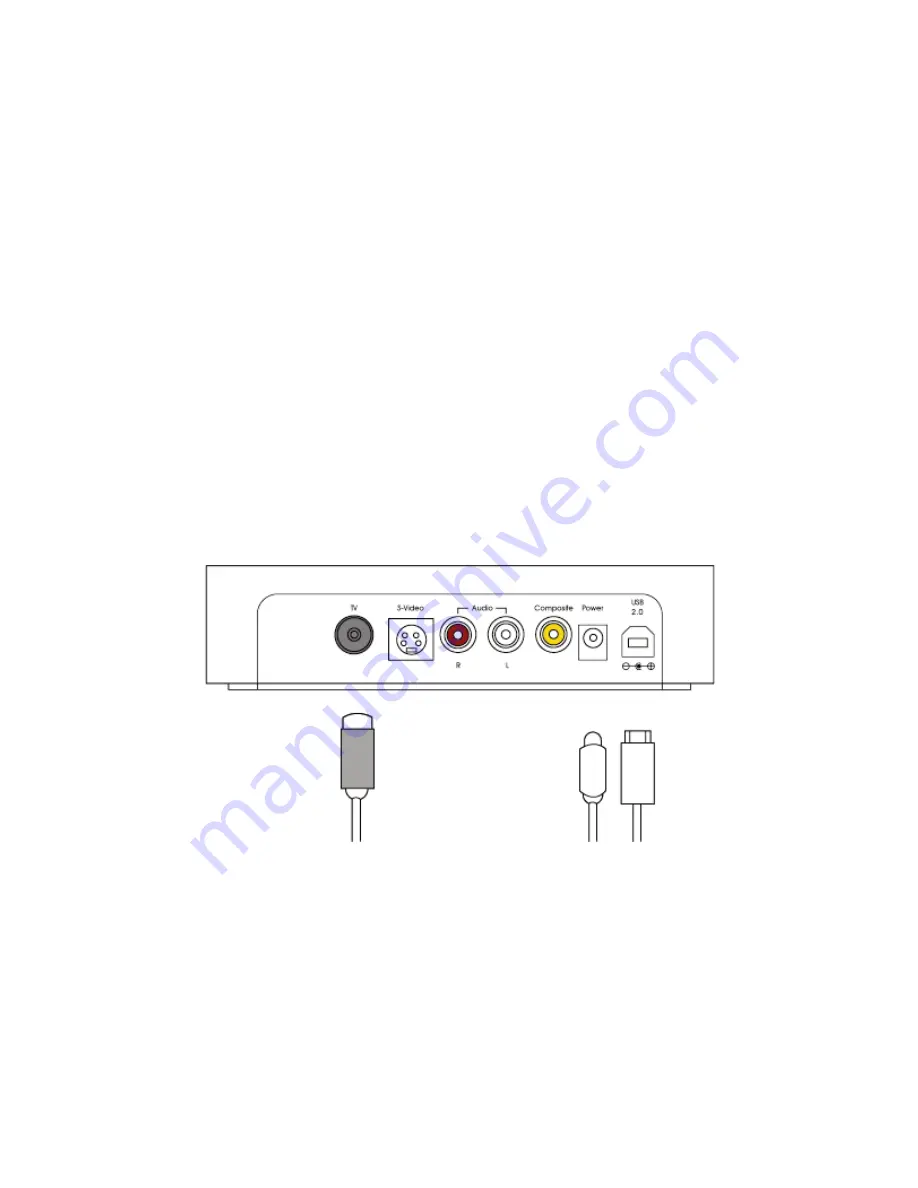
Connect your coaxial cable as shown on the illustration below

TVMax+™ User Guide

Page 5

Содержание TVMax Plus

Страница 1: ...Revision 1 0 c 2007 Miglia TVMax Hardware Guide...

Страница 2: ...and System requirements 2 Overview of TVMax 3 Hardware and Software installation 4 Hardware installation 5 Connecting your video source 5 Software installation 7 Compression settings for TVMax 8 Video...

Страница 3: ...Introduction and Overview of TVMax TVMax User Guide Page 1...

Страница 4: ...and installation guide Power Supply USB 2 0 Cable A B Warranty card User Guide Overview This User Guide will guide you through the TVMax installation as well as explain as certain hardware specific f...

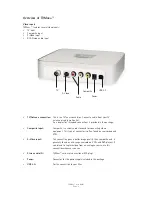
Страница 5: ...dard for connecting video equipment This type of connector is often found on camcorders and VCRs S Video input This connection gives a better image quality than composite and is generally found on mid...

Страница 6: ...Hardware and Software Installation TVMax User Guide Page 4...

Страница 7: ...ongly recommend using the USB 2 0 cable provided with TVMax Do not use low quality cables or very long cables as this will affect the performance of the unit II Connecting your video source 1 Coaxial...

Страница 8: ...deo is recommended The diagram below shows a connection via Composite 3 S Video Connection For digital TV subscribers and users wishing to capture video from an analogue source an S Video connection i...

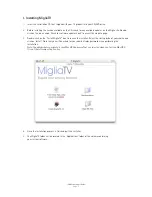
Страница 9: ...ble click on the Install MigliaTV icon to launch the installer Select the startup drive of your choice and click on Install Note that you will be asked for your administrator password when performing...

Страница 10: ...Compression Settings for TVMax TVMax User Guide Page 8...

Страница 11: ...file directly readable by iMovie HD No lengthy conversion will be required when opening the file in iMovie HD The size for the iMovie HD option is 640x480 Apple TV This option will generate a 640x480...

Страница 12: ...EG 4 and delivers great picture quality combined with small file sizes The video size is 720x576 PAL or 720x480 NTSC DivX Portable TVMax lets you create video files compatible with the DivX Portable p...

Страница 13: ...Remote control keys TVMax Hardware Guide Page 11...

Страница 14: ...Reserved 22 Channel down 23 Reserved 24 Rewind live TV 25 Pause Resume live TV 26 Skip forward live TV 27 Go back to beginning of TV buffer 28 Go to live feed 29 Go to end of TV buffer 30 Reserved 31...

Страница 15: ...he casing has been modified removed or broken The decision of HDMI Ltd shall be final and binding with regards to the condition of product return and eligibility of repair or replacement Software Prod...

Отзывы: