11694001-01
Installation
*INSTALLATION*
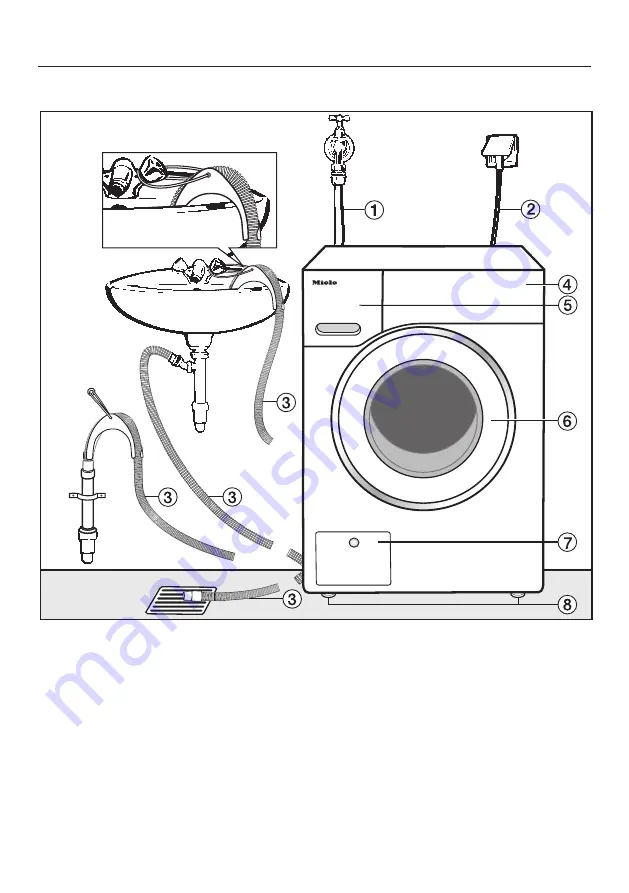
Front view
a
Water inlet hose
b
Electrical connection
c
Flexible drain hose (with detachable
swivel elbow)
d
Control panel
e
Detergent dispenser drawer
f
Door
g
Access to drain filter, drain pump and
emergency release
h
4 height-adjustable feet


