background image

Frequently Asked Questions

With the help of the following guide minor faults in the performance of the
machine, some of which may result from incorrect operation, can be remedied
without contacting the Service Department.

This guide may help you to find the reason for the fault, and how to correct it.

To prevent cold from escaping, open the appliance doors as little as possible
until the fault has been corrected.

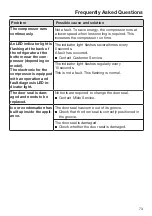
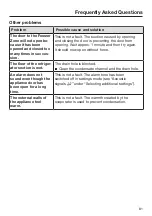
Problem

Possible cause and solution

The appliance is not
getting cold, the interior
lighting does not come
on when the door is
opened, and the display
is not lit up.

The appliance is not switched on and the power
supply symbol 

 is lit up in the display.

Switch the appliance on.

The plug is not properly plugged into the electrical
outlet.

Insert the plug correctly into the socket. The power
supply symbol 

 appears in the display when the

appliance is switched off.

Check whether the fuse has tripped. There could be
a fault with the appliance, the household electrical
wiring or another electrical appliance.

Contact a qualified electrician or Miele Technical
Service for assistance.

The compressor comes
on less and less often
and for shorter periods
of time. The tempera-
ture in the appliance
rises.

This is not a fault. The temperature setting is too
high.

Correct the temperature setting.

Check the temperature again after 24 hours.

The food begins to thaw. 
The ambient temperature is too low for this
appliance. 
If the ambient temperature is too low, the
compressor will run less frequently. This may cause
the freezer to become too warm.

See the information in the section on “Installation –
Installation location”.

Increase the ambient temperature.

71

Содержание KFNS 37692 iDE-1

Страница 1: ...Operating and Installation Instructions Fridge freezer Combination To prevent accidents and machine damage read these instructions before installation or use en US M Nr 11 450 680 ...

Страница 2: ...tching off for longer periods of time 24 The correct temperature 25 in the refrigerator section and in the PerfectFresh Pro zone 25 Automatic cold air circulation DynaCool 25 in the Freezer Zone 25 Temperature display 26 Setting the temperature for the refrigerator freezer section 26 Adjusting the temperature in the PerfectFresh Pro zone 28 Using Automatic SuperCool and SuperFreeze 29 The automati...

Страница 3: ...rawers 49 Moving the carbon filter 50 Freezing and storing food 51 Maximum freezing capacity 51 What happens when you freeze fresh food 51 Storing frozen food 51 Home freezing 52 Adjusting the interior fittings 55 Using accessories 55 Making ice cubes 56 Ice cube maker with integrated ice cube tray 56 Turning the ice cube maker on off 57 Making a large quantity of ice cubes 58 Changing the size of...

Страница 4: ...r dealers 84 Demo mode 84 Installation 86 Installation information 86 Side by side 86 Installation location 86 Ventilation 87 Cabinet doors 88 Before installing the appliance 92 Installation dimensions 94 Limiting the opening angle of the appliance doors 95 Changing the door hinges 95 Building in the appliance 99 Fitting the cabinet doors 107 Water connection 113 Information on the fresh water con...

Страница 5: ...ow the instructions in the chapter on installing the refrigeration appliance as well as the IMPORTANT SAFETY INSTRUCTIONS Miele cannot be held liable for injury or damage caused by non compliance with these instructions Keep these instructions in a safe place and pass them on to any future owner Appropriate use This appliance is intended for use in the home and similar environments This appliance ...

Страница 6: ...ge resulting from incorrect or improper use or operation This refrigeration appliance may only be used by people including children with reduced physical sensory or mental capabilities or lack of experience and knowledge if they are supervised while using it The refrigeration appliance may only be used by these people without supervision if they have been shown how to use it in a safe way and reco...

Страница 7: ...not affect the performance of the refrigeration appliance When transporting and installing the refrigeration appliance ensure that no parts of the cooling circuit are damaged Splashes of coolant can damage the eyes In the event of damage Avoid open flames or anything which creates a spark Disconnect the refrigeration appliance from the power supply Ventilate the room where the refrigeration applia...

Страница 8: ...der to protect the user from harm Do not connect the appliance to the electrical supply with a power bar or extension cord These are a fire hazard and do not guarantee the required safety of the appliance If moisture gets into electrical components or into the power cord it could cause a short circuit Therefore do not operate the machine in areas where there may be moisture or splashing water e g ...

Страница 9: ...s should only be replaced by Miele original parts Only with these parts can the manufacturer guarantee the safety of the appliance Correct use The appliance is designed for use within a certain climate range ambient temperatures and should not be used outside this range The climate range for your appliance is stated on the data plate inside the appliance Installing it in a room with too low an amb...

Страница 10: ...frozen food or to the metal Risk of injury Do not take ice cubes out with your bare hands and never place ice cubes or ice pops in your mouth straight from the freezer section The very low temperature of the frozen food can cause frost burn to the lips and tongue Do not refreeze partially or fully defrosted food Consume defrosted food as soon as possible as it will lose its nutritional value and s...

Страница 11: ...ds or remove ice trays Never place electric heaters or candles in the appliance to defrost it These can damage the plastic parts Do not use defrosting sprays or de icers as they could contain substances which could damage the plastic parts or which might cause the build up of gases and pose a danger to health Rinse the ice cube maker and the water supply line before using for the first time if the...

Страница 12: ...off the old appliance Dispose of them separately from the appliance Ensure that the appliance is not stored in the vicinity of gasoline or inflammable gases and liquids during and after disposal Make sure that the coolant pipework is not damaged during disposal to avoid uncontrolled leakage of oil and coolant see data plate for coolant type If your old refrigeration appliance has a door lock destr...

Страница 13: ...g the surface coating Symbol on the compressor depending on model This information is only relevant for recycling There is no risk during normal operation The oil in the compressor can be fatal if swallowed or if it penetrates the airways 13 ...

Страница 14: ...ealth and to the environment if disposed of with general waste or if handled incorrectly Please do not therefore dispose of your old appliance with general waste Instead please make use of officially designated collection and disposal points to dispose of and recycle electrical and electronic appliances By law you are solely responsible for deleting any personal data from the appliance prior to di...

Страница 15: ...heat source radiator oven Where the ideal room temperature is approx 68 F 20 C Where the ambient room temperature is above 77 F 25 C Air vents uncovered and dusted regularly Where the ventilation openings are blocked and full of dust Temperature setting 39 F to 41 F 4 C to 5 C in the refrigerator section The lower the temperature in the appliance the higher the energy consumption PerfectFresh Pro ...

Страница 16: ...ppliance as soon as possible Replace any food removed as quickly as possible before it warms up too much Allow hot food and drinks to cool down before placing them in the appliance Hot food or food at room temperature raises the temperature inside the refrigeration appliance The appliance will try to cool down and the compressor will run for longer periods Store food well packaged or covered The e...

Страница 17: ...on off e For setting the temperature for colder selection button in settings mode f For confirming your selection OK button g For setting the temperature for warmer selection button in settings mode h For selecting and deselecting settings mode i For deactivating the temperature door alarm j Display with temperature and symbols symbols only visible in settings mode in the event of an alarm message...

Страница 18: ...Display Brightness Settings For adjusting the brightness of the display Carbon filter replacement indicator Active AirClean This function must be activated after installing a carbon filter it lights up to remind you to replace it PerfectFresh Pro temperature For adjusting the temperature in the PerfectFresh Pro zone Sabbath Mode For turning Sabbath mode on and off Power supply Confirms that the ap...

Страница 19: ...an help prolong the storage life The cool pack will be at its most effective after it has been in the freezer for approximately 24 hours Optional accessories A range of useful Miele accessories and care products are available for your appliance Accessories are available to order via the Miele Webstore from Miele directly see back cover for contact details or from your Miele dealer Bottle rack Bott...

Страница 20: ...s onto the protective strip at the back of the shelf and can be moved as necessary Now activate the carbon filter replacement indicator in Settings mode see Selecting additional settings Carbon filter replacement indicator KKF RF Active AirClean replacement filters Replacement filters to fit the Active AirClean holder are available We recommend replacing the carbon filters every 6 months ...

Страница 21: ...the accessories Operating the appliance A light touch on the sensors is all that is required to operate this appliance A tone will sound each time a sensor is touched You can deactivate this if you wish see Selecting additional settings Audible signals Switching on the appliance Once the appliance is connected to the electricity supply the power supply symbol will soon appear on the display Touch ...

Страница 22: ...ly cold inside the appliance allow the appliance to run for a few hours before placing food in it Do not place food in the Freezer Zone until it has reached the required coldness at least 0 F 18 C Individual settings can be set for each zone Touch the sensor button for the zone in which you want to adjust the settings The selected sensor button will light up yellow The Automatic SuperCool function...

Страница 23: ...ut having to turn off the freezer section This is for example useful when you go on vacation Touch the sensor for the refrigerator section until the yellow light goes out Dashes will temporarily appear on the display Turning the refrigerator section back on again The refrigerator section can be turned on separately Touch the sensor for the refrigerator section until the yellow light comes back on ...

Страница 24: ...he appliance off Unplug the appliance or trip the circuit breaker Empty the ice cube drawer Risk of damage to the ice cube maker If the water supply is cut off while the ice cube maker is still in use the water intake pipe can freeze up Turn the ice cube maker off if the water supply is interrupted e g while on vacation Close the water supply faucet Clean the refrigeration appliance and leave the ...

Страница 25: ...ctFresh Pro zone We recommend a temperature of 39 F 4 C in the refrigerator section The temperature in the PerfectFresh Pro zone is controlled automatically and maintained at 32 to 37 F 0 to 3 C Automatic cold air circulation DynaCool The fan automatically turns on when the cooling system for the refrigerator section turns on It distributes the temperature in the refrigerator section to all areas ...

Страница 26: ...he temperature setting it can take the appliance a few hours to reach the temperature required and for this temperature to then be shown as a constant temperature in the display Setting the temperature for the refrigerator freezer section The temperatures for the refrigerator and freezer sections are set separately Select the refrigerator or the freezer section Use the two sensors below the displa...

Страница 27: ...ce will be displayed or Touch the OK button to confirm your selection If you have adjusted the temperature wait for approx 6 hours if the appliance is not very full and for approx 24 hours if the appliance is full before checking the temperature display as it will take this long for the appliance to give an accurate reading If after this amount of time the temperature is too high or too low adjust...

Страница 28: ...e display and the symbol will flash Touch the buttons for setting the temperature or repeatedly until the symbol flashes on the display Touch the OK button to confirm your selection The last setting selected will flash and the symbol will light up on the display You can now adjust the temperature in the PerfectFresh Pro zone by touching the or button You can choose from settings 1 to 9 1 lowest te...

Страница 29: ...ll light up in yellow Touch the SuperCool button it will light up in yellow The appliance will work at full power to lower the temperature in the refrigerator section Turning off automatic SuperCool The automatic SuperCool function turns off automatically after approx 12 hours The appliance will then continue to operate at normal power To save energy the automatic SuperCool function can be turned ...

Страница 30: ... only freezing up to 4 5 lbs 2 kg of fresh food daily Turning on automatic SuperFreeze For freezing small quantities of food the automatic SuperFreeze function should be turned on 6 hours beforehand If you are freezing the maximum load of food the automatic SuperFreeze function should be turned on 24 hours beforehand Touch the sensor for the freezer section The freezer section symbol will light up...

Страница 31: ...The SuperFreeze symbol will then go out and the appliance will run at normal power again To save energy the automatic SuperFreeze function can be turned off once a constant temperature of 0 F 18 C has been reached inside the freezer section Check the temperature inside the appliance Touch the sensor for the freezer section The freezer section symbol will light up yellow Touch the SuperFreeze butto...

Страница 32: ...r when food is being loaded rearranged or taken out when freezing large amounts of food at once when freezing fresh food which is still warm after a power outage if the appliance has a fault The alarm will stop sounding and the alarm symbol will go out as soon as the temperature has dropped to the correct level again The freezer section sensor lights up again constantly Health risk caused by decom...

Страница 33: ...factory default or 4 minutes However the door alarm can also be turned off see Selecting additional settings Audible signals As soon as the door is closed the alarm stops sounding and the alarm symbol disappears from the display If no alarm sounds even though there is a door alarm the alarm has been turned off in settings mode see Selecting additional settings Audible signals Cancelling the door a...

Страница 34: ... for the ice cube maker are described in Making ice cubes and Cleaning and maintenance How to adjust the temperature in the PerfectFresh Pro zone is described in The right temperature All other available settings are described below Safety lock The safety lock can be activated to prevent the appliance being switched off by mistake the temperature being changed by mistake SuperCool and SuperFrost b...

Страница 35: ...gs mode automatically after approximately one minute The symbol will appear in the display when the safety lock is activated Temperature unit Celsius or Fahrenheit The temperature can be displayed in either Fahrenheit F or Celsius C Degrees Fahrenheit F is the factory setting Setting the temperature display to Celsius Touch the settings sensor All symbols available for selection will appear on the...

Страница 36: ... 1 minute The temperature will now be displayed in Celsius Setting the temperature display to Fahrenheit Touch the settings sensor All symbols available for selection will appear on the display and the symbol will flash Touch the sensors for setting the temperature or repeatedly until C and F flash on the display Touch the OK sensor to confirm the selection C will flash on the display You can now ...

Страница 37: ... and the door alarm on and off but you cannot turn off the temperature alarm There are 4 settings to choose from Option 3 is set at the factory this means that the button tone and the door alarm are switched on Switching acoustic signals on off Touch the settings sensor All symbols available for selection will appear on the display and the symbol will flash Touch the sensors for setting the temper...

Страница 38: ...ngs mode automatically after approximately 1 minute Display brightness You can adjust the brightness of the display to suit the ambient light conditions in the room The display brightness can be adjusted incrementally from 1 to 3 The factory default setting is 3 maximum brightness Changing the brightness of the display Touch the settings sensor All symbols available for selection will appear in th...

Страница 39: ...n the appliance door is opened All audible and visual signals The temperature display SuperCool and SuperFrost if previously selected The ice cube maker if previously turned on The following can be selected The settings button for turning off Sabbath mode The On Off button The Sabbath mode function will turn itself off automatically after approximately 120 hours Ensure that the appliance doors are...

Страница 40: ...n the display after 3 seconds Sabbath mode is switched on Turn off Sabbath mode after the Sabbath has passed Turning off Sabbath mode Touch the Settings sensor to leave Sabbath mode The temperature will appear in the display and the interior lighting will come on Carbon filter replacement indicator This appliance is not supplied with carbon filters with a KKF FF holder Active AirClean The holder i...

Страница 41: ...he OK sensor button to confirm the selection The most recently selected setting flashes and the symbol lights up in the display Touch or to make your selection Carbon filter replacement indicator deactivated 1 Carbon filter replacement indicator activated 2 Counter reset Touch the OK sensor button to confirm the selection The selected setting is applied the symbol flashes Touch the settings sensor...

Страница 42: ... not come into contact with plastic components as this could cause stress cracks or break the plastic Make sure that no fat or oil leaks onto the plastic parts of the appliance Different storage zones Due to natural air circulation there are different temperature zones in the refrigerator section Cold heavy air sinks to the lowest section of the refrigeration section Make use of the different zone...

Страница 43: ...s containing eggs or cream Fresh dough cake mixtures pizza dough or pie dough Raw milk cheese and other raw milk products Pre packed vegetables Other fresh food with a label stating it should be kept at a temperature of approximately 39 F 4 C Food which is not suitable for storage in the refrigerator section Not all food is suitable for refrigeration at temperatures below 41 F 5 C because it is se...

Страница 44: ...od in the appliance as soon as possible Storing food correctly Ensure that food stored in the refrigerator section is in packaging or covered properly some exceptions apply in the PerfectFresh Pro zone This will prevent food smells from affecting other food food from drying out and also any cross contamination of bacteria This is particularly important when storing meat products Make sure that foo...

Страница 45: ...r longer Food should be in good condition from the start to get good storage results Take food out of the PerfectFresh Pro zone approx 30 60 minutes before using it The aroma and flavor do not fully develop until the food has reached room temperature The PerfectFresh Pro zone is divided into two compartments The Info system shown here in sections above the PerfectFresh Pro zone helps you to choose...

Страница 46: ...foods rich in protein deteriorate faster than others Shellfish for example deteriorate faster than fish and fish deteriorates faster than meat For hygiene reasons you should always keep these foods covered or wrapped Humidity controlled compartment Regulating humidity in the humidity controlled compartment A slide control is used to regulate the amount of moisture in the humidity controlled compar...

Страница 47: ...ntrolled compartment low or high humidity for the type of food being stored High humidity in the humidity controlled compartment is achieved solely through the moisture contained in the food stored i e the more food in the compartment the more moisture there is If too much moisture collects in the compartment with setting and this is affecting the food select Otherwise mop up the condensate with a...

Страница 48: ...ch the bottle holder from the back edge of the bottle shelf Moving the shelf shelf with lighting By adjusting the position of the shelf with lighting in the refrigerator section you can change the illumination in this section as required Stops prevent the shelves from being dislodged by mistake The shelves can be adjusted according to the height of the food 1 Lift the shelf up slightly at the fron...

Страница 49: ...t upwards to prevent the bottles from touching the back wall Stops prevent the bottle rack from being dislodged by mistake PerfectFresh Pro zone drawers The drawers in the PerfectFresh Pro zone are on telescopic rails and can be removed for filling emptying or cleaning purposes To make it easier to pull out the drawers remove the bottle shelf from the appliance door Pull the drawers out as far as ...

Страница 50: ...er The carbon filter with KKF FF holder Active AirClean is available as an optional accessory see Accessories Optional accessories When you are storing very strong smelling food e g cheese Place the holder with the carbon filters on the adjustable shelf where this food is being kept Change the carbon filters sooner if necessary Use additional carbon filters with holders in the appliance see Access...

Страница 51: ...ng the defrosting process only some of this water is reabsorbed by the cells What this means in practice is that the food loses more moisture You can see this in the large amount of water that collects around the food when it defrosts If food is frozen quickly the cells have less time to lose moisture so they shrink less As there is not so much moisture loss it is easier for the food to reabsorb i...

Страница 52: ...bly longer Separate chops steaks cutlets etc with a sheet of plastic freezer film to prevent them from freezing together in a block Do not season raw food or blanched vegetables with herbs or salt before freezing Cooked food should only be lightly seasoned The flavor of some herbs intensifies when frozen Placing hot food or drink in the freezer causes food that is already frozen to partially thaw ...

Страница 53: ... packaging and containers are dry to prevent them from freezing together or to the walls Freezing small amounts of food Place the food in the upper freezer drawers Place the food flat in the bottom of the freezer drawer so that it freezes through to the middle as quickly as possible Freezing the maximum amount of food see data plate If the ventilation slots are obstructed the cooling performance w...

Страница 54: ...s follow the advice on the packaging Defrosting frozen goods Never re freeze partially or fully defrosted food Defrosted food may only be re frozen after it has been cooked Frozen food can be defrosted in different ways In a microwave In an oven using Convection or the Defrost setting At room temperature In the Fridge Zone the cold given off by the frozen food helps to keep the other food cold In ...

Страница 55: ...Lift the glass plate slightly pull it forwards and out Using accessories Using the cool pack The cool pack prevents the temperature in the freezer section from rising too quickly in the event of a power failure This can help prolong the storage life Place the cool pack in the top drawer of the freezer section The cool pack will be at its most effective after it has been in the freezer for approxim...

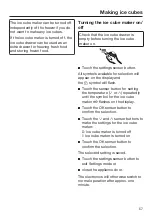
Страница 56: ...e cubes with the ice cube maker After the initial commissioning of the machine it can take up to 24 hours for the first ice cubes to drop out of the ice cube maker and collect in the drawer After the ice cube maker has been turned off and on again it can take up to 6 hours for this process to be completed The ice cube drawer contains an automatic ice cube maker When the ice cube maker is switched ...

Страница 57: ... for selection will appear on the display and the symbol will flash Touch the sensor button for setting the temperature or repeatedly until the symbol for the ice cube maker flashes on the display Touch the OK sensor button to confirm the selection Touch the and sensor buttons to make the settings for the ice cube maker 0 Ice cube maker is turned off 1 Ice cube maker is turned on Touch the OK sens...

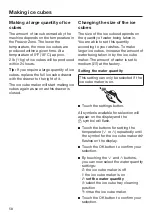
Страница 58: ...ble to set this quantity according to your wishes To make larger ice cubes increase the amount of water being taken in by the ice cube maker The amount of water is set to medium E3 at the factory Setting the water quantity This setting can only be selected if the ice cube maker is on Touch the settings button All symbols available for selection will appear on the display and the symbol will flash ...

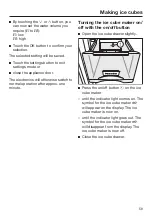
Страница 59: ...cs will otherwise switch to normal operation after approx one minute Turning the ice cube maker on off with the on off button Open the ice cube drawer slightly Press the on off button on the ice cube maker until the indicator light comes on The symbol for the ice cube maker will appear on the display The ice cube maker is now on until the indicator light goes out The symbol for the ice cube maker ...

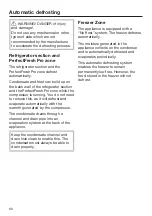
Страница 60: ...this as it will defrost and evaporate automatically with the warmth generated by the compressor The condensate drains through a channel and drain pipe into an evaporation system at the back of the appliance Keep the condensate channel and drain hole clean to enable this The condensate must always be able to drain properly Freezer Zone The appliance is equipped with a NoFrost system The freezer def...

Страница 61: ...s information which is required in the event of a service call Cleaning agents Cleaning and conditioning agents used inside the appliance must be food safe To avoid damaging the surfaces of your appliance do not use cleaning products containing soda ammonia acid or chloride lime scale removers abrasive cleaning products such as scouring powder scouring liquid or pumice stones cleaners containing s...

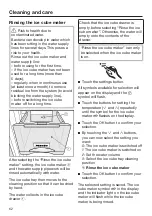
Страница 62: ...e water collects in the ice cube drawer Check that the ice cube drawer is empty before selecting Rinse the ice cube maker Otherwise the water will empty onto the contents of the drawer Rinse the ice cube maker can only be selected when the ice cube maker is on Touch the settings button All symbols available for selection will appear on the display and the symbol will flash Touch the buttons for se...

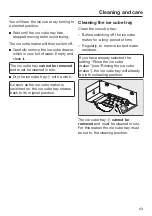
Страница 63: ...th a cloth As soon as the ice cube maker is switched on the ice cube tray rotates back to its original position Cleaning the ice cube tray Clean the ice cube tray Before switching off the ice cube maker for a long period of time Regularly to remove ice and water residues If you have already selected the setting Rinse the ice cube maker see Rinsing the ice cube maker the ice cube tray will already ...

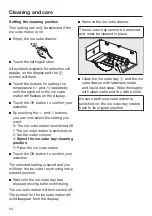
Страница 64: ...witched on 2 Set the water volume 3 Select the ice cube tray cleaning position 4 Rinse the ice cube maker Touch the OK button to confirm your selection The selected setting is saved and you will hear the ice cube tray moving into a slanted position Wait until the ice cube tray has stopped moving before continuing The ice cube maker will then switch off The symbol for the ice cube maker will disapp...

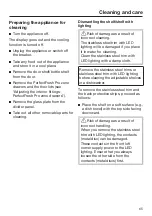
Страница 65: ...lt of incorrect cleaning The stainless steel trim with LED lighting will be damaged if you place it in water for cleaning Clean the stainless steel trim with LED lighting with a damp cloth Remove the stainless steel trims or stainless steel trim with LED lighting before cleaning the adjustable shelves in a dishwasher To remove the stainless steel trim and the back protective strips proceed as foll...

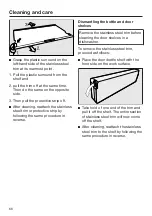
Страница 66: ...otective strip by following the same procedure in reverse Dismantling the bottle and door shelves Remove the stainless steel trim before cleaning the door shelves in a dishwasher To remove the stainless steel trim proceed as follows Place the door bottle shelf with the front side on the work surface Take hold of one end of the trim and pull it off the shelf The entire section of stainless steel tr...

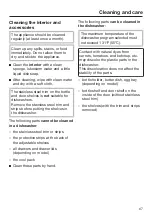
Страница 67: ...hwasher The following parts cannot be cleaned in a dishwasher the stainless steel trim or strips the protective strips at the back of the adjustable shelves all drawers and drawer lids depending on model the cool pack Clean these parts by hand The following parts can be cleaned in the dishwasher The maximum temperature of the dishwasher program selected must not exceed 131 F 55 C Contact with natu...

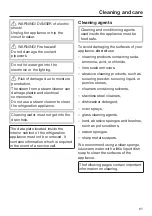
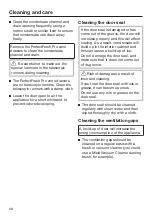
Страница 68: ... has come out of the groove the door will not close properly and this will affect cooling As a result condensate will build up in the interior cabinet and this can cause a build up of ice Do not damage the door seal and make sure that it does not come out of its groove Risk of damage as a result of incorrect cleaning If you treat the door seal with oils or grease it can become porous Do not use an...

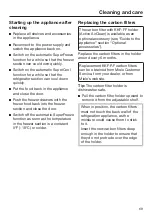
Страница 69: ...perature in the freezer section is a constant 0 F 18 C or colder Replacing the carbon filters The carbon filter with KKF FF holder Active AirClean is available as an optional accessory see Guide to the appliance section Optional accessories Replace the carbon filters in the holder around every 6 months Replacement KKF RF carbon filters can be obtained from Miele Customer Service from your dealer o...

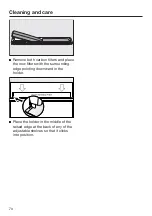
Страница 70: ...both carbon filters and place the new filters with the surrounding edge pointing downward in the holder Place the holder in the middle of the raised edge at the back of any of the adjustable shelves so that it clicks into position ...

Страница 71: ...o the electrical outlet Insert the plug correctly into the socket The power supply symbol appears in the display when the appliance is switched off Check whether the fuse has tripped There could be a fault with the appliance the household electrical wiring or another electrical appliance Contact a qualified electrician or Miele Technical Service for assistance The compressor comes on less and less...

Страница 72: ...sed properly A thick layer of ice may have already formed in the freezer Close the appliance doors After a while the temperature will return to normal by itself If a thick layer of ice has already formed this will affect cooling and increase energy consumption Defrost the appliance and clean it The ambient temperature is too high The higher the ambient temperature the longer the compressor has to ...

Страница 73: ... an operation and fault diagnosis LED in dicator light The indicator light flashes several times every 5 seconds A fault has occurred Contact Customer Service The indicator light flashes regularly every 15 seconds This is not a fault This flashing is normal The door seal is dam aged and needs to be replaced No tools are required to change the door seal Contact Miele Service Ice or condensation has...

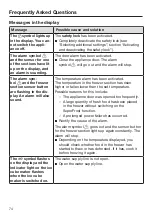
Страница 74: ...erature alarm has been activated The temperature in the freezer section has risen higher or fallen lower than the set temperature Possible reasons for this include The appliance door was opened too frequently A large quantity of fresh food has been placed in the freezer without switching on the SuperFrost function A prolonged power failure has occurred Rectify the cause of the alarm The alarm symb...

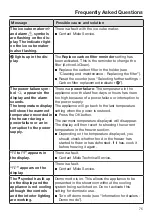
Страница 75: ...he appliance over the last few days or hours has risen too high because of a power failure or interruption to the power supply The appliance will go back to the last temperature setting when the power is restored Press the OK button The warmest temperature displayed will disappear The display will then revert to showing the current temperature in the freezer section Depending on the temperature di...

Страница 76: ...on of the ice cube tray The temperature in the Freezer Zone is too high Select a lower temperature The water supply to the ice cube maker has been interrupted Check the water connection and the hose The filter in the end of the water inlet hose or the filter in the connection on the appliance is blocked Clean the filters The water line has not been vented Have a qualified professional check that t...

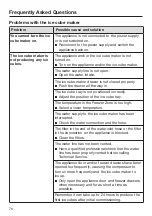
Страница 77: ... and water supply line regularly see Cleaning and care Rinsing the ice cube maker The ice cube maker is seldom used If you do not use it very often ice cubes that are stored for a long period can absorb the taste and smell of other items Empty the ice cube drawer if you are not going to use the ice cube maker for a long time Rinse the ice cube maker and water supply line regularly see Cleaning and...

Страница 78: ...ing switches itself off automatically after approximately 15 minutes if the appliance door is left open If this is not the cause there is a fault Risk of electric shock due to exposed live electrical components When removing the lighting cover there is a risk of coming into contact with live electrical components Do not remove the lighting cover The LED lighting may only be repaired or replaced by...

Страница 79: ...hting on the stainless steel trim is faulty Risk of electric shock due to exposed live electrical components When removing the lighting cover there is a risk of coming into contact with live electrical components Do not remove the lighting cover The LED lighting may only be repaired or replaced by Customer Service Risk of injury from LED lighting This lighting corresponds to risk group RG 2 If the...

Страница 80: ... on all the shelves Wipe the stainless steel trim with LED lighting with a damp cloth and dry it or leave it outside the appliance to dry Clean the metal contacts in the shelf supports in the same way Ensure that the contacts are clean and dry before replacing the shelves with LED lighting Push in the shelf until it clicks into position Close the appliance door When the door is opened again the in...

Страница 81: ... then try again It should now open without force The floor of the refriger ator section is wet The drain hole is blocked Clean the condensate channel and the drain hole An alarm does not sound even though the appliance door has been open for a long time This is not a fault The alarm tone has been switched off in settings mode see Acoustic signals under Selecting additional settings The external wa...

Страница 82: ...Please bear in mind that a certain amount of noise is unavoidable from the compressor and the coolant circulating through the system Noises Possible cause and solution Rattling clinking The appliance is uneven Realign the appliance using a spirit level by raising or lowering the screw feet underneath the appliance or place something underneath it The appliance is touching another appliance or piec...

Страница 83: ...e Customer Service can be found at the end of this document Please quote the model identifier and serial number of your appliance SN when contacting Miele Customer Service Both pieces of information can be found on the data plate You will find the data plate inside your appliance Appliance warranty and product registration You can register your product and or view the manufacturer s warranty terms...

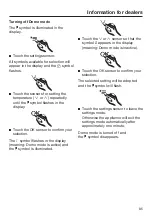
Страница 84: ...e appliance off by touching the On Off button If this does not work the safety lock is activated The temperature shown on the display will go out and the power connection symbol appears Touch and hold the button At the same time briefly touch the on off button without letting go of the button Keep your finger on the button until the symbol appears on the display Release the button Demo mode is on ...

Страница 85: ... to confirm your selection The 1 symbol flashes in the display meaning Demo mode is active and the symbol is illuminated Touch the or sensor so that the symbol 0 appears in the display meaning Demo mode is inactive Touch the OK sensor to confirm your selection The selected setting will be adopted and the symbol will flash Touch the settings sensor to leave the settings mode Otherwise the appliance...

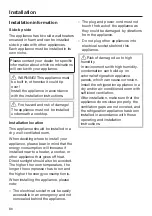
Страница 86: ...ppliance that gives off heat Direct sunlight should also be avoided The higher the room temperature the longer the compressor has to run and the higher the energy consumption is When installing the appliance please note The electrical socket must be easily accessible in an emergency and not concealed behind the appliance The plug and power cord must not touch the back of the appliance as they coul...

Страница 87: ...ruction If the ventilation slits are not kept free and unobstructed the compressor will switch on more often and will run for longer This can cause higher energy consumption and to an increased compressor operating temperature which can result in damage to the compressor Do not block the ventilation slits The air at the back wall of the appliance warms up Therefore the cabinet must be constructed ...

Страница 88: ...he appliance with a ventilation grille free airflow of at least 31 sq inches 200 cm b Between the kitchen cabinetry and the ceiling c In a suspended ceiling Cabinet doors An upper cabinet door for the refrigerator section and a lower cabinet door for the freezer section are required The cabinet doors must be at least 5 8 16 mm 3 4 19 mm thick If the cabinet doors are too heavy this can cause damag...

Страница 89: ...hat of the doors of the adjacent units The following gaps are required The horizontal gap between the cabinet door and the cupboard door above it must be at least 1 8 3 mm The vertical gap between the cabinet doors should be approx 1 8 3 mm The exact value will depend on the radius of the edge of the cabinet door The cabinet door must be fitted correctly and not under tension Tip Please also see t...

Страница 90: ... of freezer section cabinet door min max height of refrigerator section cabinet door Refrigerator section cabinet door Freezer section cabinet door Refrigerator section appliance door Freezer section appliance door Fitted unit cover panel Fitted unit cabinet base 90 ...

Страница 91: ... Height of freezer section cabinet door 1 The freezer section cabinet door must be at least A 27 3 8 695 mm to cover the bottom section of the appliance 2 To cover the front of the cabinet floor panel add the height of the cabinet base to height A min A G4 28 1 8 714 mm 3 The height of the cabinet door may need to be altered depending on the adjacent kitchen units max A G4 D 1 8 3 mm 28 9 16 726 m...

Страница 92: ...of the appliance the spacers depending on the model They ensure the distance required between the back of the appliance and the wall the bags located in the metal grille heat exchanger depending on model These are required for the functioning of the appliance Their contents are not toxic or hazardous Remove the cable clips from the back of the appliance Remove red transport safety device depending...

Страница 93: ... than 21 3 4 553 mm you can remove the wall spacer from the back of the appliance so that you can push the appliance right into the niche Removing the wall spacer can increase energy consumption as there is then a smaller ventilation area Loosen the screw and remove the wall spacer ...

Страница 94: ...epth of 21 5 8 550 mm but will consume slightly more energy If the appliance is suitable for installation in a niche ensure before installation that it has precisely the correct dimensions The specified ventilation grille dimensions must be observed to ensure that the appliance functions correctly Niche height A Freezer section B KFNS 37692 iDE 1 69 3 4 70 3 8 1772 1788 mm 27 3 8 695 mm 94 ...

Страница 95: ...ocking pins for limiting the door opening must be fitted before the appliance is installed The refrigerator section door must be removed in order to insert the pins into the upper hinge of the freezer section door Insert the locking pins supplied for limiting the door opening into the hinges from above The appliance door opening angle is now limited to approximately 90 Changing the door hinges Alw...

Страница 96: ...nce doors Remove the door shelves bottle shelves from the appliance door Remove the covers and Danger of injury The hinges can snap closed Leave them open Slightly loosen the hinge screws and Push the appliance doors and outward and take them off ...

Страница 97: ...ted pins into the hinges to limit the opening angle of the door Lift the pins up and out of the hinges Carry out the following steps for each door Unscrew the soft close mechanism The soft close mechanism folds in when dismantled Place the door with the front facing down on a stable surface Remove the soft close mechanism from the ball joint Unscrew the mount and pull the soft close mechanism towa...

Страница 98: ...s hinges remain open Do not close the hinges Remove the screws Place each hinge in the corner diagonally opposite its original position Fastening the soft close mechanism Now turn over the appliance door so that the outer side faces downwards Screw the mount onto the hinge and firmly tighten Pull the soft close mechanism so that it extends and hook it onto the ball joint ...

Страница 99: ...appliance Two people are required to install the appliance Install the appliance in a stable solid cabinet positioned on an even and level floor Secure the cabinetry against tipping Use a spirit level to align the cabinet The cabinet corners must be at 90 angles to each other otherwise the cabinet door will not sit straight on all 4 corners The required ventilation gaps must be provided see Instal...

Страница 100: ... To install the appliance you will need the following tools Parts required for installation All installation parts are number coded This coding is also used in the installation instructions For building the appliance into the niche ...

Страница 101: ...binet niche Push the filler strip lugs into the holders from the front If the appliance is hinged on the left slide the lugs into the right hand opening of the holder Risk of damage to the securing bracket and cover The cover on the securing bracket can easily become detached Always close the cover as soon as you have finished working on the bracket Loosely screw the securing brackets into the pre...

Страница 102: ... Tip Tie a piece of string to the plug to lengthen the power cord this will help you to push the appliance into position Pull the power cord through the cabinet by the other end of the string so that the appliance can be connected to the power supply easily after installation With 5 8 16 mm thick cabinet walls only Clip the spacers and onto the right of the hinges Open the appliance doors ...

Страница 103: ...uring bracket Loosely fit the securing bracket using the screws Tip Do not tighten the screws so that you can adjust the position of the connecting bracket Carefully remove the protective film from the sealing strip Stick the sealing strip onto the side of the appliance on which the door will open flush with the front 1 Align the sealing strip with the bottom edge of the top fixing bracket 2 Stick...

Страница 104: ... 1 5 8 42 mm is maintained all around between the appliance casing and the front of the cabinet side walls Now push the appliance into the niche until all securing brackets at the top and bottom are touching the front edge of the cabinet side wall 5 8 16 mm thick walls The spacers should touch the front edge of the cabinet side walls at the top and bottom 3 4 19 mm thick walls The front edges of t...

Страница 105: ...te dimension Tip If possible remove the door fittings and push the appliance into the niche until all securing brackets at the top and bottom are touching the front edge of the cabinet side wall Align the appliance on both sides via the adjustable feet so that it stands upright Securing the appliance in the niche Push the appliance onto the cabinet wall on the hinge side Screw the particleboard sc...

Страница 106: ...erwise the gap of 1 5 8 42 mm will not be maintained all the way round Push the protruding bracket toward the cabinet wall using your thumb while tightening the screws Fix the securing bracket to the cabinet wall with the screws Tip Pre drill the holes Re tighten screws and Snap off any protruding ends from the securing bracket They are no longer required and can be disposed of Place the covers an...

Страница 107: ...fit the appliance into a new housing unit Close the appliance doors Fitting the cabinet doors An installation set or an extra pair of securing brackets is available from Miele Customer Service or from specialist retailers for the installation of large or divided cabinet doors Complete the following steps on both doors The distance between the appliance door and the mounting frame is set to 5 16 8 ...

Страница 108: ... downward Draw a faint central line with a pencil on the inside of the cabinet door Hang the mounting frame with the installation aids on the inside of the cabinet door Align the mounting frame centrally Attach the mounting frame securely using at least 6 short particleboard screws On raised paneled doors only use 4 screws on the edges Tip Pre drill the holes Pull the installation aids upward to r...

Страница 109: ...nge Turn the cabinet door over and attach the handle if required Open the appliance door Hang the cabinet door on adjusting bolts Screw nuts loosely onto the adjusting bolts Adjusting the position of the door Check the distance between the door and adjacent cabinet doors The distance should be the same ...

Страница 110: ...the appliance door and the mounting frame is set to 5 16 8 mm Only adjust the distance within the specified range Turn the adjusting bolts with a screwdriver While counterholding the adjusting bolts with a screwdriver tighten the nuts The filler strip must not protrude it must completely disappear into the niche ...

Страница 111: ...The cover on the securing bracket can easily become detached Always close the cover as soon as you have finished working on the bracket Close the cover and close the door Z depth adjustment Check the distance between the cabinet door and the housing unit A distance of approximately 1 16 2 mm is required Undo screws and Tighten all the screws again ...

Страница 112: ...se properly The doors are not sitting against the cabinet carcase The seal on the top corner of the handle side is firmly seated To check this place a lamp that is switched on inside the appliance and close the appliance doors Make the room dark and then check whether you can see light shining out from the sides of the appliance If so go back and check the individual installation steps ...

Страница 113: ...lations in the country where the appliance is being installed All appliances and systems used to supply water to the refrigeration appliance must also comply with the applicable regulations in the respective country The water connection pressure needs to be between 21 and 87 psi 1 5 and 6 bar Use fresh water to ensure that the quality of the ice cubes remains high Connect the stainless steel hose ...

Страница 114: ... is disconnected from the power supply The fresh water connection is at the back of the appliance at the bottom The connection parts included with the appliance permit the connection of various water lines water line not supplied Do not connect old water lines that have been used before The solenoid valve has a metric R 3 4 connection thread Remove the cap from the solenoid valve Insert the adapte...

Страница 115: ...g the clamping ring and nut In case of a water line with a 7 16 24 UNS thread Connect the water line directly to the adapter or elbow a clamping ring and nut are not required Secure the water line to the casing using the retaining clip Slowly open the faucet in the water supply line and check the whole water system for leaks The appliance can now be connected to the power supply see Electrical con...

Страница 116: ...r after installation before plugging the appliance into the power supply This allows coolant and refrigerator oil to settle in accordance with regulations Ensure that the voltage of the main power supply corresponds with the connection voltage of the appliance A power supply of 110 120 V 60 Hz and 15 Amp 20 Amp for side by side installation with a NEMA 5 15 molded plug which is protected by a main...

Страница 117: ...tactor compliant with local regulations The plug and power cord must not come into contact with the back of the appliance as vibrations can cause damage to these components This in turn could result in a short circuit Do not plug in other devices behind this appliance Do not connect the appliance to an inverter such as those used with an autonomous energy source e g solar power When switched on pe...

Страница 118: ......

Страница 119: ... Service Canada Importer Miele Limited Headquarters and Miele Centre 800 843 7231 609 419 4298 Customer Service Support Phone Fax service mieleusa com 161 Four Valley Drive Vaughan ON L4K 4V8 www miele ca 888 99 MIELE 64353 888 586 8056 Customer Care Centre Phone customercare miele ca 800 565 6435 905 532 2272 International Headquarters Miele Cie KG Carl Miele Straße 29 33332 Gütersloh Germany ...

Страница 120: ...M Nr 11 450 680 00 en US KFNS 37692 iDE 1 ...

Отзывы: