background image

Combination programmes

– Mic Fan plus

– Mic Auto roast

– Mic Grill

– Mic Fan grill

The combination programmes enable
food to be reheated and cooked
quickly with even browning results.

The combination programmes enable
the grill or the fan setting to be used in
conjunction with the microwave facility.

The Mic Fan plus combination
programme is the most effective
because the heat reaches the food to
be baked or cooked immediately,
giving the greatest savings in both time
and energy.

In general when using the combination
programmes, you should not set the
microwave power level  higher than
150 W for baking, and not higher than
450 W for cooking, roasting and grilling.

Automatic programmes

– Defrosting

– Reheating

– Cooking

Food can be cooked, reheated or
defrosted using microwave power or
combination programmes. Automatic
programmes are dependent on weight,
i.e. after selecting the appropriate food
group, you then enter the weight of the
food and the microwave power setting
and time will be calculated
automatically.

Operating modes

24

Содержание H 4050 BM

Страница 1: ...ons Microwave combination oven H 4050 BM H 4060 BM To avoid the risk of accidents or damage to the appliance it is essential to read these instructions before it is installed and used for the first time G M Nr 06 230 161 ...

Страница 2: ...g modes 22 Microwave function 22 Traditional oven functions 23 Fan plus 23 Auto roast 23 Grill 23 Fan grill 23 Combination programmes 24 Automatic programmes 24 Operating sequence 25 Programming cooking times 29 Automatic programmes 31 User programmes 33 Settings 36 Suitable containers for microwave ovens 39 Material and shape 39 Testing dishes for their suitability 42 A cover 43 Defrost 44 Chart ...

Страница 3: ...rt for roasting 60 Baking 61 Baking chart 63 Cleaning and care 64 Oven interior and inside of the door 64 Appliance front and control panel 65 Accessories supplied 67 Problem solving guide 68 After sales service 71 Electrical connection IRL U K ZA 72 Electrical connection AUS NZ 73 Installation 74 Miele home 76 Contents 3 ...

Страница 4: ...FF switch bDisplay cFunction selector with turn and press mechanism Oven interior dGrill element eOven interior lighting fConnection socket for the roast probe gThree shelf levels hOven door Description of the appliance 4 ...

Страница 5: ...uld cause arcing to occur Boiling rod When heating liquids the boiling rod provided should always be placed into the container It helps liquids to heat evenly Roast probe The roast probe enables the roasting process to be monitored simply and reliably See Roasting with the Roast probe for details Optional accessories Miele home The Miele home system gives you the ability to call up your appliance ...

Страница 6: ...ppliance before should be supervised by a competent and responsible person to avoid the risk of injury This appliance is not a toy To avoid the risk of injury keep children well away and do not let them play with it or use the controls They will not understand the potential dangers posed by it They should be supervised whenever you are working in the kitchen Older children may use the appliance on...

Страница 7: ... held liable for the consequences of an inadequate earthing system e g electric shock The appliance must be built in before operation to ensure that no electrical components are accessible Installation work and repairs may only be carried out by suitably qualified and competent persons in accordance with local and national safety regulations Repairs and other work by unqualified persons could be d...

Страница 8: ...ire Do not use the microwave function to dry breadcrumbs flowers herbs grain etc Use the Fan plus function for this type of procedure and do not leave the oven unattended Do not use the microwave function to heat up cushions or pads filled with cherry kernels wheat grain lavender or gel such as those used in aromatherapy These pads can ignite when heated even after they have been removed from the ...

Страница 9: ...nsation forming on the control panel and surrounding kitchen furniture and drops of moisture collecting under the worktop Condensation can damage the housing unit worktop lead to moisture damage in the oven The glass tray and the combi rack take a maximum load of 8 kg Exceeding this weight limit can cause them damage Do not lean or sit on an open oven door or place heavy items on it This could dam...

Страница 10: ... screw top and teat must be removed Otherwise pressure builds up which can cause the bottle or container to explode posing a severe risk of injury When heating liquids the boiling rod provided should always be placed into the container When heating liquids milk sauces etc using microwave heat without the boiling rod the boiling point of the liquid may be reached without the production of typical b...

Страница 11: ... cooked without their shells using microwave heat only if the yolk membrane has been punctured several times first The pressure could otherwise cause the egg yolk to explode Danger of injury Do not reheat food in the oven in heat retaining bags which are intended for use in normal ovens These heat retaining bags usually contain a thin layer of aluminium foil which reflects microwaves This reflecte...

Страница 12: ... before lowering it for cleaning Danger of burning Do not use force to lower it as this can cause it to break In countries where there are areas which may be subject to infestation by cockroaches or other vermin pay particular attention to keeping the appliance and its surroundings in a clean condition at all times Any damage which may be caused by cockroaches or other vermin will not be covered b...

Страница 13: ...h if handled or disposed of incorrectly could be potentially hazardous to human health and to the environment They are however essential for the correct functioning of your appliance Please do not therefore dispose of your old appliance with your household waste Please dispose of it at your local community waste collection recycling centre and ensure that it presents no danger to children while be...

Страница 14: ...turned The right hand control is the multi function dial It is used for selecting the menu options The dial can be turned as well as pressed Turning it allows you to select a function or a setting as well as to change values e g times and temperatures Pressing it confirms the selection of the option or setting highlighted in the display Display The parameters and settings which can be selected are...

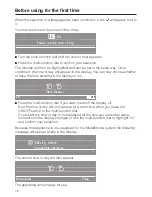
Страница 15: ...ply M Willkommen Selecting a language After a few seconds the display will change to the Language menu EINSTELLUNGEN SPRACHE The choice of languages will appear in alphabetical order in the right hand column of the display The language currently selected is shown highlighted The text in the left hand column will be in that language You can now select the language you want or confirm the one curren...

Страница 16: ...5 Clock Display on off Press the multi function dial if you want to switch the display off Now the time of day will only appear for a short time when you press the ON OFF switch or the multi function dial If you want the time of day to be displayed all the time you can either wait a moment until the display changes or turn the multi function dial to highlight on and confirm your selection Because ...

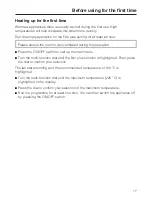
Страница 17: ...ll up the main menu Turn the multi function dial until the Fan plus function is highlighted Then press the dial to confirm your selection The fan starts running and the recommended temperature of 160 C is highlighted Turn the multi function dial until the maximum temperature 225 C is highlighted in the display Press the dial to confirm your selection of the maximum temperature Run the programme fo...

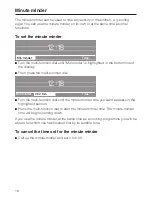
Страница 18: ... the multi function dial 12 18 Min minder 0 00 min Time Turn the multi function dial until the minute minder time you want appears in the highlighted section Press the multi function dial to start the minute minder time The minute minder time will begin counting down If you use the minute minder at the same time as a cooking programme you will be able to tell which one has finished first by its au...

Страница 19: ...hlighted in the bottom of the display Then press the multi function dial Turn the multi function dial until the correct hour appears Press the multi function dial to confirm your selection Now turn the dial until the correct minutes appear and press the dial to confirm the entry To alter the time of day 19 ...

Страница 20: ...s of poultry etc Grill with the oven door closed Combination programmes In the combination programmes microwave power is used in conjunction with a traditonal function Fan plus Fan grill Grill Auto roast Automatic programmes For cooking reheating and defrosting selected food groups using microwave power or a combination programme Automatic programme delay You can programme the start or end time of...

Страница 21: ...ns Door contact switch If the door is opened during a programme the heater element and fan are automatically switched off The programme will continue to run again as soon as the door is shut and the start button has been pressed If the door is opened during a conventional programme i e one without microwave power the programme will continue to run again as soon as the door is shut You do not need ...

Страница 22: ...ould lead to the creation of sparks The microwaves cannot be absorbed Microwaves pass through a suitable container and find their way directly into the food All food contains moisture molecules which when subjected to microwave energy start to oscillate 2 5 thousand million times a second The friction caused by this vibration creates heat which first starts developing around the outside of the foo...

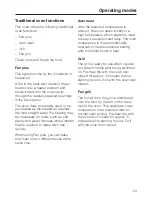
Страница 23: ...e and roast on two different levels at the same time Auto roast After the selected temperature is entered the oven heats initially to a high temperature which seals the meat to keep it succulent and tasty The oven temperature is then automatically returned to the pre selected setting after this initial boost of heat Grill The grill is ready for use when it glows red a few minutes after being switc...

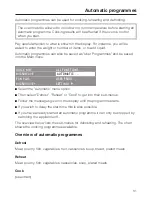
Страница 24: ...baked or cooked immediately giving the greatest savings in both time and energy In general when using the combination programmes you should not set the microwave power level higher than 150 W for baking and not higher than 450 W for cooking roasting and grilling Automatic programmes Defrosting Reheating Cooking Food can be cooked reheated or defrosted using microwave power or combination programme...

Страница 25: ... sub menus cannot be altered Quick MW This programme uses microwave power at 1000 W for one minute The settings for this programme can be altered if wished via the Settings menu Microwave The parameters for a microwave programme can be pre set including the power level the duration and also the settings for delaying the start Fan plus As soon as this programme is selected the hot air fan can be he...

Страница 26: ...nctions such as Auto Roast Grill Fan Plus Microwave Microwave Fan Grill and Quick MW can all be selected via this menu Automatic A number of automatic programmes are stored in this menu For an overview of them please see Automatic programmes User programmes You can save processes which you use most frequently here and also give them special names to help you select them easily Settings A number of...

Страница 27: ...s setting The display will change after a few seconds and you can then enter the duration for the microwave programme If you don t want to wait for the display to change you can simply press the function selector to confirm the power setting showing in the display MICROWAVE 1000 W 9 47 Duration 0 00 min Turn the function selector until the required duration shows in the display Press the function ...

Страница 28: ...2 20 min STOP Min minder Duration Save Once a programme has started it can be interrupted by pressing the function selector or cancelled by pressing the ON OFF switch The door is not locked during microwave operation and can be opened at any time without having to stop the programme This only interrupts the programme The programme can be continued after closing the door again and as long as START ...

Страница 29: ...ant cooking to start or finish The oven will switch on or off automatically at the time you have set To switch a programme off automatically you can either enter the Duration or just the Finish time To switch a programme on and off automatically you have three choices Enter the Duration and Finish time Enter the Start time and the Duration Enter the Start time and the Finish time The time not ente...

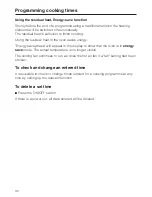
Страница 30: ...l appear in the display to show that the oven is in energy save mode The actual temperature is no longer visible The cooling fan continues to run as does the hot air fan if a fan setting had been chosen To check and change an entered time It is possible to check or change times entered for a cooking programme at any time by calling up the relevant function To delete a set time Press the ON OFF swi...

Страница 31: ...OMATIC FAN PLUS USER PROGS MICROWAVE SETTINGS F Select the Automatic menu option Then select Defrost Reheat or Cook to get into their sub menus Follow the messages given in the display until the programme starts If you wish to delay the start time this is also possible If you have already started an automatic programme it can only be stopped by switching the appliance off The overview below lists ...

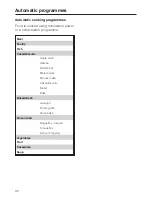
Страница 32: ...rogramme Meat Poultry Fish Cakes Biscuits Apple cake Gateau Plaited loaf Marble cake Streusel cake Cakes Biscuits Bread Bake Bakes Gratin Lasagne Potato gratin Pasta bake Frozen food Baguettes topped Croquettes Fish with topping Vegetables Fruit Casseroles Soup Automatic programmes 32 ...

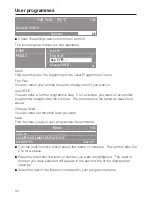
Страница 33: ...F Select User Progs from the main menu USER back A PROGS create H Press the multi function dial to confirm your selection USER back A PROGS create AUTO ROAST GRILL FAN PLUS H Now select the function Confirm the selection of for example Fan Plus FAN PLUS 160 C 9 52 If necessary alter the recommended temperature FAN PLUS 150 C 9 52 Coretemp Duration 01 30 h Select a duration or a core temperature if...

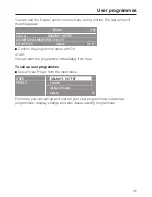
Страница 34: ...r programme straight after the first one The procedure is the same as described above Change Shelf You can enter set the shelf level you want save This is where you give your programme its own name Miele 9 52 save as ABCDEFGHIJKLMNOPQRSTUVWXYZ_ 0123456789 back A Turn the multi function dial to select the letters or numbers The symbol after the Z is for a space Press the dial when the letter or num...

Страница 35: ...te OK A Confirm the programme name with OK START You can start the programme immediately from here To call up user programmes Select User Progs from the main menu USER GRANNYS HOTPOT PROGS create display change delete H From here you can call up and start all your user programmes create new programmes display change and also delete existing programmes User programmes 35 ...

Страница 36: ...on during the entire programme Main menu The first three options in the main menu can be allocated to programmes which you use more frequently than the pre set programmes Quick MW Microwave and Fan plus Each option is shown as a position and can be changed You can select other options from the range of functions and from your user programmes Confirming Continue will take you through the three posi...

Страница 37: ... levels You can alter the recommended power levels for solo programmes and for combination programmes using microwave heat Display The display can be switched on or off If you select the setting Display on then the time of day will show in the display even when the appliance is switched off If you select Display on for 60 seconds then the display will go out after 60 seconds You can also adjust th...

Страница 38: ...change the factory default setting from Off to On A lock symbol will then appear in the middle of the bottom line of the display SOLO programme You can select one of the programmes from all the functions and user programmes which you can start even when the appliance is locked A lock symbol and SOLO will then be visible in the bottom line of the display Units You can alter the units namely the wei...

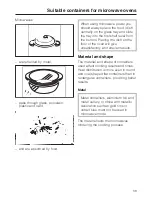
Страница 39: ...atisfactory and uneven results Material and shape The material and shape of containers used affect cooking results and times Heat distribution is more even in round and oval shaped flat containers than in rectangular containers providing better results Metal Metal containers aluminium foil and metal cutlery or china with metallic decoration such as gold rims or cobalt blue must not be used in micr...

Страница 40: ...t must not touch the walls Metal meat skewers or clamps should only be used if they are very small in comparison to the size of the cut of meat The combi rack supplied with the appliance is suitable for use with microwave power However it must not be placed on the oven floor The rack can get hot Glassware Heat resistant glass or ceramic glass are ideal for use in the microwave oven Crystal glass c...

Страница 41: ...oasted and carefully tied with string Turn the ends over and secure them The bag should be pierced according to the manufacturer s instructions Do not use metal clips plastic clips containing metal parts or paper ties containing wire There is a danger that they will ignite when heated Wood Wooden dishes are not suitable Moisture contained in the wood evaporates when exposed to microwave energy cau...

Страница 42: ...hest microwave power level is then highlighted 1000 W Press the function selector to confirm this selection 1000 W Turn the function selector to call up a time of 30 seconds Then press the selector to confirm your selection Press the Function selctor again to start the process If a crackling noise is heard accompanied by sparks during the test switch off the appliance imme diately Press the ON OFF...

Страница 43: ...re placed in the oven Do not attempt to heat them up unopened Do not use a cover if food coated with breadcrumbs is being cooked cooking meals which are to be given a crisp finish using a combination programme The cover supplied may only be used in Microwave solo mode The cover can only withstand temperatures of up to 110 C Higher temperatures generated by grilling or fan heat could cause the plas...

Страница 44: ...ity e g 2 kg of fish you can place the food directly on the glass tray and then slide it into the lowest shelf level Important when using an automatic programme for defrosting When defrosting a large amount of food which has been wrapped in individual portions enter a lower total weight than the actual total weight This will give a more even result Example 1 5 kg sliced steak packed into 3 individ...

Страница 45: ...r cake Cream cake Yeast buns puff pastries 1 piece approx 100 g 300 g 3 pieces approx 300 g 3 pieces approx 300 g 1 piece approx 100 g 3 pieces approx 300 g 4 pieces 1 2 4 6 6 8 5 7 6 8 1 5 4 4 5 5 10 5 10 10 15 5 10 5 10 5 10 5 10 Meat 2 10 15 Poultry 2 10 15 Fish 2 10 15 Vegetables 2 10 15 Fruit 2 5 10 Casserole 2 10 15 Soup 2 10 15 Bread 2 5 10 Plated meals 2 5 10 1 During this time the tempera...

Страница 46: ...ammes are also ideal for reheating Always use a lid or cover for reheating food except when a drier finish is needed e g breaded poultry meat Always remove the lids from jars e g jars of baby food Remove the rubber teat and screw cap before warming baby bottles When reheating liquids place the boiling rod supplied with the appliance into the cup or glass Never reheat hard boiled eggs using microwa...

Страница 47: ... the container may be considerable making the container itself hot Allow food to stand for a few minutes at room temperature once a programme has ended to allow the heat to be distributed evenly After reheating food especially food for babies and small children stir the food or shake the container and check that the temperature does not pose any danger Double check after it has been left to stand ...

Страница 48: ...les Soup Plated meals Frankfurters in 250 ml water Cutlets grilled Fillet of fish grilled Potato cakes Gravy Sauces 1 jar 200 g 100 g 200 g 200 g 250 g 250 ml 250 ml 3 4 3 5 3 4 3 5 4 5 0 30 1 3 1 3 5 3 5 3 5 3 5 3 5 3 5 3 5 1 2 2 1 1 1 During this time the temperature spreads evenly through the food Put the boiling rod in the container Times are based on an initial temperature of approx 5 C Use t...

Страница 49: ...er to vegetables which have been kept stored Vegetable cooking times depend on the texture of the vegetable Fresh vegetables contain more water than vegetables which have been stored and usually cook more quickly Food taken straight from the refrigerator requires longer to reheat than food stored at room temperature Stir and turn food at least once during cooking With the automatic programme a buz...

Страница 50: ...This also prevents the food from drying out Where a crisp finish is required e g for meat cook without a lid Combination programmes Place the dish on the glass tray and slide into the lowest shelf level Only use heat resistant microwave safe crockery No metal Generally you can cook without a lid when using the combination programmes Never use a lid when using Microwave Grill The food will not brow...

Страница 51: ...s Peppers sliced Vegetable batons Brussels sprouts Asparagus Broccoli florets Leeks Green beans 2 3 2 3 2 3 2 3 2 3 2 3 2 3 2 3 2 3 2 3 Frozen vegetables Peas mixed veg Spinach Brussels sprouts Broccoli Leeks 450 g 450 g 300 g 300 g 450 g 5 5 4 3 4 11 7 6 6 8 2 2 2 2 2 Desserts Cheese cake 500 g cream cheese Fruit compote 500 ml fruit juice or 500 g fruit 10 12 6 8 During this time the temperature...

Страница 52: ...5 45 approx 120 approx 100 Snacks 2 Toast with topping Baked artichoke hearts Chicken nuggets fresh 1 4 pieces 8 10 pieces approx 1000 g Grill Grill Fan plus 190 C 5 9 3 8 10 3 approx 20 4 1 lowest shelf level 2 second shelf level rack in the highest position 3 Pre heat the grill for 5 minutes place food on the rack 4 Pre heat the oven Slide the glass tray with the rack into the shelf level quoted...

Страница 53: ...lfway through the programme Turn pieces of fish at the halfway stage Deep frozen ready made meals in card trays which according to manufacturer s instructions are suitable for use in a normal oven are normally also microwave safe Combination programme Select Microwave Grill for cooking ready made meals which are to be crisped and browned Select a microwave power level of 450 watts The grill temper...

Страница 54: ...g the pre heating phase Brush the rack with oil and place the prepared food on the rack It is best to grill food of a similar thickness at the same time so that the grilling time for each item does not vary too greatly Place the rack on the glass tray and slide into the second or third shelf level from the bottom depending on the type of food you are grilling The rack can be used either way up to ...

Страница 55: ...llet 16 20 Toast 2 4 Toast with topping 5 9 Tomatoes 8 10 Peaches 7 10 1 Third shelf level 2 Turn half way through the grilling time The information given in this chart is intended only as a guide See the cookbook supplied with your oven and or a good microwave or microwave combi oven cookbook for further details on these and other foods Grilling 55 ...

Страница 56: ...roast Slide the glass tray with the combi rack into the first shelf level from the bottom Roasting pots with a lid made from earthenware cast iron ovenproof china or glass and roasting foil are suitable Make sure that the pot and lid have heat resistant handles Place the dish directly on the glass tray The roasting time will depend on the type of meat the size and thickness of the cut and can be c...

Страница 57: ...Roasting in a covered pot Season the meat and place in the pot Add some knobs of butter or margarine or baste with a little oil or cooking fat Add about 1 8 litre of water when roasting a big lean joint of meat 2 3 kg or roasting poultry with a high fat content Browning only occurs towards the end of the roasting time 15 20 minutes before the end of roasting time take the lid off the pot Roasting ...

Страница 58: ... of the probe reaches the centre Please note You can place the meat in a pot or on the rack on the glass tray Roasting bags or foil may also be used but only when left open at the ends Insert the probe through the foil or bag into the centre of the meat If fat or bone come into contact with the probe this can lead to the oven being switched off too early Therefore do not let the probe touch any bo...

Страница 59: ...ion then comes into action Energy save phase will appear in the display If the oven temperature is altered or the core temperature increased the oven heating will switch on again As soon as the core temperature selected has been reached the oven will switch itself off automatically the cooling fan will continue to run for a while Note The timer can also be used to delay the start of the programme ...

Страница 60: ... 170 190 50 60 300 180 35 40 75 80 Veal approx 1 kg 180 200 90 110 300 180 70 80 75 80 Leg of lamb approx 2 5 kg 170 190 120 140 300 180 70 80 70 90 Poultry 0 8 1 kg 170 190 50 60 150 180 40 45 Poultry approx 2 kg 170 190 90 110 150 180 70 80 Poultry approx 4 kg 160 180 150 180 150 170 100 120 Whole fish approx 1 5 kg 160 180 35 55 The times given are calculated on the basis of an oven which has n...

Страница 61: ...r baking in Thin walled and bright non reflective metal tins can be used but results may not be as good as with dark non reflective tins Baking times should not be set too long This can lead to the cake etc drying out Microwave Fan plus Slide the glass tray into the 1st shelf level from the bottom and place the baking container on it For preference use ovenproof glass or ceramic baking dishes as m...

Страница 62: ...brown Do not allow them to become dark brown To achieve even results without over browning the food when baking cakes pastries deep frozen foods such as chips croquettes frozen pizza baguettes etc always select the lowest temperature given in the recipe cooking instructions on the packaging Do not set a temperature higher than that recommended Increasing the temperature may reduce the cooking time...

Страница 63: ...170 25 30 40 50 20 30 85 95 45 55 60 70 Yeast mixtures and dough Streusel cake glass tray 1 Fresh fruit cake glass tray 1 Stollen White bread Dark rye bread Pizza glass tray 1 Onion tart glass tray 1 Apple turnovers 1 150 170 160 180 150 170 160 180 140 160 170 190 150 170 150 170 35 45 40 50 55 65 40 50 150 180 40 50 35 40 25 30 150 150 170 180 35 40 30 40 Choux pastry Eclairs 1 160 180 30 40 Fla...

Страница 64: ...ied with a soft spong or cloth Wipe dry with a soft cloth For more heavy soiling heat a glass of water for 2 to 3 minutes until the water begins to boil The steam will collect on the walls and soften the soiling The oven interior can now be wiped clean using a little washing up liquid if necessary If food has burnt on use a mild non abrasive cleaner or a proprietary cleaner for stainless steel app...

Страница 65: ...pliance front and control panel All surfaces and controls should be cleaned using an E Cloth or with warm water and a little washing up liquid applied with a soft sponge or cloth Wipe the surfaces dry using a soft cloth Do not use sharp metal tools to clean glass as these can scratch the surface Clean the door handle and the control elements regularly preferably after each use This will help preve...

Страница 66: ...re susceptible to scratches and abrasion Avoid cleaning agents containing soda acids or chlorides abrasive cleaning agents e g powder cleaners and cream cleaners abrasive sponges e g pot scourers or sponges which have been previously used with abrasive cleaning agents stainless steel cleaners cleaning agents containing descaling agents dishwasher detergent oven sprays Stainless steel fronted appli...

Страница 67: ... soiling straight away Avoid cleaning agents containing soda acids or chlorides abrasive cleaning agents e g powder cleaners and cream cleaners abrasive sponges e g pot scourers or sponges which have been previously used with abrasive cleaning agents stainless steel cleaners oven sprays Accessories supplied Combi rack Wash and dry the rack after each use Remove stubborn soiling with a stainless st...

Страница 68: ... programme the following have been entered a power setting a time for the microwave mode and a temperature for the conventional oven operating mode no operating noise is heard when the appliance door is opened during a cooking process in conventional oven mode This is not a fault If the door is opened during a cooking process the door contact switch will switch off the heating and depending on the...

Страница 69: ...icrowave mode the correct duration was selected for the setting chosen The lower the power level the longer the duration cakes or biscuits are not cooked after a recommended time Check whether the correct temperature was set there were any alterations to the recipe The addition of more liquid or more eggs makes a moister mix which would take longer to cook cakes or biscuits are unevenly browned Th...

Страница 70: ... If so remove it a fault message appears in the display Fault 54 Roast probe short circuit The roast probe is defective Remove the probe from its socket and the message will disappear Fault 55 Over riding time The oven has automatically switched itself off during use This is a safety feature to protect the oven if it has been operating for an exceedingly long period The length of time depends on t...

Страница 71: ...t see back cover for address When contacting your Dealer or the Service Department please quote the model and serial number of your appliance These are given on the data plate which is located on the front of the oven cavity Please note that calls may be monitored and recorded for training purposes After sales service 71 ...

Страница 72: ... is advisable to install a residual current device with a trip current of 30 mA in accordance with DIN VDE 0664 VDE 0100 Section 739 If the cable is damaged a new cable must be fitted by a Miele approved service technician This appliance conforms with European Standard EN 55011 as a Group 2 Class B product Group 2 appliances use high frequency energy in the form of electro magnetic waves to create...

Страница 73: ...he oven interior Please ensure that these match the household mains supply For extra safety it is advisable to install a residual current device RCD with a trip current of 30 mA Connection for the appliance should be made via a suitable isolator which complies with national and local regulations and which is accessible after the appliance has been built in Test marks Electrical safety C Tick Mark ...

Страница 74: ...an oven in a tall unit on its own in a base unit Building in dimensions Installation in a tall unit in combination with an oven Installation in a tall unit Installation in a base unit If fitted underneath a hob the installation instructions for the hob must also be taken into account Installation 74 ...

Страница 75: ... oven housing unit as far as the oven trim and align Open the oven door and with two screws secure the oven to the side walls of the furniture unit through the holes in the oven trim The oven must not be operated until it has been correctly installed in its housing unit Installation 75 ...

Страница 76: ...em Switch on the Miele home system Switch the appliance on and call up the Settings J menu Miele home will now appear as an option Confirm this option to sign on The signing on procedure will then commence It can be followed in the display It will take a few minutes As soon as it has finished the message Sign on successful will appear in the display Once you are successfully signed on you can use ...

Страница 77: ...77 ...

Страница 78: ...78 ...

Страница 79: ...79 ...

Страница 80: ...Alteration rights reserved 3306 H 4050 BM H 4060 BM M Nr 06 230 161 03 en GB ...

Отзывы: