background image

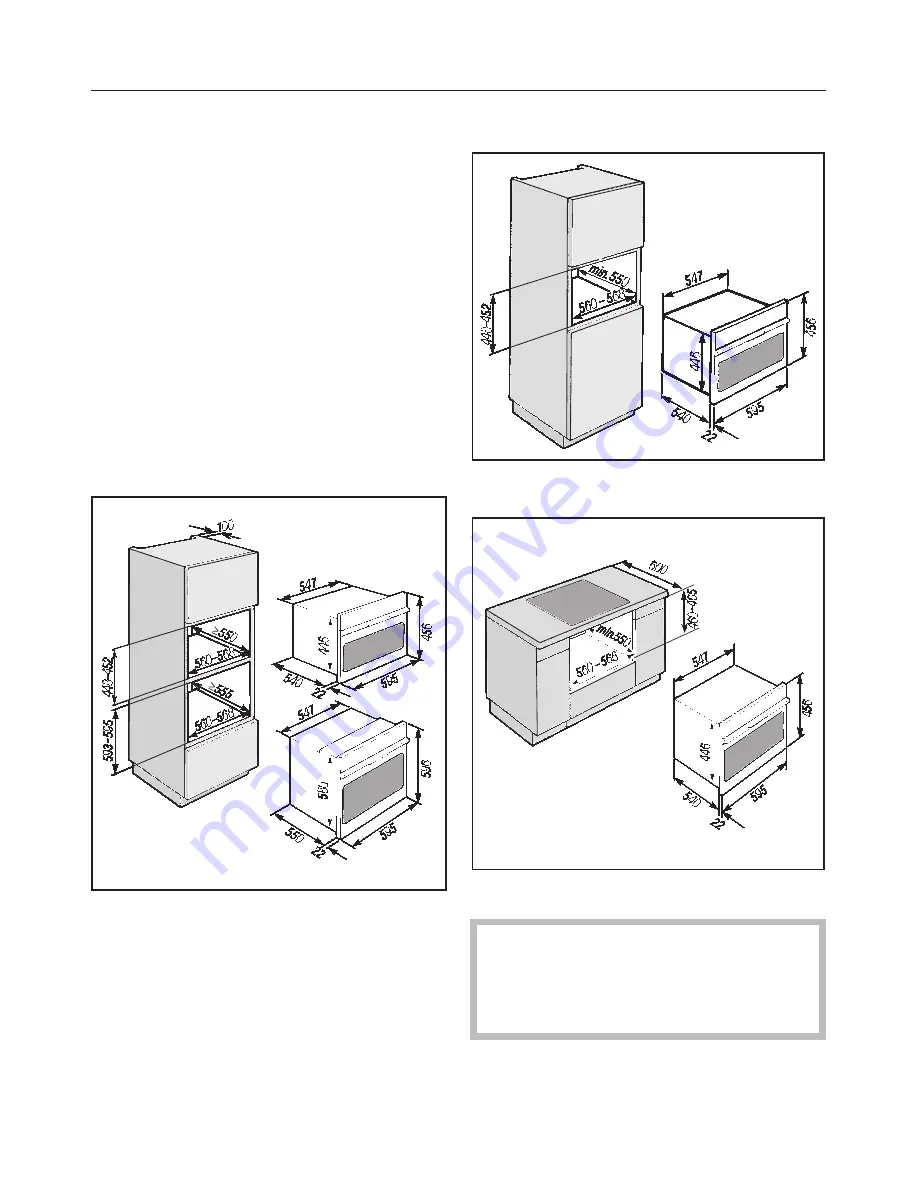
Possibilities for installation
and combination

The appliance is suitable for installa-
tion:

– in a tall unit in combination with an

oven,

– in a tall unit,

– in a base unit.

Installation measurements

Installation in a tall unit in combina-
tion with an oven

Installation in a tall unit

Installation in a base unit

If fitted in combination with a hob,
the installation instructions for the
hob must also be taken into ac-
count.

Installation

60

Содержание H 136 MB

Страница 1: ...rowave Combination Oven H 136 MB H 137 MB H 146 MB H 147 MB It is essential to read these operating instructions before installing or using the machine to avoid the risk of accident or damage to the machine GiZWO 05 237 641 M Nr ...

Страница 2: ...Control panel Appliance Description of the appliance 2 ...

Страница 3: ... and time Press and hold the button briefly to change in short steps hold in for a longer time to change quickly Appliance jElement kOven interior lighting lFirst and second shelf supports mAir vent for the fan nData plate Accessories A Rack B Glass tray C Boiling rod Special accessories Glass rear panel with grease filter optional accessories A glass panel and grease filter can be inserted in the...

Страница 4: ...and shape 16 Using microwave mode 21 Deactivating the door lock before the end 22 Using traditional functions 23 Fan heat 23 Switching on the timer 23 Grill 24 Switching on the timer 24 Using combination programmes 26 Microwave Fan heat h D 26 Deactivating the door lock before the end 27 Microwave Grill h n 28 Deactivating the door lock before the end 29 Altering entered data 30 Minute Minder 31 A...

Страница 5: ...frozen ready made meals 43 Grilling 44 Preparation of meat or fish 44 Test to see if cooked 44 Chart for grilling 45 Baking 46 Fan Heat D 46 Microwave Fan Heat h D 46 Chart for baking 48 Cleaning and care 49 Appliance front and control panel 49 Oven interior 50 Problem solving guide 53 After sales service 55 Customer contact 55 Electrical connection IRL U K ZA 56 Electrical connection AUS NZ 58 In...

Страница 6: ... aware of how a mi crowave oven works and understand the dangers of improper use Technical safety If the connection cable is damaged the new cable must be fitted by a Miele approved service technician Do not use the microwave function of the appliance if the door is warped the door hinges are loose holes or cracks are visible in the cas ing the door the door seal or the oven interior walls Operati...

Страница 7: ...be a suitably qualified engineer The appliance is only completely isolated from the electricity supply when it is switched off at the wall socket and the plug removed where appli cable Do not pull on the cable only on the plug or the mains fuse is withdrawn or the screw out fuse is removed in countries where this is applicable Ensure that current is not supplied to the appliance while maintenance ...

Страница 8: ...n as pressure will build up in the tin and it can explode This could result in injury or damage Food left in the oven to take advan tage of residual heat should always be covered to avoid it drying out and to avoid a possible build up of conden sation which could adversely affect the oven interior Try to avoid the interior walls being splashed with food or liquids con taining salt If it does happe...

Страница 9: ...is is particularly important when preparing food for babies children and the elderly or infirm Never cook or reheat food or liq uids in sealed containers or bot tles With baby bottles the screw top and teat must be removed Otherwise pressure builds up which can cause the bottle or container to explode pos ing a severe risk of injury When heating liquids the boiling rod provided should be placed in...

Страница 10: ...a thin layer of alu minium foil which reflects microwaves This reflected energy can in turn cause the outer paper covering to be come so hot that it ignites Food with a thick skin or peel such as tomatoes sausages jacket po tatoes aubergines should be pierced or cut in several places to allow steam to escape and prevent the food from bursting Ovenproof earthenware can retain a considerable amount ...

Страница 11: ... be undertaken by an experienced cook who has received proper training in this method of pre serving fruit and vegetables in an oven or microwave oven and understands the implications of the chemical reac tions involved The manufacturer cannot be held lia ble for damage caused by non com pliance with these Warning and safety instructions Warning and Safety instructions 11 ...

Страница 12: ...re of fered for recycling Disposal of your old appliance Old appliances may contain materials which can be reclaimed or recycled Please contact your dealer your local waste collection centre or scrap mer chant about potential recycling schemes Before discarding an old appliance switch off and disconnect it from the power supply This should be done by a competent person Cut off and render any plug ...

Страница 13: ...of gold or silver trim The metal reflects the microwaves and this could lead to the creation of sparks The microwaves cannot be ab sorbed All food contains moisture molecules which when subjected to microwave energy start to oscillate 2 5 thousand million times a second The friction caused by this vibration creates heat which first starts developing around the outside of the food and then slowly p...

Страница 14: ...ment needs to radiate a high heat in order to cook the food it will take several minutes after being switched on to glow red hot and so pro duce sufficient infra red heat for grilling Pre heat the with the oven door closed for approx 5 minutes before starting to cook Combination programmes Microwave Fan Heat h D Microwave Grill h n The combination programmes enable the grill or the fan setting to ...

Страница 15: ...urs is shown as 0 00 Press the g and h buttons at the same time The dot after the first figure in the dis play starts flashing Whilst it is flashing approx 4 seconds set the time of day It is shown in hours minutes Use the or button to enter the time of day After four seconds if no further entry is made the oven display shows this time The dot between the figures now stays on constantly to indicat...

Страница 16: ... as follows Run the oven on the Fan Heat D set ting for at least an hour Select Fan Heat D with the function selector The cooling fan starts up and the oven interior light comes on Turn the temperature selector to 200 C Only turn the temperature selector clockwise and then back again anti clockwise Do not force it past the resistance Otherwise it could be damaged The oven begins to heat up The ind...

Страница 17: ...ptions If recommended by the producer pre cooked meals packed in aluminium foil containers can be defrosted and re heated in the microwave oven Impor tant remove the lid first However as food is only heated from the top it is better to remove the food from the alu minium foil container and transfer it to a dish suitable for a microwave oven The heat distribution will be more even If sparks and arc...

Страница 18: ...id using it in a microwave oven Earthenware containers with hollow handles and lid knobs must only be used if they have vent holes which al low the moisture to escape Without vent holes there can be a pressure build up causing the container to crack or shatter with the danger of injury Decorated earthenware is only suitable if the decoration is beneath an all over glaze Earthenware can get very ho...

Страница 19: ...t a build up of pressure Roasting bags and tubes Roasting tubes should be about 40 cm longer and roasting bags about 20 cm longer than the food being roasted and carefully tied with string Turn the ends over and secure them Holes should be made according to the manufacturer s instructions Do not use metal clips or wire ties even if bound by paper There is a danger that they will ignite when heated...

Страница 20: ...nterior light comes on The time entered counts down in the display in second steps The c symbol stays on constantly If a crackling noise is heard accom panied by sparks during the test switch off the appliance immediately Turn the function selector to the 0 position Any crockery which causes this reaction is unsuitable for use in the microwave oven At the end of this period a beep sounds three tim...

Страница 21: ...i crowave safe glass or plastic or use a clingfilm recommended for use in a mi crowave oven pierce as instructed by the manufacturer Unsuitable clingfilm can melt into the food Sealed glass containers such as jars of food must be opened before they are placed in the oven Do not use a cover if cooking meals which are to be given a crisp finish cooking breaded or battered foods using a combination p...

Страница 22: ... 99 min utes 59 seconds With power level 900 W a maximum of only 30 minutes can be entered The time entered appears in the display in minutes seconds The c symbol flashes above the dot Shut the oven door if it is still open A microwave process can only start once the door is shut Press the Start Stop button to start the process The oven interior light comes on The c symbol lights up constantly and...

Страница 23: ...re the end To deactivate the door lock you will have to interrupt the process Press the Start Stop button During the interruption the time goes on hold The cooling fan continues to work and the c symbol flashes To continue the process shut the oven door and press the Start Stop button The time proceeds again and the c symbol stays on constantly Switching off the appliance The cooling fan prevents ...

Страница 24: ...e is heating up Switching on the timer You can use the timer at any time to set the length of time for the fan heat to be on At the end of this period the heating and the oven interior light switch off Press the g button 0 00 appears in the display for approx 4 seconds Within these 4 seconds use the or button to set the required time The oven interior light and the heat ing will go out as soon as ...

Страница 25: ...ction selector to Grill n The cooling fan starts and the oven in terior lighting comes on The grill temperature cannot be changed The element begins to heat up The in dicator light on the control panel stays on while the appliance is heating up Switching on the timer You can use the timer at any time to set the length of time for the grill to be on At the end of this period the grill and the oven ...

Страница 26: ...tantly at the left of the display At the end of the time a beep sounds three times and the AUTO symbol flashes Press any button to cancel them The heating and the oven light go out If the food is still not cooked set a new time and press the Start Stop button Switching off the appliance The cooling fan prevents a build up of condensation in the warm appli ance Leave the cooling fan on until the ov...

Страница 27: ...ss the g button 0 00 appears in the display for approx 4 seconds Within these 4 seconds set the re quired time using the or button You can enter a maximum of 99 min utes 59 seconds With power level 450 W a maximum of 60 minutes can be entered The time entered appears in the display in minutes seconds The c and AUTO symbols flash With the temperature selector choose a temperature for the Fan heat f...

Страница 28: ... above the dot Press the or button within 4 sec onds to enter the microwave power level required Press the Start Stop button The period of time set appears in the display Deactivating the door lock before the end To deactivate the door lock you have to interrupt the process Press the Start Stop button During the interruption the time goes on hold The cooling fan continues to run the oven light goe...

Страница 29: ...n utes 59 seconds With power level 450 W a maximum of 60 minutes can be entered The time entered appears in the display in minutes seconds The c and AUTO symbols flash The grill temperature cannot be altered Press the Start Stop button The oven interior light comes on The microwave function starts and the grill begins to heat The indicator light on the control panel stays alight while the oven is ...

Страница 30: ...isplay Deactivating the door lock before the end To deactivate the door lock you have to interrupt the process Press the Start Stop button During the interruption the time goes on hold The cooling fan continues to run the oven light goes out and the sym bols flash To continue the process shut the oven door and press the Start Stop button The oven light comes on again and the symbols light up const...

Страница 31: ...rowave function Press the or button to enter a new microwave power level Press the Start Stop button to start the process After starting a process If you discover after the process has begun that you have made an error with the data entry press the Start Stop but ton to interrupt the process The time is halted at the point of inter ruption The cooling fan continues to run during this period Correc...

Страница 32: ... the l but ton It counts down in minutes Once the minute minder has counted down to one minute the time remaining counts down in the display in seconds Altering a minute minder entry If you have entered a wrong time this can be corrected You cannot change the time set if the timer is counting down in sec onds i e during the last minute If the or button is pressed the dis play changes to 0 00 follo...

Страница 33: ...afe con tainer Place the container in the middle of the oven floor If defrosting a large quantity e g 2 kg of fish you can also use the glass tray as a container Place the glass tray on the oven floor Turn stir or separate the food about half way through the defrosting time After defrosting Allow the food to stand at room temper ature long enough to allow the tempera ture to spread evenly througho...

Страница 34: ...50 g 4 rolls ca 200 g 1 slice 1 2 4 6 6 8 5 7 6 8 11 2 2 4 6 1 2 1 11 2 2 5 10 5 10 10 15 5 10 5 10 5 10 5 10 5 10 3 4 Fruit Strawberries Raspberries Blackcurrants Plums 250 g 250 g 500 g 7 8 8 9 12 16 5 10 5 10 5 10 Meat Minced beef Chicken 500 g 1000 g 18 20 36 38 5 10 10 15 Vegetables Peas Asparagus Beans Red cabbage Spinach 250 g 250 g 500 g 500 g 300 g 10 14 10 14 15 20 15 20 14 16 5 10 10 15...

Страница 35: ...e does not pose any dan ger Double check after it has been left to stand Always use a lid or cover for reheating food except when a drier finish is needed e g breaded poultry meat When reheating liquids place the boil ing rod supplied into the cup or glass Never reheat hard boiled eggs in a mi crowave oven even without the shell The eggs can burst Do not reheat food in the oven in heat retaining b...

Страница 36: ...g the container itself hot Allow food to stand for a few minutes at room temperature once a programme has ended to allow heat to be distrib uted evenly After reheating food especially food for babies and small children stir the food or shake the container and check that the temperature does not pose any danger Double check after it has been left to stand For more detailed information on re heating...

Страница 37: ...00 g 1000 g 1 portion 400 g 2 portions 800 g 250 g 500 g 200 g 500 g 100 g 200 g 200 g 250 g 1 4 l 1 4 l 4 5 7 8 4 5 7 8 10 12 5 7 10 12 3 4 5 6 3 5 7 9 3 4 3 5 3 4 3 5 4 5 1 2 1 3 1 1 2 2 3 3 2 3 2 3 2 3 1 2 2 1 1 1 See Warning in Section on Reheating During this time the temperature spreads evenly through the food Put the boiling rod in the container Times are based on an initial temperature of ...

Страница 38: ...ent the food from bursting Eggs can only be cooked in their shells in the microwave oven in a specially designed egg boiling device available from specialist shops Similarly hard boiled eggs should not be reheated in the microwave oven as this may lead to the eggs bursting even once they have been removed from the oven Eggs can be cooked without their shells in the microwave oven only if the yolk ...

Страница 39: ...e lowest run ner level Only use heat resistant microwave safe crockery No metal Cover food being cooked in the Micro wave Fan Heat combination to avoid it drying out Leave food being cooked in the Micro wave Grill combination uncovered so that it can brown Ensure that food such as meat and fish are cooked for an appropriate length of time For more detailed information on cooking consult a good mic...

Страница 40: ...ch Pepper strips Kohlrabi batons beans Brussel sprouts Asparagus Broccoli florets Leeks Fennel 300 g 500 g 500 g 500 g 500 g 500 g 500 g 300 g 500 g 500 g 2 5 3 5 3 5 5 2 3 3 6 10 10 10 10 9 9 4 9 10 2 2 2 2 2 2 2 2 2 2 Frozen vegetables Peas Mixed veg Spinach Brussel sprouts Broccoli Leeks 450 g 450 g 300 g 300 g 450 g 5 5 4 3 4 11 7 6 6 8 2 2 2 2 2 Desserts Baked apples Apples in wine sauce Crea...

Страница 41: ...roll 1000 g 1000 g 150 450 28 30 44 48 Snacks 2 Tuna on toast Tuna on toast Sausage wrapped in cheese and ham 2 pcs 4 pcs 4 pcs 450 450 450 3 4 5 6 5 6 Pre cook vegetables sauce or fillings with lid on Pre heat grill for approx 5 minutes place food on the rack 1 First shelf level from bottom 2 Second shelf level from bottom 3 Oven floor Slide the glass tray with the rack in at the appropriate shel...

Страница 42: ...uitable for use in a normal oven are microwave safe Microwave Grill h n This method is suitable for defrosting and then reheating or cooking deep frozen ready made meals which are to be crisped and browned Microwave output is limited to 450 watts when used with the grill For deep frozen pre cooked meals which are to be crisped and browned the Microwave Grill combination can be selected Select micr...

Страница 43: ...icken fricassé 160 g 450 g 250 g 450 g 450 g 3 3 3 3 3 7 8 5 6 6 7 7 8 1 1 1 2 2 Vegetables Puree Vegetable casserole 1 8 l Water 450 g 400 g 4 5 7 8 6 7 2 3 Rice Noodles Plated meals Paella 0 1 l Water Tortellini 0 2 l Milk water Lasagne 400 g 450 g 420 g 6 7 5 3 4 5 10 12 2 2 2 During this time the temperature spreads evenly through the food Consult a good microwave microwave combi oven cookbook...

Страница 44: ... 450 450 450 450 450 450 8 10 14 16 14 16 16 18 18 20 8 10 2 2 2 2 2 2 During this time the temperature spreads evenly through the food Ready made meals in heat resistant dishes suitable for microwaving Ready made meals in aluminium containers can be put directly onto the glass tray Remove the cover Slide the glass tray into the second shelf level Consult a good microwave microwave combi oven cook...

Страница 45: ...ll for approx 5 minutes with the oven door shut Do not select a microwave setting Brush the rack with oil and place the prepared food on the rack It is best to grill food of a similar thick ness at the same time so that the grill ing time for each item does not vary too greatly Slide the glass tray with the rack into the upper 2nd runner level for flat pieces of food into the lowest runner level f...

Страница 46: ...ge 20 25 Fish fillet 16 20 Toast 2 4 Toast with topping 5 7 Tomatoes 8 10 Peaches 7 10 1 upper runner level 2 Turn the food half way through grilling Consult a good microwave micro wave combi oven cookbook for fur ther details on grilling these and other foods The information given in the chart is intended only as a guide Grilling 46 ...

Страница 47: ...rse effect on brown ing To achieve even browning it might be better to select a slightly longer cooking time at a slightly lower temper ature Microwave Fan Heat h D This combination programme is suit able for doughs which require longer baking such as rubbed in and beaten mixtures yeast recipes and cheese cake For preference use ovenproof glass or ceramic baking dishes as microwaves can penetrate ...

Страница 48: ...king time The microwave set ting should not be higher than 150 W Temperature settings times and micro wave power settings in the Baking Chart are suggestions only Select an average temperature and time for first attempts and adapt accordingly If the grease filter is in position in front of the fan grille opening this lengthens baking time At the end of the shorter time given check to see whether t...

Страница 49: ...150 170 150 170 150 170 150 170 150 170 150 170 190 200 20 25 40 50 15 25 75 85 45 55 60 70 25 35 150 150 150 150 150 160 160 160 160 160 15 20 30 36 64 70 38 48 50 60 Yeast mixtures Hot cross buns Granary loaf Stollen White loaf Wholemeal loaf Pizza glass tray 160 170 150 170 160 180 170 190 170 190 20 25 50 60 40 50 50 55 40 50 150 300 150 150 200 160 180 30 35 30 34 36 40 Choux pastry Eclairs 1...

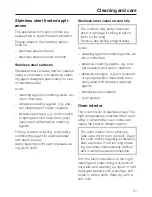
Страница 50: ... g pot scourers or sponges which have been previ ously used with abrasive cleaning agents oven sprays Clean the door handle and the control elements regularly preferably after each use This will help prevent grease or other deposits adhering to surfaces and becoming impossible to remove Aluminium fronted appliances Aluminium is affected by the way that light falls it by the surrounding environ men...

Страница 51: ...The controls may suffer discolour ation or damage if soiling is left on them for too long Remove any soiling straight away Avoid cleaning agents containing soda ac ids or chlorides abrasive cleaning agents e g pow der cleaners and cream cleaners abrasive sponges e g pot scourers or sponges which have been previ ously used with abrasive cleaning agents stainless steel cleaners oven sprays Oven inte...

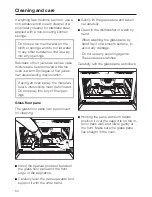
Страница 52: ... into any of the open ings Glass floor pane The glass floor pane can be removed for cleaning Insert the spatula provided between the glass floor pane and the front edge of the appliance Carefully lever the pane upwards and support it with the other hand Gently lift the glass pane and take it out carefully Clean in the dishwasher or wash by hand When washing the glass pane by hand lay it on a smoot...

Страница 53: ...Do not use any scouring agent Check the door and door seal at regular intervals for any sign of damage If any damage is noticed the oven should not be used again in micro wave mode until the fault has been rectified by a service technician Accessories Rack Wash and dry the rack after each use Remove stubborn soils with a stainless steel cleaner Glass tray The glass tray can be washed in hot water ...

Страница 54: ... follows Disconnect the appliance from the electricity supply switch off and un plug at the socket or remove the fuse or switch off at the isolator as appropriate Loosen and remove the lamp cover 1 This may be easier using a rub ber glove Take out the halogen lamp 2 Exercise caution when changing a light bulb Halogen lights get very hot during use and will remain hot for some time after being swit...

Страница 55: ... so far in that it touched the back wall whether the grease filter had been left in place on the back wall the colour and composition of the baking tins being used Try using a different tin next time food cools down too quickly after being reheated or cooked in micro wave mode When cooked by microwaves food be gins to cook from the outside first the inside of the food relying on the slower conduct...

Страница 56: ...ee address on the back page When contacting the Service depart ment please quote the model and se rial number of your appliance given on the data plate which is located on the front of the oven interior visible when the door is opened Please note that telephone calls may be monitored and recorded to im prove our service After sales service 56 ...

Страница 57: ...cc to EN 60335 For extra safety it is advisable to install a residual current device with a trip cur rent of 30 mA in accordance with DIN VDE 0664 VDE 0100 Section 739 If the cable is damaged a new cable must be fitted by a Miele approved ser vice engineer In certain unfavourable circumstances microwave appliances can be a source of interference In this event please contact your dealer or the Miel...

Страница 58: ...where in the house electric shock hazard The fuse cover must be re fitted when changing the fuse and if the fuse cover is lost the plug must not be used until a suitable replacement is obtained The colour of the correct replacement cover is that of the coloured insert in the base of the plug or the colour that is em bossed in words on the base of the plug as applicable to the design of plug fitted...

Страница 59: ...een built in Test marks Electrical safety C Tick Mark Electrically suppressed according to AS NZS 1044 Important The wires in the mains lead are col oured in accordance with the follow ing code Green yellow earth Blue neutral Brown live As the colours of the wires in the mains lead of this appliance may not corre spond with the coloured markings iden tifying the terminals in your plug pro ceed as ...

Страница 60: ...nation with an oven in a tall unit in a base unit Installation measurements Installation in a tall unit in combina tion with an oven Installation in a tall unit Installation in a base unit If fitted in combination with a hob the installation instructions for the hob must also be taken into ac count Installation 60 ...

Страница 61: ...en to the electricity supply Push the oven into the furniture unit as far as the oven trim and align Open the oven door and with two screws secure the oven to the side walls of the furniture unit through the holes in the oven trim The appliance must only be oper ated when it has been built in Installation 61 ...

Страница 62: ...62 ...

Страница 63: ...63 ...

Страница 64: ...Alteration rights reserved 2902 H 136 MB H 137 MB H 146 MB H 147 MB This paper consists of cellulose which has been bleached without the use of chlorine 05 M Nr 05 237 641 V ...

Отзывы: