


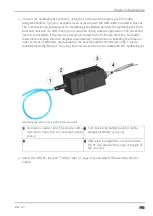


7. Set your current source to the value that you want to use for the lower reference point and
wait 3-5 seconds until the value displayed by the DeviceConfig has stabilised. Ensure that the
required value is entered for the lower reference point before you press the button to adopt
the lower reference point for the relevant universal input. You can also use the "Set all lower"
button to set the lower reference points for both of the universal inputs at the same time. How-
ever, each of the universal inputs requires its own current source for this purpose. The current
sources must all be set to the same value during this process.
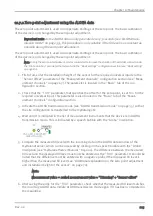
Note: The values for both of the reference points can be selected freely. However, it is
recommended to use a value in the range of 5 mA for the lower reference point and a
value in the range of 20 mA for the upper reference point.
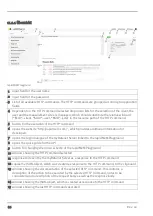
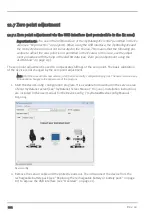
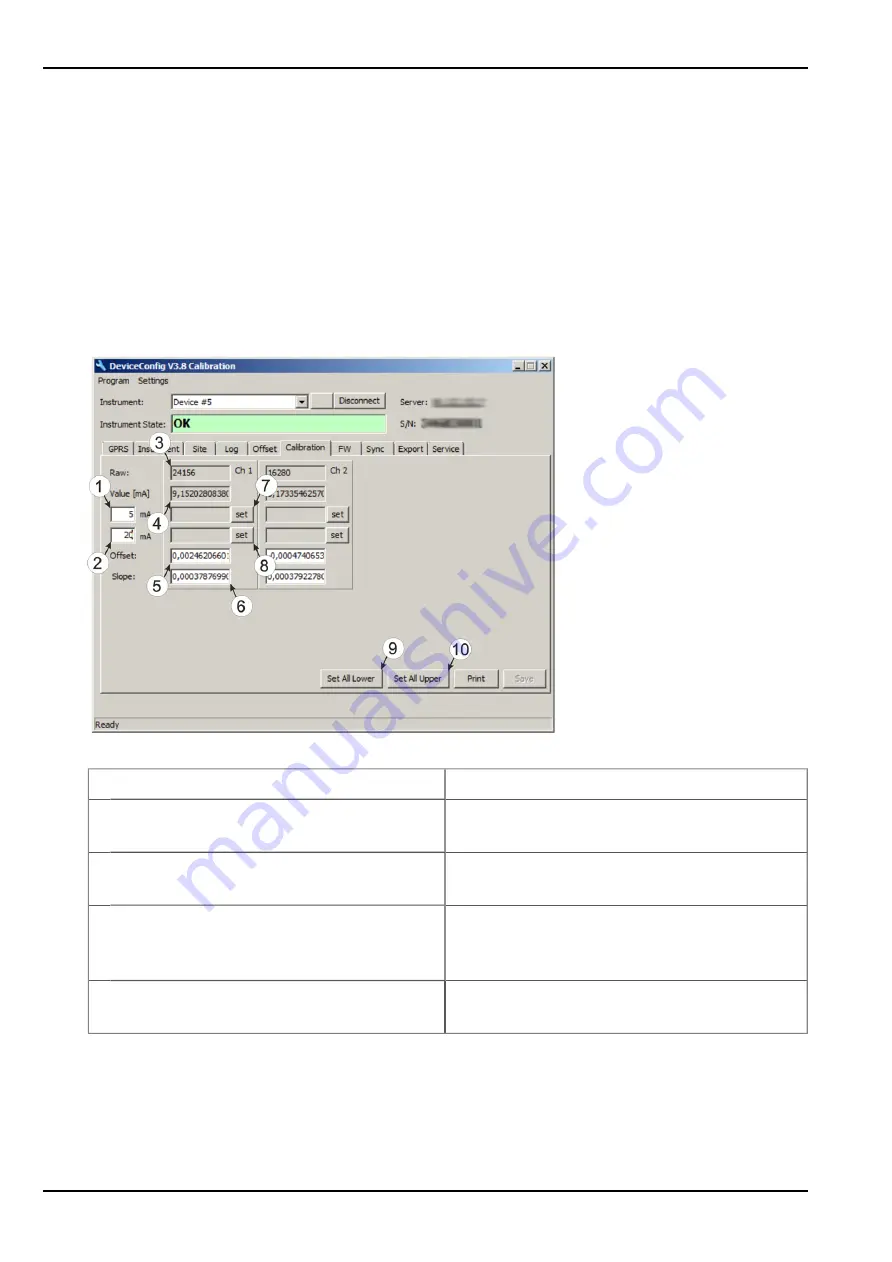
"Calibration" tab
1 Lower reference point (target value in mA) 6 Calculated slope
2 Upper reference point (target value in mA) 7 Button for adopting the lower reference
point for universal input 1
3 Raw value
8 Button for adopting the upper reference
point for universal input 1
4 Rescaled raw value in mA (calculated with
the currently valid values for the offset
and slope)
9 Button for adopting the lower reference
point for both universal inputs
5 Calculated offset
10 Button for adopting the upper reference
point for both universal inputs
100
Rev. 02
Содержание 305001
Страница 2: ......
Страница 8: ......
Страница 9: ...Chapter 2 Declaration of conformity Chapter 2 Declaration of conformity Rev 02 9 ...
Страница 10: ......
Страница 11: ...Chapter 3 Ex certification Chapter 3 Ex certification Rev 02 11 ...
Страница 12: ...12 Rev 02 ...
Страница 13: ...Chapter 3 Ex certification Rev 02 13 ...
Страница 14: ......
Страница 26: ......
Страница 38: ......
Страница 64: ......
Страница 84: ......
Страница 106: ......
Страница 108: ......
Страница 126: ......


