3
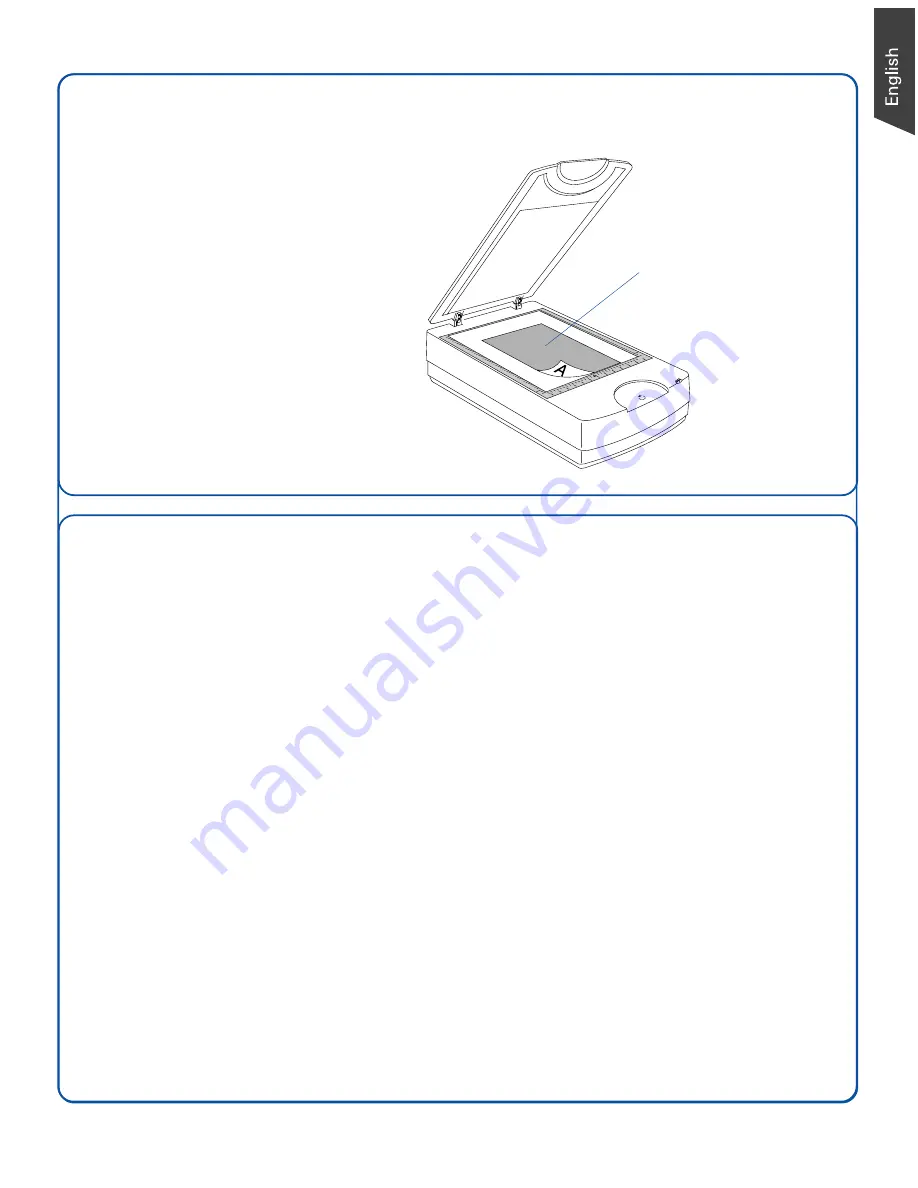
Position Documents
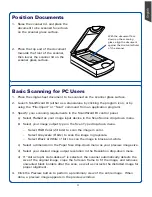
1. Raise the scanner lid, and place the
document to be scanned face down
on the scanner glass surface.
1
0
3
4
5
6
6
5
4
3
2
1
With the document face
down on the scanning
glass, align the document
against the Horizontal Ruler
of the scanner.
Basic Scanning for PC Users
1. Place the single-sheet document to be scanned on the scanner glass surface.
2. Launch ScanWizard DI
(either as a stand-alone by clicking the program icon, or by
using the “File-Import” or “Scan” command from an application program).
3. Specify your scanning requirements in the ScanWizard DI control panel.
a) Select
Flatbed
as your image input device in the Scan Source drop-down menu.
b) Select your image output type in the Scan Type drop-down menu.
– Select
RGB Color (24 bits)
to scan the image in color.
– Select
Grayscale (8 bits)
to scan the image in grayscale.
– Select
Black & White (1 bit)
to scan the image in black-and-white.
c) Select a dimension in the Paper Size drop-down menu as your preview image size.
d) Select your desired image output resolution in the Resolution drop-down menu.
d) If “Auto-crop & Auto-deskew” is selected, the scanner automatically detects the
size of the original image, crops the full scan frame to fit the image, and removes
unwanted black borders after the scan, as well as corrects the distorted image for
proper alignment.
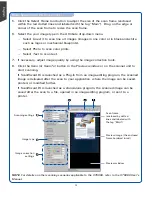
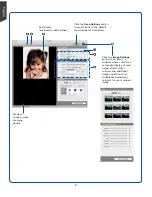
4. Click the
Preview
button to perform a preliminary view of the entire image. When
done, a preview image appears in the preview window.
2. Place the top end of the document
towards the front
of the scanner,
then lower the scanner lid on the
scanner glass surface.


