4
English
Deutsch
Fran
ç
ais
Italiano
Nederlands
Espa
ñ
ol
10. Scan an Image
1. Power up your scanner and then the computer.
2. Press the scanner’s “Go” button, or double-click
the
ScanWizard 5
icon on the desktop to
launch ScanWizard 5.
3. When ScanWizard 5 launches, it automatically
performs a fast preview of the material on your
scan bed and displays it in the preview area.
4. In the preview window, you can resize the
floating dotted line around the image by
dragging on the edge or corner of the scan
frame to determine the final size of the actual
scan.
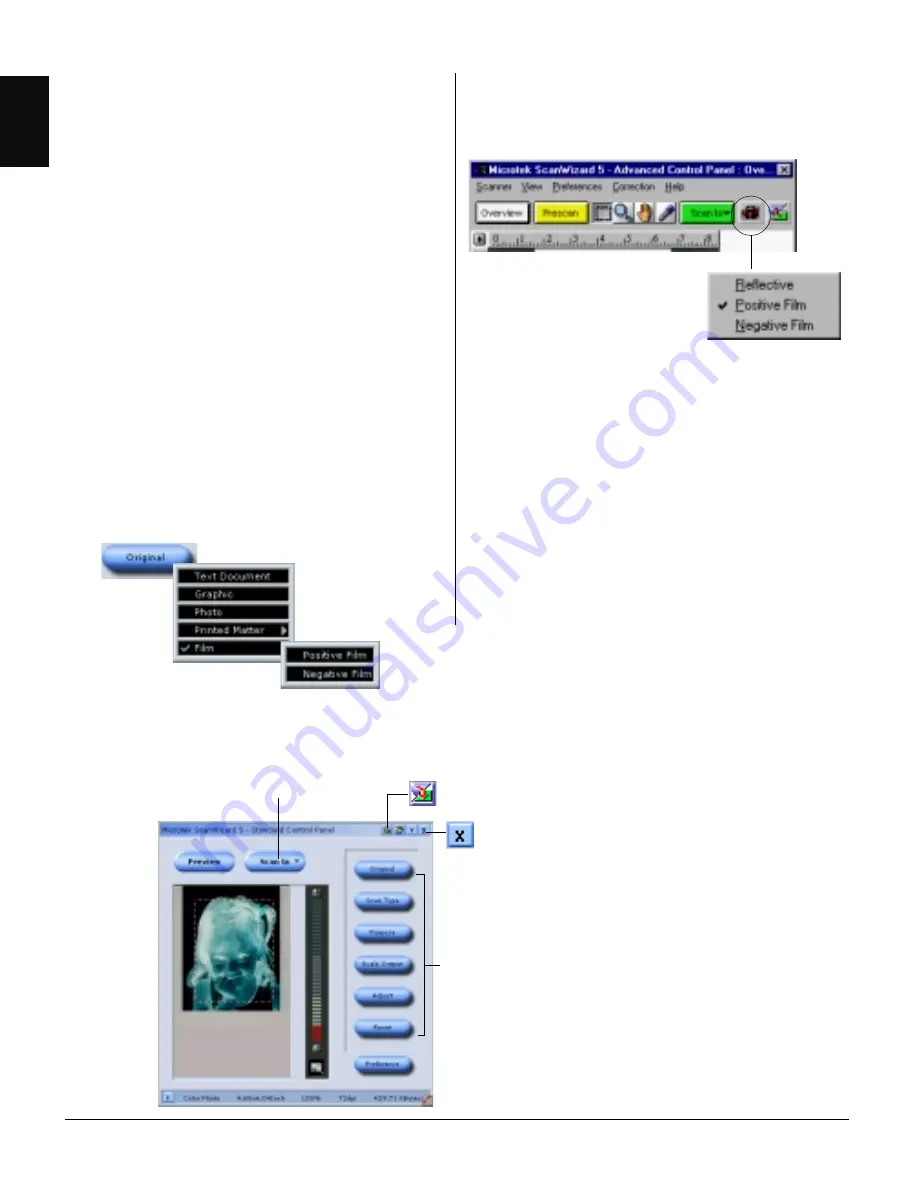
5. To make adjustments to the image, use the tool
buttons. To scan the image, click the
Scan to
button. The image is then scanned and saved to
a file. Aside from saving, you may also deliver
the saved image to an image-editing software, an
e-mail editor, or a web browser.
To switch to the Advanced Control
Panel window
To save the scanned image
to a file, or deliver it to an
image-editing program,
an e-mail editor, or a web
browser.
To specify image settings
To exit ScanWizard 5
After launching ScanWizard 5, you may want to
change the scan material. To do this, click the
Original
button, select
Film
, then
Positive
Film
or
Negative Film
.
If you are running ScanWizard 5 in Advanced
Control Panel mode, click on the
Scan Material
icon, then select
Positive Film
or
Negative Film
.


