
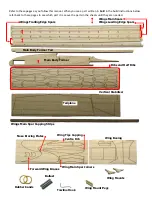
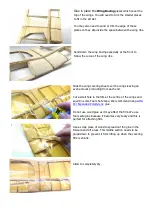


Glue in place the
Main Body Former Tail
to the
Main
Body Former
section.
Next, glue in place the
Wing Mounts
and
Wing Mount
Pegs
as shown here. Take care to make sure the
Wing
Mounts
are level.
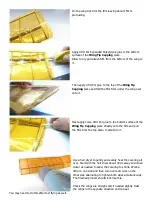
Put the ballast pieces into the nose section and glue both
the
Nose Bracing Plate
pieces in place.
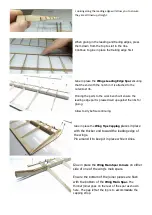
Attach the tow line hook in just behind the leading edge of
the wing. Press it into the body and araldite around it to
hold it in place.
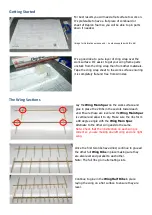
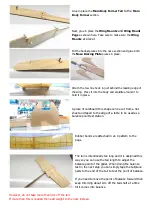
A piece of cardboard this shape can be cut from a flat
sheet and taped to the edge of a table to be used as a
balance point test station.
Rubber bands are attached in an X pattern to the
pegs.
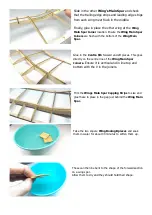
The tail is intentionally too long and it is designed this
way so you can use the tail length to adjust the
balance point of the glider. When doing the balance
test in the next step you can simply tape the tailplane
parts to the end of the tail to test the point of balance.
If you need to move the point of balance forward then
keep trimming about 1cm off the tail shaft at a time
till it comes into balance.
However, do not take more than 4cm off the tail.
If more than this is needed then add weight to the nose instead.


