MICRON
MICRON
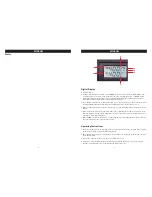
Digital Display
1. Tip Temperature
2. Setting Temperature. By pressing the “UP” or “DOWN” button a user can switch the digital display to the
set point display. The set-point can be changed in steps of ±1°C by tapping the “UP” or “DOWN” button.
Holding the button will change the set-point quickly. The digital display will return automatically to the
actual value and the tip will reach the setting temperature quickly.
3. C°/ F° Display. Switch the temperature display from C° to F° by pressing the C°/ F°button and the electronic
system will display the actual temperature (1) and setting temperature (2) in F° and vice versa.
4. When the actual temperature on the tip is less then the set-point, “HEAT ON” will display and make the tip
heat up.
5. When the absolute offset is more than ±10°C between the actual temperature and the set-point on the tip,
“WAIT” will display. It means that the temperature electronic control system has not stabilised. Please wait
a moment to let the “WAIT” disappear.
6. When “ERROR” is displayed, there may be a trouble with the unit, or the soldering iron or the de-soldering
gun is not connected to the control system correctly.
Operating Instructions
1. Place the soldering iron and de-soldering gun in their respective holders. Connect the plug to the receptacle
on the station and turn clockwise to tighten the plug nut.
2. Check that the power supply is corresponding to the specification on the type plate and the power switch is
at the “OFF” position.
3. Connect the control unit to the power supply and switch on the power.
4. A self-test is carried out in which all screen elements are displayed briefly. The electronic system then
switches on automatically to the set temperature and displays this value.
2
5
Notes:
1
2
5
6
3
3
4


