background image

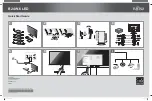
Wall Mount Installation

2. Install the four hex studs onto the back of the 
monitor in the positions indicated, then use the 
four wall mount screws to fasten the wall mount 
(sold separately) to the hex studs.
Note: The compatible wall mount must have the 

from each other vertically and horizontally. 

Wall

Wall

Wall Mount

(sold separately)

Monitor Arm Wall Mount

(sold separately)

Quick Release

5

3. Refer to the instructions of the wall mount to mount the monitor.

CAUTION: Do not press on the screen during the wall-mounting to avoid damaging the screen.

Содержание XMMNT27HQ

Страница 1: ...Mi 2K Gaming Monitor 27 66 Mi 2K Gaming Monitor 27 Benutzerhandbuch 79 Mi 2K 27 in Oyun Monit r Kullan m K lavuzu 92 Monitor dla graczy Mi 2K 27 instrukcja obs ugi 105 Gebruikershandleiding Mi 2K Gam...

Страница 2: ......

Страница 3: ...Product Overview Monitor Overview Package Contents Installation Installing the Base Cable Management Wall Mount Installation Instructions Connections Indicator Status Menu Description 10 10 12 Precau...

Страница 4: ...ilgi i in l tfen www mi com u ziyaret edin Xiaomi Communicati ons Co Ltd Adres 019 9th Floor Building 6 33 Xi erqi Middle Road Haidian District Pekin Chiny 100085 Wi cej informacji www mi com Xiaomi C...

Страница 5: ...ation Installing the Base 3 Remove the top foam layer and the plastic bag to expose the mounting point on the back of the monitor 3 Do not press It is recommended to install the monitor on the foam to...

Страница 6: ...connect them to the monitor Install the cable management cover back onto the monitor Cable management Cover Do not press the screen 5 Use both hands to carefully take out the fully assembled monitor a...

Страница 7: ...sold separately to the hex studs Note The compatible wall mount must have the from each other vertically and horizontally Wall Wall Wall Mount sold separately Monitor Arm Wall Mount sold separately Qu...

Страница 8: ...put ports 3 Connecting the USB cable a Make sure the monitor and the computer are both turned off b Connect the USB cable to the USB IN port of the monitor and the USB port of the computer 4 Connect a...

Страница 9: ...On In sleep mode On Dimmed Off Blinking Turn On Off Indicator Status 1 Menu Select 2 Up 3 4 5 Down Exit Back On Off 7...

Страница 10: ...ack Level Adjust the monitor s brightness Adjust the monitor s dynamic brightness Adjust the monitor s contrast Adjust the monitor s dynamic Contrast Adjust the monitor s black level 0 100 70 On Off O...

Страница 11: ...the menu language Set function for shortcut Key 1 Set function for shortcut Key 2 Enable or disable the power supply of the USB port when the monitor is standby and not connecting to the computer via...

Страница 12: ...onitor in a cool dry ventilated place Keep the monitor away from radiation and heat sources Do not overload electrical outlets as this may cause a fire or an electric shock Do not insert any foreign o...

Страница 13: ...arm elbow and shoulder pain caused by using the computer for a long time please follow the suggestions listed below Keep the monitor at a distance of 20 28 inches approx 50 70 cm from your eyes Take...

Страница 14: ...Trademarks HDMI HDMI High Definition Multimedia Interface and the HDMI Logo are trademarks or registered trademarks of HDMI Licensing Administrator Inc in the United States and other countries 2560 14...

Страница 15: ...l help prevent potential negative consequences to the environment and human health Please contact the installer or local authorities for more information about the location as well as terms and condit...

Страница 16: ...15 15 15 16 16 17 18 19 19 20 20 20 21 23 23 25 14...

Страница 17: ...e Road Haidian District Pekin Chiny 100085 Wi cej informacji www mi com Xiaomi Communicati ons Co Ltd Adres 019 9th Floor Building 6 33 Xi erqi Middle Road Haidian District Be ing China 100085 Ga voor...

Страница 18: ...2 4 3 16 1 2...

Страница 19: ...5 DisplayPort 17...

Страница 20: ...1 2 VESA 75 75 75 3 18...

Страница 21: ...1 DisplayPort DisplayPort DisplayPort DisplayPort DisplayPort 2 HDMI HDMI HDMI HDMI HDMI 3 USB USB USB USB 4 5 DisplayPort DisplayPort USB HDMI 19 5V 2A 5V 2A...

Страница 22: ...1 2 3 4 5 20...

Страница 23: ...1 2 1 2 3 1 Pro DCR sRGB OSD DCR 0 100 70 0 100 75 0 100 50 0 100 0 100 1 8 2 0 2 2 2 4 2 6 1 1 50 50 2 2 IMBC 0 100 50 21...

Страница 24: ...nc HDR Low Blue Light sRGB Low Blue Light sRGB HDMI 1 HDMI 2 DP 1 2 USB USB USB HDMI Logo Low Blue Light Content Adaptive Sync HDR Adaptive Sync HDR 0 100 50 HDR HDR IMBC 22 English English Espa ol Fr...

Страница 25: ...DisplayPort 23...

Страница 26: ...24 300 500 Low Blue Light Low Blue Light...

Страница 27: ...BC 1 2560 1440 2560 1440 6 53 1 5 A 165 25 0 40 20 93 20 80 The Adopted Trademarks HDMI HDMI High Definition Multimedia Interface and the HDMI Logo are trademarks or registered trademarks of HDMI Lice...

Страница 28: ...WEEE 2012 19 EU Xiaomi Communications Co Ltd QR 26...

Страница 29: ...monitor Contenido del paquete Instalaci n Instalar la base Gesti n del cableado Instalaci n del soporte para pared Instrucciones Conexiones Descripci n de los botones Bot n de encendido apagado Estado...

Страница 30: ...33 Xi erqi Middle Road Haidian District Pekin in 100085 Daha fazla bilgi i in l tfen www mi com u ziyaret edin Xiaomi Communicati ons Co Ltd Adres 019 9th Floor Building 6 33 Xi erqi Middle Road Haid...

Страница 31: ...n r pida para quitar el soporte Instalaci n Instalar la base 3 Retire la capa superior de espuma y la bolsa de pl stico para exponer el punto de montaje de la parte trasera del monitor 29 No presiona...

Страница 32: ...alla LCD al levantarla Gesti n del cableado Retire la cubierta para la administraci n de los cables y pase el cable de alimentaci n y el cable del DisplayPort a trav s de la abertura del soporte para...

Страница 33: ...nde por separado a los pasadores hexagonales Nota El soporte de pared compatible debe tener orificios de montaje con patr n VESA con una separaci n entre ellos de 75 75 mm vertical y horizontalmente 3...

Страница 34: ...trada HDMI del monitor 3 Conectar el cable USB a Aseg rese de que el monitor y el ordenador est n apagados b Conecte el cable USB al puerto de ENTRADA USB de su pantalla y al puerto USB del ordenador...

Страница 35: ...enuado Apagado Intermitente Pulse el bot n de encendido Encender apagar Descripci n de los botones Bot n de encendido apagado Estado del indicador Funciones de los botones 1 Men Seleccionar 2 Subir 3...

Страница 36: ...inalizado la calibraci n del color se recomienda activar el modo sRGB Acceda al Men de visualizaci n en pantalla OSD y seleccione Modos inteligentes sRGB Men principal Bri Con Submen Descripci n Opci...

Страница 37: ...Establecer funci n para la Tecla de acceso directo 2 Activar o desactivar el suministro de energ a del puerto USB cuando el monitor est en modo espera y no se conecte al ordenador mediante el cable US...

Страница 38: ...os o descargas el ctricas No inserte objetos extra os en el monitor ya que esto puede provocar cortocircuitos lo que a su vez puede generar incendios o descargas el ctricas No intente desmontar ni rep...

Страница 39: ...cuello brazo codo y hombro causados por el uso del ordenador durante largos per odos siga las sugerencias que se enumeran a continuaci n Mantenga el monitor a una distancia de aprox 50 70 cm de sus o...

Страница 40: ...omendad 2560 1440 609 44 L 200 00 An 461 25 Al mm Dimensiones del art culo Potencia nominal Tensi n nominal 35W TYP 75W M x 100 240 V Peso neto 6 53 kg Temperatura de funcionamiento Humedad de funcion...

Страница 41: ...evitar posibles consecuencias negativas para el medio ambiente y la salud humana P ngase en contacto con el instalador o con las autoridades locales para obtener m s informaci n sobre la ubicaci n y l...

Страница 42: ...41 41 41 42 42 43 44 45 45 46 46 46 47 49 49 51 40...

Страница 43: ...e Road Haidian District Pekin Chiny 100085 Wi cej informacji www mi com Xiaomi Communicati ons Co Ltd Adres 019 9th Floor Building 6 33 Xi erqi Middle Road Haidian District Be ing China 100085 Ga voor...

Страница 44: ...2 4 3 42 1 1 2...

Страница 45: ...5 DisplayPort 43...

Страница 46: ...1 2 VESA 75 75 3 44...

Страница 47: ...playPort DisplayPort DisplayPort DisplayPort DisplayPort 2 HDMI HDMI HDMI HDMI HDMI 3 USB USB USB USB 4 5 DisplayPort DisplayPort USB DisplayPort 1 4 2560 1440 165 HDMI 2 0 2560 1440 144 HDMI 45 5V 2A...

Страница 48: ...1 2 3 4 5 46...

Страница 49: ...0 100 1 8 2 0 2 2 2 4 2 6 1 1 Auto 50 50 2 2 Ultrafast Superfast Fast 0 100 50 Bri Con Brightness Display DLC Contrast DCR Black Level Bri Con Display Brightness DLC Contrast DCR Black Level Color Tem...

Страница 50: ...I 1 HDMI 2 DP HDMI 1 HDMI 2 DP 1 2 USB 1 2 USB USB HDMI Logo Low Blue Light Content Adaptive Sync HDR Adaptive Sync HDR 0 100 50 HDR HDR IMBC Standard ECO Game Movie Low Blue Light sRGB 48 English Eng...

Страница 51: ...49 DisplayPort...

Страница 52: ...50 300 500 50 70 20 28 20 20...

Страница 53: ...1440 2560 1440 609 44 200 00 461 25 6 53 1 5 A 165 51 20 80 The Adopted Trademarks HDMI HDMI High Definition Multimedia Interface and the HDMI Logo are trademarks or registered trademarks of HDMI Lic...

Страница 54: ...WEEE 2012 19 EU Xiaomi Communications Co Ltd QR 52...

Страница 55: ...del monitor Contenuto della confezione Installazione Installazione della base Gestione dei cavi Installazione del supporto da parete Istruzioni Collegamenti Descrizione dei pulsanti Pulsante di accen...

Страница 56: ...Xi erqi Middle Road Haidian District Pekin in 100085 Daha fazla bilgi i in l tfen www mi com u ziyaret edin Xiaomi Communicati ons Co Ltd Adres 019 9th Floor Building 6 33 Xi erqi Middle Road Haidian...

Страница 57: ...Nota premere il pulsante di sgancio rapido per rimuovere il supporto Installazione Installazione della base 3 Rimuovere lo strato superiore di schiuma e il montaggio sul retro del monitor 55 Non prem...

Страница 58: ...lo si posiziona ATTENZIONE Gestione dei cavi Rimuovere il coperchio per la gestione dei cavi quindi far passare il cavo di alimentazione e il cavo DisplayPort attraverso l apertura nel supporto per c...

Страница 59: ...Nota il supporto da parete compatibile deve avere i fori di montaggio del modello VESA a 75 75 mm di distanza l uno dall altro in verticale e in orizzontale 3 Fare riferimento alle istruzioni del supp...

Страница 60: ...l computer siano entrambi spenti b Collegare il cavo USB alla porta USB IN del monitor e alla porta USB del computer 4 Collegare una cuffia o un qualsiasi dispositivo audio esterno compatibile da 3 5...

Страница 61: ...a Spenta Intermittente Premere il pulsante di accensione Accensione Spegnimento Descrizione dei pulsanti Pulsante di accensione spegnimento Stato della spia Funzione dei pulsanti 1 Menu Seleziona 2 Su...

Страница 62: ...schermo OSD quindi selezionare Modalit Smart sRGB Menu principale Lum Con Menu secondario Descrizione Opzione Impostazione Luminosit Dinamico luminoso Contrasto DCR Livello del nero Regola la luminos...

Страница 63: ...l menu Imposta la funzione per il tasto di scelta rapida 1 Imposta la funzione per il tasto di scelta rapida 2 Abilita o disabilita l alimentazione della porta USB quando il monitor in standby e non c...

Страница 64: ...dio o una scossa elettrica Non inserire oggetti estranei nel monitor in quanto ci potrebbe causare un cortocircuito e di conseguenza innescare un possibile incendio o una scossa elettrica Non tentare...

Страница 65: ...re di stancare gli occhi o di avere dolori al collo al braccio al gomito e alle spalle causati da un utilizzo prolungato del computer seguire i suggerimenti elencati di seguito Mantenere il monitor a...

Страница 66: ...e consigliata 2560 1440 609 44 L 200 00 P 461 25 A mm Dimensioni articolo Potenza nominale Tensione nominale 35 W TYP 75 W max 100 240 V Peso netto 6 53 kg 20 80 UR Temperatura di esercizio Umidit di...

Страница 67: ...i termini e le condizioni di tali punti di raccolta Informazioni sulla conformit a normative e standard Informazioni sullo smaltimento e sul riciclaggio dei RAEE applicabili e alle norme europee nonc...

Страница 68: ...n du produit Pr sentation de l cran Contenu du paquet Installation Installation du socle Gestion des c bles Installation murale Instructions Connexions Description des boutons Bouton Marche Arr t tat...

Страница 69: ...Pekin in 100085 Daha fazla bilgi i in l tfen www mi com u ziyaret edin Xiaomi Communicati ons Co Ltd Adres 019 9th Floor Building 6 33 Xi erqi Middle Road Haidian District Pekin Chiny 100085 Wi cej in...

Страница 70: ...sup rieure de mousse et le sac en plastique pour exposer le point de montage l arri re de l cran 4 Fixez le support en l enfon ant dans la fente l arri re de l cran jusqu entendre un d clic rapide po...

Страница 71: ...e de la gestion des C bles N appuyez pas sur l cran surface plane et stable Retirez la couverture de la gestion des c bles puis passez le cordon d alimentation et le c ble couverture de gestion des c...

Страница 72: ...n Mur Mur Bouton de lib ration rapide 2 Revissez les quatre vis hexagonales sur l cran selon les positions indiqu es Ensuite utilisez les quatre vis de support mural pour fixer le support mural vendu...

Страница 73: ...ints b Connectez une extr mit du c ble HDMI au port de sortie HDMI de l ordinateur et l autre extr mit l un des ports d entr e HDMI de l cran 3 Connectez le c ble USB a Assurez vous que l cran et l or...

Страница 74: ...tiv Faible Arr t Clignotant Appuyez sur le bouton d alimentation Allumer teindre Description des boutons Bouton Marche Arr t tat du voyant Fonction des boutons 1 2 3 4 5 Menu S lection Haut Bas Sortie...

Страница 75: ...r t 0 100 50 Display Temp rature de couleur Nuance Saturation Gamma Format de l image R gler la temp rature de couleur de l cran R gler la teinte de l cran R gler la saturation de l cran R gler la cor...

Страница 76: ...2 Mode veille USB OSD Param tres Volume Informations R initialiser S lectionner la langue du menu D finir la fonction de la touche de raccourci 1 D finir la fonction de la touche de raccourci 2 Pr f r...

Страница 77: ...e Si l cran tombe ou subit un choc cela peut occasionner des blessures corporelles ou endommager l cran Stockez et utilisez l cran dans un endroit frais sec et ventil Tenez l cran loign des sources de...

Страница 78: ...des yeux plus souvent pour soulager la fatigue oculaire lorsque vous fixez l cran tirez votre corps pour aider soulager la tension au niveau du cou des bras du dos et des paules d une fonction pour v...

Страница 79: ...solution recommand e 2560 1440 Dimensions du produit Puissance nominale Tension nominale 35W TYP 75W max 100 240 V Poids net 6 53 kg Temp rature de fonctionnement Humidit de fonctionnement 0 45 50 60...

Страница 80: ...e en apportant l quipe ment usag un point de collecte d di au recyclage des quipements lectriques et lectroniques agr par impact potentiellement n gatif sur l environnement et la sant humaine Contacte...

Страница 81: ...icht Monitor bersicht Verpackungsinhalt Installation Montage des Sockels Kabelmanagement Installation an der Wand Anweisungen Anschl sse Tastenbeschreibung Ein Aus Schalter Anzeigestatus Men beschreib...

Страница 82: ...in in 100085 Daha fazla bilgi i in l tfen www mi com u ziyaret edin Xiaomi Communicati ons Co Ltd Adres 019 9th Floor Building 6 33 Xi erqi Middle Road Haidian District Pekin Chiny 100085 Wi cej infor...

Страница 83: ...zen zu vermeiden Schnelll setaste 3 Entfernen Sie die obere Schaumstoffschicht und den Plastikbeutel um den Befestigungspunkt auf der R ckseite des Monitors freizulegen 4 Befestigen Sie den St nder in...

Страница 84: ...eine flache stabile Oberfl che VORSICHT Um Sch den am Bildschirm zu vermeiden m ssen Sie darauf achten beim Aufstellen nicht auf den LCD Bildschirm zu dr cken Entfernen Sie die Abdeckung des Kabelmana...

Страница 85: ...s zu vermeiden Wand Wand Monitorarm Wandhalterung separat erh ltlich Schnelll setaste 83 2 Schrauben Sie die vier Sechskantbolzen in die vier angegebenen L cher auf der R ckseite des Monitors und befe...

Страница 86: ...ors an 3 Anschlie en des USB Kabels a Stellen Sie sicher dass sowohl der Monitor als auch der Computer ausgeschaltet sind b Schlie en Sie das USB Kabel an den USB IN Eingang des Monitors und den USB A...

Страница 87: ...rmodus Ein Gedimmt Aus Blinkt Dr cken Sie die ein Einschalten Ausschalten Tastenbeschreibung Ein Aus Schalter Einschalten Ausschalten Tastenfunktion 1 Men Auswahl 2 Nach oben 3 4 5 Nach unten Beenden...

Страница 88: ...atur des Monitors Einstellen des Farbtons des Monitors Einstellen des Gamma Werts des Monitors Einstellen des Seitenverh ltnisses des Monitors Standard Warm Cool Custom 0 100 0 100 1 8 2 0 2 2 2 4 2 6...

Страница 89: ...SD Einstellungen Lautst rke Informationen Zur cksetzen Men sprache ausw hlen Funktion f r Kurzwahl Taste 1 einstellen Funktion f r Kurzwahl Taste 2 einstellen Aktivierung oder Deaktivierung der Stromv...

Страница 90: ...Sie diesen Monitor nicht in feuchten oder nassen Umgebungen wie Badezimmern K chen Kellern oder in der N he von Schwimmbecken Stellen Sie sicher dass der Monitor auf einer stabilen Oberfl che steht We...

Страница 91: ...zu vermeiden die durch lange Computernutzung entstehen k nnen Blinzeln Sie h ufig um die Augen zu entlasten wenn Sie lange auf den Monitor schauen G nnen Sie Ihren Augen eine 20 min tige Pause nachde...

Страница 92: ...ms 2560 1440 Empfohlene Aufl sung 2560 1440 609 44 L 200 00 B 461 25 H mm Artikelma e Nennleistung Nennspannung 35W TYP 75W Max 100 240 V 6 53 kg 20 80 RH Betriebstemperatur Betriebsfeuchtigkeit 0 C 4...

Страница 93: ...ll vermischt werden Sch tzen vorgesehene von der Regierung oder einer lokalen Beh rde eingerichtete Sammelstelle zum Recycling von gen solcher Sammelstellen zu erhalten Wir Xiaomi Communications Co L...

Страница 94: ...9 r ne Genel Bak Monit re Genel Bak Paket eri i Kurulum Taban Kurulumu Kablo Y netimi Duvar Montesi Kurulumu Y nergeler Ba lant lar D me A klamas A ma Kapatma D mesi G sterge Durumu Men A klamas 101 1...

Страница 95: ...Pekin in 100085 Daha fazla bilgi i in l tfen www mi com u ziyaret edin Xiaomi Communicati ons Co Ltd Adres 019 9th Floor Building 6 33 Xi erqi Middle Road Haidian District Pekin Chiny 100085 Wi cej in...

Страница 96: ...tak n Not Stand karmak i in h zl karma d mesine bas n Kurulum Taban Kurulumu 3 Monit r n arka k sm ndaki montaj yerini g rebilmek Bask uygulamay n Monit r n d r lmemesi veya izilmemesi i in k p k zeri...

Страница 97: ...ve dengeli bir y zeye yerle tirin D KKAT Ekrana hasar vermemek i in LCD ekran dik bir ekilde yerle tirirken ekran zerine bask uygulamamaya dikkat edin Kablo Y netimi monit re ba lay n Kablo y netimi...

Страница 98: ...alt gen pimlere sabitleyin Not Uyumlu duvar montelerinde birbirinden dikey ve yatay olarak 75 75 mm uzakl kta bulunan VESA d zeni montaj delikleri bulunur 3 Monit r monte etmek i in duvar montesinin...

Страница 99: ...b DisplayPort kablosunun bir ucunu bilgisayar n DisplayPort k ba lant noktas na di er ucunu da monit r n DisplayPort giri ba lant noktalar ndan birine tak n 2 HDMI kablosunu ayr sat l r ba lama yaln z...

Страница 100: ...A k Uyku modunda A k Soluk Kapal Yan p S n yor G d mesine bas n A ma Kapatma D me A klamas A ma Kapatma D mesi G sterge Durumu D me levi 1 Men Se im 2 Yukar 3 4 5 A a k Geri A ma Kapatma 98...

Страница 101: ...Color Temperature Hue Saturation Gamma Aspect Ratio Monit r n renk s cakl n ayarlama Monit r n renk z n ayarlama Monit r n doygunlu unu ayarlama Monit r n gamas n ayarlama Monit r n en boy oran n ayar...

Страница 102: ...SD Ayarlar Volume Information Reset Men dilini se me K sayol Tu u 1 i in i lev belirleme K sayol Tu u 2 i in i lev belirleme Monit r beklemedeyken ve bilgisayara USB kablosu ile ba l de ilken USB ba l...

Страница 103: ...irse ki isel yaralanma lara veya monit rde hasara yol a labilir Monit r serin kuru ve havaland r lan bir yerde saklay n ve kullan n Monit r radyasyon ve s kaynaklar na yakla t rmay n Monit r n arka k...

Страница 104: ...rmek i in g zlerinizi daha s k k rp n Monit r her iki saatlik kullan m n z n ard ndan g zlerinizi 20 dakika dinlendirin G zlerinizi monit rden ay r n ve en az 20 saniye boyunca belirli bir uzakl ktaki...

Страница 105: ...1 ms 2560 1440 nerilen z n rl k 2560 1440 609 44 U 200 00 A 461 25 B mm r n Boyutlar Nominal G Nominal Voltaj 35 W TYP 75 W Maks 100 240 V Net A rl k 6 53 kg 20 80 ba l nem al ma S cakl al ma Nemi 0 C...

Страница 106: ...raf ndan belirlenmi bir toplama noktas na teslim ederek insan sa l n ve evreyi koruman z gerekir Do ru imha ve geri d n m evre ve insan sa l zerindeki olas olumsuz sonu lar nlemeye yard mc olur S z ko...

Страница 107: ...112 Przegl d produktu Przegl d monitora Zawarto opakowania Monta Monta podstawy Uporz dkowanie kabli Monta uchwytu ciennego Instrukcje Po czenia Opis przycisk w Przycisk w wy Stan wska nika Opis menu...

Страница 108: ...Xi erqi Middle Road Haidian District Pekin in 100085 Daha fazla bilgi i in l tfen www mi com u ziyaret edin Xiaomi Communicati ons Co Ltd Adres 019 9th Floor Building 6 33 Xi erqi Middle Road Haidian...

Страница 109: ...m miejscu Uwaga aby zdj stojak nacisn przycisk szybkiego zwalniania Monta Monta podstawy 3 Zdj g rn warstw pianki i plastikowy worek aby ods oni punkt monta owy z ty u monitora 107 Nie naciska Zalecam...

Страница 110: ...e ci go na p askiej stabilnej powierzchni PRZESTROGA Aby unikn uszkodzenia ekranu LCD nie nale y naciska go podczas ustawiania Zdj pokryw do chowania przewod w a nast pnie przeprowadzi przew d zasilaj...

Страница 111: ...na Przycisk szybkiego zwalniania 109 2 Zamontowa cztery ko ki sze ciok tne z ty u monitora we wskazanych miejscach a nast pnie za pomoc czterech wkr t w do monta u ciennego sprzedawanych oddzielnie pr...

Страница 112: ...a HDMI sprzedawanego oddzielnie tylko w przypadku korzystania z HDMI a Upewni si e monitor i komputer s wy czone b Pod czy jeden koniec kabla HDMI do portu wyj ciowego HDMI komputera a drugi koniec do...

Страница 113: ...W Tryb u pienia W ciemniony Wy Miga Naci n przycisk zasilania W czanie wy czanie Opis przycisk w Przycisk w wy Stan wska nika Funkcje przycisk w 1 Menu Wybierz 2 G ra 3 4 5 D Wyj cie powr t W wy 111...

Страница 114: ...acja Gamma Aspect Ratio Regulacja temperatury barwowej monitora Regulacja odcienia barw monitora Regulacja nasycenia barw monitora Regulacja krzywej gamma barw monitora Regulacja wsp czynnika proporcj...

Страница 115: ...formacja Reset Wyb r menu j zyk w Ustawianie funkcji klawisza skr tu 1 Ustawianie funkcji klawisza skr tu 2 W czanie lub wy czanie zasilania portu USB gdy monitor jest w trybie czuwania i nie jest pod...

Страница 116: ...uszkodzenie monitora Monitor powinien by przechowywany i u ywany w ch odnym suchym i wentylowanym miejscu Nale y go trzyma z dala od promieniowania i r de ciep a Nie zakrywa ani nie blokowa otwor w w...

Страница 117: ...czu podczas patrzenia na monitor nale y cz sto mruga Po korzystaniu z monitora przez dwie godziny zapewni swoim oczom 20 minutow przerw Przenie wzrok z monitora i patrze w dal przez co najmniej 20 sek...

Страница 118: ...560 1440 Zalecana rozdzielczo 2560 1440 609 44 d 200 00 szer 461 25 wys mm Wymiary urz dzenia Moc znamionowa Napi cie znamionowe 35W TYP 75W maks 100 240 V 6 53 kg 20 80 wilgotno ci wzgl dnej Temperat...

Страница 119: ...zdrowia ludzi oraz rodowiska naturalnego nale y przekaza zu yty sprz t do wyznaczonego punktu utylizacji wyznaczonego przez instytucje rz dowe lub lokalne Prawid owe usuni cie zu ytego produktu pomag...

Страница 120: ...onitoroverzicht Inhoud pakket Installatie De voet installeren Kabelbeheer Wandbevestigingsinstallatie Instructies Verbindingen Beschr ving van de knoppen Aan uit knop Indicatorstatus Beschr ving van h...

Страница 121: ...aidian District Pekin in 100085 Daha fazla bilgi i in l tfen www mi com u ziyaret edin Xiaomi Communicati ons Co Ltd Adres 019 9th Floor Building 6 33 Xi erqi Middle Road Haidian District Pekin Chiny...

Страница 122: ...ngsknop om het statief te verw deren Installatie De voet installeren 3 Verw der de bovenste laag schuimrubber en de plastic zak om het bevestigingspunt aan de achterkant van de monitor zichtbaar te ma...

Страница 123: ...vlakke stabiele ondergrond te plaatsen oorkomen WAARSCHUWING Kabelbeheer Verw der de kabelbeheerkap haal dan de stroomkabel en de DisplayPort kabel door de opening in het statief om ze te verbinden m...

Страница 124: ...n de zeskantbouten te bevestigen Opmerking B de compatibele wandbevestiging moeten de bevestigingsgaten in het VESA patroon 75 75 mm verticaal en horizontaal van elkaar verw derd z n 3 Raadpleeg de in...

Страница 125: ...van de DisplayPort kabel aan op de DisplayPort uitgangspoort van de computer en het andere uiteinde op de DisplayPort ingangspoorten van de monitor 2 De HDMI kabel verbinden apart verkr gbaar alleen...

Страница 126: ...pstand Aan Gedimd Uit Knipperend Druk op de aan uitknop In en uitschakelen Beschr ving van de knoppen Aan uit knop Indicatorstatus Knopfuncties 1 Menu Selecteer 2 Omhoog 3 4 5 Omlaag Sluiten Terug Aan...

Страница 127: ...erature Hue Saturation Gamma Aspect Ratio Pas de kleurtemperatuur van de monitor aan Pas de kleurtinten van de monitor aan Pas de verzadiging van de monitor aan Pas het gamma van de monitor aan Pas de...

Страница 128: ...enu Stel de functie in voor sneltoets 1 Stel de functie in voor sneltoets 2 Schakel de stroom van de USB poort in uit wanneer de monitor in stand by staat en wanneer die niet met de computer via de US...

Страница 129: ...laatst Als de monitor omvalt of omgegooid wordt kan persoonl k letsel of materi le schade aan de monitor ontstaan Bewaar en gebruik de monitor in een koele droge geventileerde ruimte Houd de monitor u...

Страница 130: ...idheid en p n aan de nek arm elleboog en schouder als gevolg van langdurig computergebruik te voorkomen Knipper regelmatig met de ogen om oogvermoeidheid te verlichten wanneer u naar de monitor k kt G...

Страница 131: ...440 609 44 L 200 00 B 461 25 H mm Itemafmetingen Nominaal vermogen Nominale spanning 35W TYP 75W Max 100 240 V 6 53 kg 20 80 relatieve luchtvochtigheid Bedr fstemperatuur Bedr fsvochtigheid 0 C 45 C 5...

Страница 132: ...pparatuur in te leveren b een van de aangewezen inzamelpunten voor de recycling van afgedankte elektrische en elektronische apparatuur ingericht door de overheid of plaatsel ke autoriteiten Correcte v...

Страница 133: ...136 136 137 137 137 138 P ehled monitoru Obsah balen Instalace Instalace z kladny Spr va kabel Instalace na ze Pokyny P ipojen Popis tla tek Zap nac vyp nac tla tko Stav indik toru Popis nab dek 140 1...

Страница 134: ...a fazla bilgi i in l tfen www mi com u ziyaret edin Xiaomi Communicati ons Co Ltd Adres 019 9th Floor Building 6 33 Xi erqi Middle Road Haidian District Pekin Chiny 100085 Wi cej informacji www mi com...

Страница 135: ...isknut m tla tka pro rychl uvoln n stoj nek odeberte Instalace Instalace z kladny 3 Odstra te horn vrstvu p ny a plastov obal aby se odhalily mont n body na zadn stran monitoru 133 Netla te Doporu uje...

Страница 136: ...arujte se b hem manipulace tlaku na obrazovku LCD aby nedo lo k jej mu po kozen Spr va kabel Sejm te kryt spr vy kabel a prot hn te nap jec ru a kabel DisplayPort otvorem ve stojanu aby je bylo mo n p...

Страница 137: ...d v no samostatn k estihrann m ep m Pozn mka Kompatibiln mont n sada na ze mus m t mont n otvory v rozvr en VESA v rastru 75 75 mm od sebe 3 P i mont i monitoru postupujte podle pokyn mont n sady na z...

Страница 138: ...Zkontrolujte e je monitor i po ta vypnut b Zapojte kabel USB do portu USB IN monitoru a do portu USB po ta e 4 P ipojte sluch tka nebo jin extern audioza zen kompatibiln 3 5mm konektorem do portu audi...

Страница 139: ...mu sp nku Zapnuto Ztlumeno Vypnuto Blik Stiskn te nap jec tla tko Zapnut vypnut Popis tla tek Zap nac vyp nac tla tko Stav indik toru Funkce tla tka 1 Nab dka V b r 2 Nahoru 3 4 5 Dol Konec Zp t Zapno...

Страница 140: ...oporu uje se povolit re im sRGB P ejd te do nab dky OSD On Screen Display a vyberte Inteligentn re imy sRGB Hlavn nab dka Bri Con D l nab dka Popis Volba V choz Brightness DLC Contrast DCR Black Level...

Страница 141: ...e Information Reset V b r jazyka nab dky Nastaven funkce pro kl vesovou zkratku 1 Nastaven funkce pro kl vesovou zkratku 2 Povolen nebo z kaz nap jen portu USB pokud je monitor v pohotovostn m re imu...

Страница 142: ...n ch zdroj Nep et ujte elektrick z suvky proto e to m e zp sobit po r nebo raz elektrick m proudem Nevkl dejte do monitoru dn ciz p edm ty proto e to m e zp sobit zkrat a n sledn po r nebo raz elektri...

Страница 143: ...y nedoch zelo k nav o p padn bolesti krku pa e lokte i ramene zp soben dlouh m pou v n m po ta e i te se d le uveden mi doporu en mi Udr ujte mezi monitorem a va ima o ima vzd lenost 50 a 70 cm 20 a 2...

Страница 144: ...Doporu en rozli en 2560 1440 609 44 d 200 00 461 25 v mm Rozm ry v robku Jmenovit nap jen Jmenovit nap t 35W TYP 75W Max 100 240 V ist hmotnost 6 53 kg 20 80 RH Provozn teplota Provozn vlhkost 0 45 5...

Страница 145: ...Spr vn likvidace a recyklace pomohou zabr nit potenci ln m negativn m dopad m na ivotn prost ed a lidsk zdrav V ce informac o um st n a podm nk ch t chto sb rn ch m st se dozv te od mont n ho technika...

Страница 146: ...htisar Produk Gambaran Monitor Isi Kemasan Pemasangan Memasang Dasar Manajemen Kabel Pemasangan Braket Dinding Petunjuk Koneksi Deskripsi Tombol Tombol Nyala Mati Status Indikator Deskripsi Menu 153 1...

Страница 147: ...ct Pekin in 100085 Daha fazla bilgi i in l tfen www mi com u ziyaret edin Xiaomi Communicati ons Co Ltd Adres 019 9th Floor Building 6 33 Xi erqi Middle Road Haidian District Pekin Chiny 100085 Wi cej...

Страница 148: ...an Pemasangan Memasang Dasar 3 Lepaskan lapisan busa atas dan kantong plastik untuk membuka titik pemasangan di bagian belakang monitor Jangan di tekan Direkomendasikan untuk memasang monitor pada bus...

Страница 149: ...Untuk menghindari kerusakan layar berhati hatilah agar tidak menekan layar LCD saat berdiri Manajemen Kabel Lepaskan penutup manajemen kabel kemudian lewatkan kabel daya dan kabel DisplayPort melalui...

Страница 150: ...l terpisah ke tiang sekrup heksa Catatan Braket dinding yang kompatibel harus memiliki lubang pemasangan berpola VESA 75 75 mm terpisah satu sama lain secara vertikal dan horizontal 3 Baca petunjuk pe...

Страница 151: ...abel USB a Pastikan monitor dan komputer keduanya dimatikan b Sambungkan kabel USB ke port USB IN di port monitor dan port USB di port komputer 4 Hubungkan headset atau perangkat audio eksternal yang...

Страница 152: ...Dalam mode tidur Nyala Redup Mati Berkedip Tekan tombol daya Nyalakan matikan Deskripsi Tombol Tombol Nyala Mati Status Indikator Fungsi Tombol 1 Menu Pilih 2 Naik 3 4 5 Turun Keluar Kembali Nyala Mat...

Страница 153: ...Mode sRGB Harap buka menu On Screen Display OSD dan pilih Mode Pintar sRGB Menu Utama Bri Con Submenu Deskripsi Pilihan Default Brightness DLC Contrast DCR Black Level Atur kecerahan monitor Atur kece...

Страница 154: ...ge Shortcut Key Shortcut Key 1 Shortcut Key 2 USB Standby Mode Volume Information Reset Pilih bahasa menu Setel fungsi untuk tombol pintas 1 Setel fungsi untuk tombol pintas 2 catu daya port USB saat...

Страница 155: ...bebani stopkontak secara berlebihan karena dapat menyebabkan kebakaran atau sengatan listrik Jangan memasukkan benda asing ke dalam monitor karena hal ini dapat menyebabkan korsleting yang dapat menga...

Страница 156: ...penggunaan komputer dalam waktu lama ikuti saran yang tertera di bawah ini Jaga jarak monitor 20 28 inci sekitar 50 70 cm dari mata Anda Berkedip lebih sering untuk menghilangkan rasa lelah pada mata...

Страница 157: ...usi yang direkomendasikan 2560 1440 609 44 P 200 00 L 461 25 T mm Dimensi Item Nilai Daya Tegangan Nominal 35W TYP 75W Maks 100 240 V Berat Bersih 6 53 kg 20 80 RH Suhu Pengoperasian Kelembapan Pengop...

Страница 158: ...g yang benar akan membantu mencegah potensi konsekuensi negatif terhadap kesehatan manusia dan lingkungan Hubungi pemasang atau otoritas setempat untuk mendapatkan informasi lebih lanjut tentang lokas...

Страница 159: ...157 158 158 158 159 159 160 161 162 162 163 163 163 164 166 166 168...

Страница 160: ...oad Haidian District Pekin Chiny 100085 Wi cej informacji www mi com Xiaomi Communicati ons Co Ltd Adres 019 9th Floor Building 6 33 Xi erqi Middle Road Haidian District Be ing China 100085 Ga voor me...

Страница 161: ...2 4 3 159 1 2...

Страница 162: ...160 5 LCD DisplayPort...

Страница 163: ...1 2 4 4 75x75mm VESA 3 161...

Страница 164: ...162 1 DP DP a b DP DP DP 2 HDMI HDMI a b HDMI HDMI HDMI 3 USB a b USB USB USB 4 3 5mm 5 AC HDMI DP USB DP 1 4 2560 1440 165Hz HDMI 2 0 2560 1440 144Hz 5V 2A 5V 2A...

Страница 165: ...1 2 3 4 5 163...

Страница 166: ...2 1 2 Bri Con Brightness PQ Display Pro Functions Smart Modes Input Source DLC Contrast DCR Black Level sRGB OSD sRGB DLC 0 100 70 0 100 75 0 100 50 Display 0 100 0 100 1 8 2 0 2 2 2 4 2 6 1 1 50 50 2...

Страница 167: ...sRGB sRGB HDMI 1 HDMI 2 DP HDMI 1 HDMI 2 DP 1 2 USB Standby Mode OSD 1 2 USB USB Input Source HDMI Logo Low Blue Light Content HDR HDR Rotation 0 100 10 50 HDR HDR IMBC English English Espa ol Fran ai...

Страница 168: ...A S DisplayPort 166...

Страница 169: ...300 500nm 20 28 50 70cm 2 20 20 167...

Страница 170: ...560 1440 609 44 200 00 461 25 mm 35W TYP 75W 100 240 V 6 53 kg 20 80 RH 0 45 50 60 Hz 1 5 A 165 Hz 168 The Adopted Trademarks HDMI HDMI High Definition Multimedia Interface and the HDMI Logo are trade...

Страница 171: ...WEEE 2012 19 EU WEEE Xiaomi Communications Co Ltd EU Product Information Sheet QR code EU 169...

Страница 172: ...171 171 171 172 172 173 174 175 175 176 176 176 177 179 179 181 Troubleshooting 170...

Страница 173: ...ad Haidian District Pekin Chiny 100085 Wi cej informacji www mi com Xiaomi Communicati ons Co Ltd Adres 019 9th Floor Building 6 33 Xi erqi Middle Road Haidian District Be ing China 100085 Ga voor mee...

Страница 174: ...172 1 2...

Страница 175: ...173...

Страница 176: ...174...

Страница 177: ...175 5V 2A 5V 2A...

Страница 178: ...1 2 3 4 5 176...

Страница 179: ...Bri Con Brightness PQ Display Pro Functions Smart Modes Input Source DLC Contrast DCR Black Level 177...

Страница 180: ...H P D Language Shortcut Key Shortcut Shortcut Key 2 USB Standby Mode OSD Setting Volume Information Reset 2 B S U Model Number Current Resolution Input Source HDMI Logo Low Blue Light Content c n y S...

Страница 181: ...179...

Страница 182: ...180 Eye Health 0 0 5 0 0 3 0 7 0 5 8 2 0 2 2 0 2 0 2...

Страница 183: ...80 The Adopted Trademarks HDMI HDMI High Definition Multimedia Interface and the HDMI Logo are trademarks or registered trademarks of HDMI Licensing Administrator Inc in the United States and other co...

Страница 184: ...U E 9 1 2 1 0 2 E E E W E E E W d t L o C s n o i t a c i n u m m o C i m o a i X http www mi com global service support declaration html QR 182...

Страница 185: ...oduto Vis o geral do monitor Conte dos da embalagem Instala o Instala o da base Consola de cabos Instala o do suporte de parede Instru es Liga es Descri o dos bot es Bot o de ligar desligar Indicador...

Страница 186: ...i erqi Middle Road Haidian District Pekin in 100085 Daha fazla bilgi i in l tfen www mi com u ziyaret edin Xiaomi Communicati ons Co Ltd Adres 019 9th Floor Building 6 33 Xi erqi Middle Road Haidian D...

Страница 187: ...ase e aperte o com o parafuso de fixa o na parte inferior da base 3 Remova a camada de esponja superior e o saco de pl stico para expor o ponto de montagem na parte de tr s do monitor 4 Prenda o supor...

Страница 188: ...certifique se de que n o pressiona o ecr LCD ao levantar o monitor Consola de cabos Remova a tampa da consola de cabos e em seguida passe o cabo de alimenta o e o cabo DisplayPort atrav s da abertura...

Страница 189: ...arede Parede Bot o de desbloqueio r pido 187 2 Instale os quatro pinos sextavados na parte traseira do monitor nas posi es indicadas Depois utilize os quatro parafusos do suporte de parede para aperta...

Страница 190: ...utilizar HDMI a Certifique se de que o monitor e o computador se encontram desligados b Ligue uma das pontas do cabo HDMI porta de sa da HDMI do computador e a outra ponta a uma das portas de entrada...

Страница 191: ...ado Desligado Intermitente Pressione o bot o de alimenta o Ligar Desligar Descri o dos bot es Bot o de ligar desligar Indicador de estado Fun o do bot o 1 Menu Selecionar 2 Para cima 3 4 5 Para baixo...

Страница 192: ...Saturation Gamma Aspect Ratio Ajustar temperatura da cor do monitor Ajustar tom do monitor Ajustar satura o do monitor Ajustar gama do monitor Ajustar propor o do monitor Padr o Warm Cool Custom 0 100...

Страница 193: ...lho de teclado 1 Definir fun o do Atalho de teclado 2 Ativar ou desativar a fonte de alimenta o da porta USB quando o monitor estiver em descanso e n o ligado ao computador atrav s do cabo USB Prefer...

Страница 194: ...as pode provocar les es pessoais bem como danos no monitor Armazene e utilize o monitor num ambiente fresco seco e ventilado Mantenha o monitor afastado de fontes de radia o e de calor N o cubra nem b...

Страница 195: ...o da luz azul baixa Para evitar a fadiga ocular ou dores no pesco o bra o cotovelo e ombro causadas pela utiliza o do computador durante muito tempo siga as sugest es indicadas abaixo Pestaneje com ma...

Страница 196: ...ecomendada 2560 1440 609 44 L 200 00 W 461 25 H mm Dimens es do produto Pot ncia nominal Tens o nominal 35 W TYP 75 W M x 100 240 V Peso l quido 6 53 kg 20 80 RH Temperatura operacional Humidade opera...

Страница 197: ...mana e o meio ambiente e entregar o respetivo equipamento num ponto de recolha designado para reciclagem de res duos de equipamentos el tricos e eletr nicos indicado pelo governo ou pelas autoridades...

Страница 198: ......

Страница 199: ......

Страница 200: ...inden Sie auf www mi com Xiaomi Communications Co Ltd Adres 019 9th Floor Building 6 33 Xi erqi Middle Road Haidian District Pekin in 100085 Daha fazla bilgi i in l tfen www mi com u ziyaret edin Xiao...

Страница 201: ...g 6 33 Xi erqi Middle Road Haidian District Pekin Chiny 100085 Wi cej informacji www mi com Xiaom i Com munications Co Ltd Adres 019 9th Floor Building 6 33 Xi erqi Middle Road Haidian District Be ing...

Отзывы: