background image


- 7 - 


- Press the 

MENU

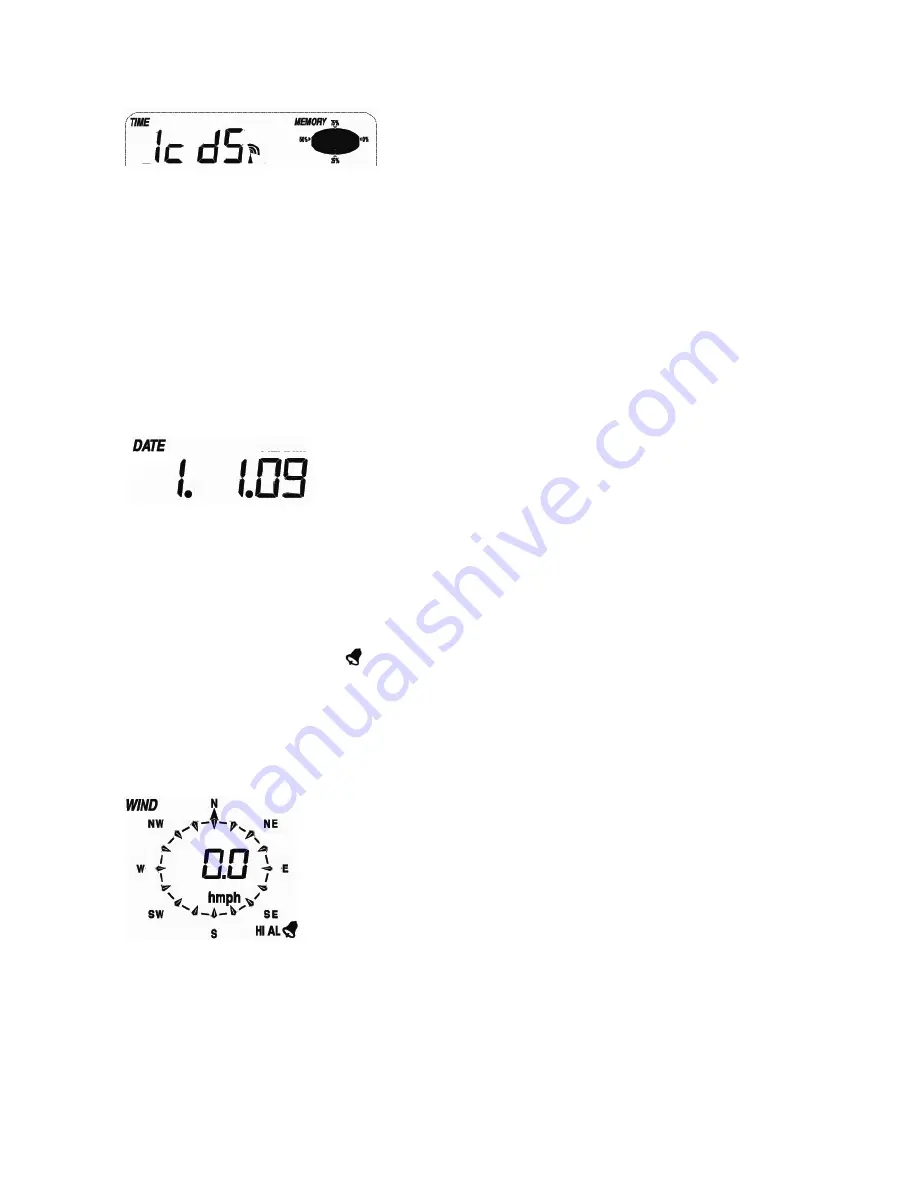
 key to select the TIME section, TIME section digits will start flashing.    Enter 

LCD contrast setting mode (level 1-8, default level 5), press the 

UP/+

 or 

DOWN/- 

key to set the 

value.   


- Press the 

ENTER

 key to select the following modes:


z

 Time 

zone


Note: 

At Europe, 0 for GMT+1 time zone, 1 for GMT+2 time zone, -1 for GMT time zone. 

At America, -4 for Atlantic time zone, -5 for Eastern Time zone, -6 for Central Time 

Zone, -7 for Mountain Time zone, -8 for Pacific time zone, -9 for Alaska time zone, -10 
for Hawaii time zone. 

z


12/24h time display select (default 12 hours) 

z


Manual time setting (hours/minutes) 

Press the 

UP/+

 or 

DOWN/- 

key to set the value. 


Date 


- Press the 

MENU

 key twice to select the DATE section, DATE section digits will start flashing. Press 

the 

UP/+

 or 

DOWN/- 

key to shift the display of 

DD-MM-YY, DD-MM-WEEK and Time alarm display 

(Default DD-MM-YY format),


- Press the 

ENTER

 key to select the following modes, press the 

UP/+

 or 

DOWN/- 

key to select 

the format or set the value:


z


Select DD-MM or MM-DD format. (Default DD-MM format) 

z


Calendar setting (year/month/date)   

z


Time alarm setting. (Hours/minutes). Press the 

ON/OFF

 key to on/off the alarm. If alarm is 

enabled, an alarm symbol 

  appears in the display indicating the alarm function has been 

enabled. 

Note

: When a set weather alarm condition has been triggered that particular alarm will sound for 

120 seconds. The corresponding value, ‘HI AL” or “LO AL” and the alarm symbol are flashing 
until the weather condition doesn’t meet the user set level. Press any key to mute the alarm. 


Wind 


- Press the 

MENU

 key the third time to select the WIND section, WIND section digits will start flashing. 

Press the 

UP/+

 or 

DOWN/- 

key to shift the display of 

average wind speed and Gust (Default average wind 

speed),  
- Press 

ENTER

 key to select the following modes, then press the 

UP/+

 or 

DOWN/- 

key to select 

the display or set the value:     

z


Select the wind speed unit between km/h, mph, m/s, knots, bft. (Default mph) 

Содержание WH2081

Страница 1: ...ometric pressure because the air pressure is pushing equally in every direction RELATIVE AIR PRESSURE Relative air pressure is the same as the barometric pressure The calculation of relative air pressure is a combination of the absolute air pressure and the altitude ABSOLUTE AIR PRESSURE Absolute air pressure is the actual air pressure on the barometer without regard to altitude INCHES OF MERCURY ...

Страница 2: ...essure 4 Barometric trend 5 Indoor Temperature 6 Outdoor Temperature 7 Memory 8 Date 9 Rainfall 10 Weather Forecast 11 Indoor Humidity 12 Outdoor reception signal 13 Outdoor Humidity Note The presence of the Alarm On icon in the section means that the particular alarm has been enabled ...

Страница 3: ...es to the sensor or plugging or unplugging cables simply press and hold the DOWN key for 4 seconds and a short beep will sound to synchronize the base station to sensors Without being synchronized weather data will not be received Note Commonly the radio communication between receiver and transmitter in the open field can reach a distance of up to 330 feet providing that there are no interfering o...

Страница 4: ... 4 ...

Страница 5: ... 5 ...

Страница 6: ... operation MENU key UP key DOWN key ENTER key HISTORY key ON OFF key Note Because of the default settings already determined by the manufacturer it may not b necessary for the majority of user to perform except the relative pressure see further down any further basic settings and changes however can be easily made Note Keeping the UP or DOWN key depressed when setting certain units in the manual s...

Страница 7: ...ress the ENTER key to select the following modes press the UP or DOWN key to select the format or set the value z Select DD MM or MM DD format Default DD MM format z Calendar setting year month date z Time alarm setting Hours minutes Press the ON OFF key to on off the alarm If alarm is enabled an alarm symbol appears in the display indicating the alarm function has been enabled Note When a set wea...

Страница 8: ... both the rain value and MAX icon are flashing hold the ENTER key for 3s the maximum rain value will be reset to current reading z Clear the total rainfall When both the total rain value and CLEAR word are flashing hold the ENTER key for 3s the total value will be reset to zero 1h 24h week month rain value will be reset to zero automatically Press Press the MENU key the fifth time to select the PR...

Страница 9: ...N key to select the display or set the value z Set the pressure threshold from 2 4hPa default 2hPa z Set the storm threshold from 3 9hPa default 4hPa Notes to pressure sensitivity setting for weather forecasting The pressure threshold can be set to suit the user s requirement for weather forecasting from 2 4hPa default 2hPa For areas that experience frequent changes in air pressure requires a high...

Страница 10: ...ion INDOOR HUMIDITY section digits will start flashing Enter the indoor humidity high alarm setting mode press the ON OFF key to on off the alarm If alarm is enabled an alarm symbol appears in the display indicating the alarm function has been enabled Press ENTER key to select the following modes then press the UP or DOWN key to set the value z The indoor humidity low alarm setting Press the ON OF...

Страница 11: ...ata together time stamp press UP key to see later history weather data When history data displayed the corresponding time will be displayed at the time section area History data saving interval can only be changed using the PC software that comes with this product the default history data saving time interval is preset to 30 minutes prior to shipment 2 Press the HISTORY key again will trigger the ...

Страница 12: ... The installation of software is very simple double click the setup exe file and follow the steps popped up Make sure you are running the program under the administrator accounts of your windows PC platform Otherwise the graphic function might not be working when graph display mode is needed to display all history data If you run the program for the first time the current weather display will be d...

Страница 13: ...ld 100m 300 feet Frequency 433MHz Temperature range 40 C 65 C 40 to 149 Accuracy 1 C Resolution 0 1 C Measuring range rel humidity 10 99 Accuracy 5 Rain volume display 0 9999mm show if outside range Accuracy 10 Resolution 0 3mm if rain volume 1000mm 1mm if rain volume 1000mm Wind speed 0 160km h 0 100mph show if outside range Accuracy 1m s wind speed 10m s 10 wind speed 10m s Measuring interval th...

Страница 14: ... can get enough power to maintain its function properly Normal alkaline batteries is not allow to be used since when outdoor temperature is lower than 20 C the battery s discharging capability is greatly reduced Please help in the preservation of the environment and return used batteries to an authorized depot All rights reserved This handbook must not be reproduced in any form even in excerpts or...

Страница 15: ...ve Processor Pentium III 500 MHz or above Memory at least 128MB 256MB recommended CD ROM Drive Base Station and PC must be connected by USB cable 3 0 Installation of the EasyWeather Software Firstly the Base Station and the Outdoor Sensors should be connected and checked for correct function see Operation Manual for setting up the Weather Station After successful checking install the EasyWeather s...

Страница 16: ...the base unit then you don t need to make any setting changes on the PC software However you can still easily make any setting changes you wanted from the PC and download the changes into the base station the setting change will be refreshed when next full minute arrives on the base station When base unit is connected to PC the icon of will be displayed If no base station is connected then will be...

Страница 17: ...s used to set up PC software display base station units as well as able or disable the corresponding alarm function Once you made your choice press Save to make the setting effective display and setup system alarm value ...

Страница 18: ... desired time high or low alarm value for the base unit Once you made your choice choose Save to make the setting effective If you don t want to make any change just press Cancel and exit without change display min and max recorded value ...

Страница 19: ... 19 This section is used to display the recorded min and max value recorded with time stamp Min Max reset can only be done through key operation on the base station display listed history data ...

Страница 20: ...ion is full press Clear Memory button to refresh the memory space on the base station remember to upload all data before pressing this button If you wanted to start a new weather history record press Clear Data button to clear up the data base all history weather data will be deleted if you would like to keep a back up history file before deleting all weather data you can make a copy of the EasyWe...

Страница 21: ...u can see the history data plotted in graph format for easier observation If you want to see more details just use your mouse to select the area you wanted and the display will be automatically updated in more detailed scale ...

Страница 22: ... 22 Also you can see the graph in 3D mode by selecting the 3D check box You can change the Y axel by scrolling the mouse up and down roller ...

Страница 23: ...e automatically synchronizes the weather data with a time stamp calculated Thus the history data file can have different time when the PC time and base station time is not same In order to make the time scale correct remember to set the PC time and base station time same and further to this no weather data is allowed to be missed or over written If history weather memory on the base station is cle...

Страница 24: ...eather software products are protected by copyright laws and international copyright treaties as well as other intellectual property laws and treaties You may not copy the printed materials accompanying the products ...

Отзывы: