Loading
32
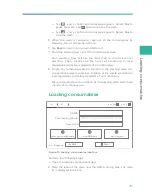
If scanning fails, input the plate ID with the on-screen keyboard.
z
Ensure that the ID format is correct when you input ID manually.
Otherwise, you will be prompted that the ID is incorrect and the
procedure cannot continue.
z
The plate ID consists of 10-digit catalogue numbers and 11-character
serial numbers.
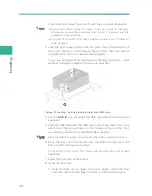
3. Load the post-loading plate onto the plate tray in the direction of
the arrow shown in the following figure. After that, you will be
prompted that the post-loading plate is loaded.
If you are prompted that loading post-loading plate fails, check
whether the plate is placed in the wrong direction.
3
5
Figure 11 Loading the post-loading plate and DNB tube
4. Tap the
DNB ID
box and input the DNB tube ID with the on-screen
keyboard.
5. Load the DNB tube into the DNB tube hole of the plate tray in the
direction of the arrow shown in the following figure. After that,
you will be prompted that the DNB tube is loaded.
NOTE
Press the DNB tube gently to ensure that the tube is placed in position.
6. Place the label of the flow cell near the RFID scanning area. The
flow cell ID is displayed in the box.
If scanning fails, input the flow cell ID with the on-screen
keyboard.
7. Open the flow cell compartment.
8. Install the flow cell.
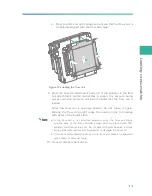
1) Hold the flow cell by upper and lower edges. Install the flow
cell onto the flow cell stage as shown in the following figure.
Содержание MGIDL-T7RS
Страница 7: ... T h i s p a g e i s i n t e n t i o n a l l y l e f t b l a n k ...
Страница 17: ... T h i s p a g e i s i n t e n t i o n a l l y l e f t b l a n k ...
Страница 30: ...23 Getting started This chapter describes laboratory preparations and loading preparations ...
Страница 55: ... T h i s p a g e i s i n t e n t i o n a l l y l e f t b l a n k ...
Страница 57: ... T h i s p a g e i s i n t e n t i o n a l l y l e f t b l a n k ...
Страница 59: ... T h i s p a g e i s i n t e n t i o n a l l y l e f t b l a n k ...


