en
Operating manual
W e m o v e p e o p l e .
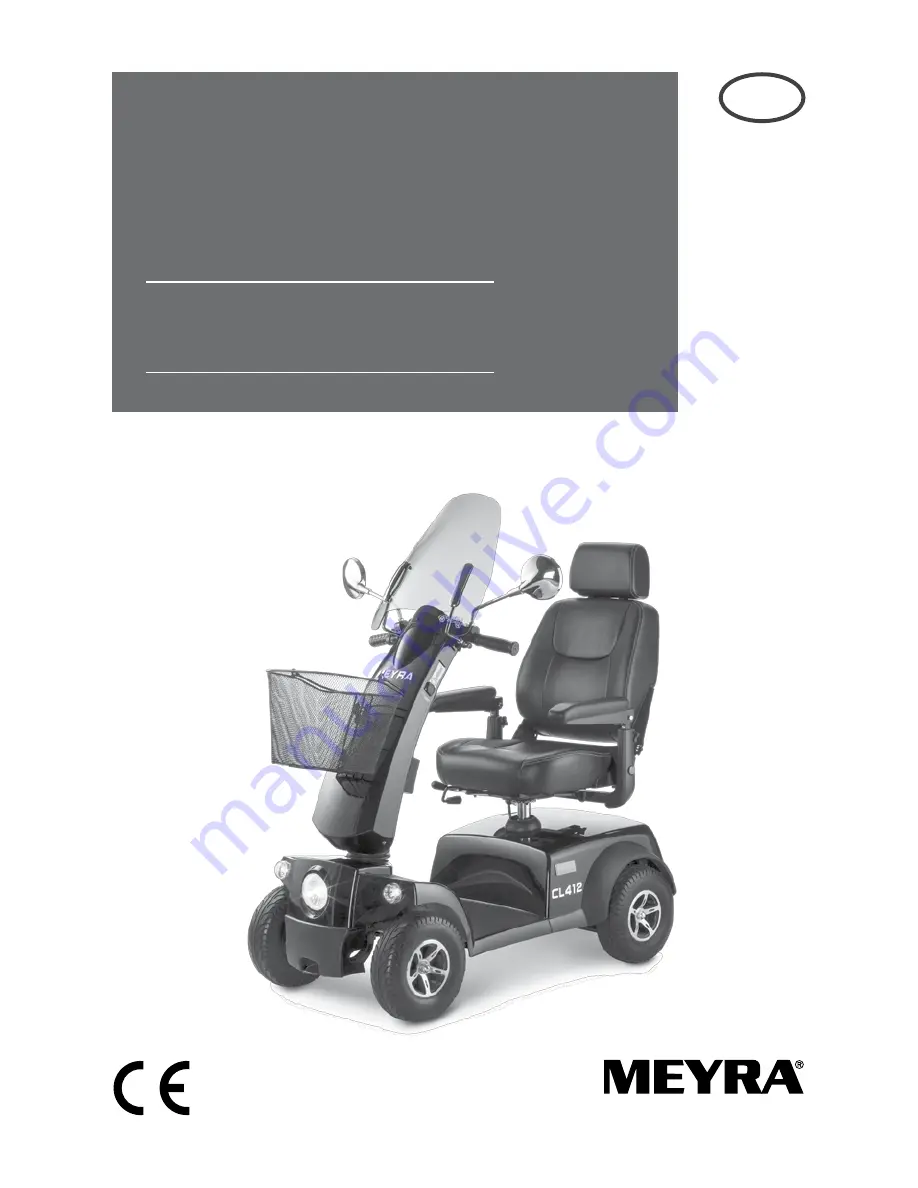
Scooter
Model 2.364
Страница 1: ...en Operating manual W e m o v e p e o p l e Scooter Model 2 364...
Страница 2: ...1 Supplementary safety information 11 Functional checks 11 Locking the SCOOTER 11 Drive key 12 Position of drive key 12 Director 13 Drive push mode 14 Selecting the motor mode 14 Selecting the push mo...
Страница 3: ...handicapped transport vehicles HTV 24 Transport security 25 Reducing the size of the SCOOTER 26 Disassembling the SCOOTER into components 27 Reassembly of SCOOTER components 31 Components 34 Seat 34...
Страница 4: ...ery fuses 47 Charging and control fuse 47 Replace fuse 47 Fault correction 48 Information for the specialist dealer 49 Programming the driving behaviour 49 Technical data 50 Kilometric performance 50...
Страница 5: ...e therefore also listed chapters with options that might not be appli cable for your vehicle Attention Read and observe the following documentation belonging to the SCOOTER before first operation this...
Страница 6: ...of remaining walking abili ties is required for the use of such vehicles ACCEPTANCE All products are checked for faults in the factory and packed in special boxes Note However we request that you che...
Страница 7: ...of a sitting person Other pulling or transporting uses do not comply with its intended purpose This model is a SCOOTER mainly for outdoor use on firm level surfaces Insurance licence plate The insuran...
Страница 8: ...by a doctor in order to ensure active use of the SCOOT ER s Attention Always have adaptation and ad justment work carried out by a specialist dealer LIFE SPAN We expect an average lifespan of about 5...
Страница 9: ...iption 9 Actuator director 10 Control panel 11 Lever for steering column lock ing device 12 Front basket 13 Lever for seat lock 14 Lever of the magnetic brake Emergency lock 15 Support wheel 16 Back l...
Страница 10: ...manual Control panel with LCD Dis play Driving lock 1 Driving lock 2 Key position 0 OFF 3 Key position 45 Push mode 4 Key position 90 ON Battery charging socket 5 Battery charging socket The battery c...
Страница 11: ...t and the hip of the user is at the back end of the seat belt Transit out of the SCOOTER on hills slopes may only be carried out in emergencies and with the aid of an accompanying person and or helper...
Страница 12: ...lockwise 1 The SCOOTER is switched off Position push mode The driving is inserted turned clock wise by 45 inside the driving key socket 2 For pushing turn the driving key from position 1 clockwise by...
Страница 13: ...speed is achieved through activation of the director via the the actuator as a seesaw device for thumb activation standard the actuator as a thumb or finger seesaw lever option 1 acceleration rotary g...
Страница 14: ...observe chapter Driv ing key The SCOOTER is now ready for use Selecting the push mode In order to establish push mode turn the driving key to position Push 2 Therefore observe chapter Driv ing key Th...
Страница 15: ...disconnecting the emer gency lock switch the SCOOTER off Therefore observe chapter Driving key 2 In order to push the SCOOTER first press the lever of the magnetic brake 2 down as far as possible then...
Страница 16: ...erefore observe chapter Bat tery charging procedure Attention Only enter or exit the seat of the SCOOTER when the driving key is pulled An unintentional movement of the accelerator lever can cause an...
Страница 17: ...witching on the SCOOTER Turn the driving key into the ON posi tion 2 in order to switch the Scooter on 3 Therefore observe chapter Driv ing key Also observe the operating manu al SCOOTER Control panel...
Страница 18: ...status of the battery charge through the battery gauge 1 Therefore observe chapter Battery gauge the pre selected maximum final speed setting 2 Therefore observe chap ter Limiting the maximum speed co...
Страница 19: ...et Danger of short circuit Therefore also observe the operat ing manual of the battery charger 2 Switch the battery charger on resp insert the main plug of the battery charger into the corre sponding...
Страница 20: ...lowest final speed for this purpose Therefore also observe the operat ing manual Control panel with LCD display Direction of travel Note The speed is reduced automatically during the rearward travel T...
Страница 21: ...lever with hand option Rearward travel 3 Left Press cap with thumb dent 4 Right Pull lever with hand option Driving speed Slowly move the director out of the basic position until the desired driving s...
Страница 22: ...Danger of tilting when turning around especially on slopes and hills The SCOOTER features and automatic blinker reset after driving through a curve The additional turn signal control is mandatory in a...
Страница 23: ...the driving lever director back into the original position according to the desired braking effect The braking distance of the SCOOTER must be taken into account for a time ly braking Attention Brake...
Страница 24: ...c vehi cles chapter Ramps and lifting platforms Transport in vehicles Attention Transport of the SCOOTERS may only be carried out in driving direc tion To save space for the transport in ve hicles a r...
Страница 25: ...this observe the regulations of the respective transport company Locking the SCOOTER Therefore also observe chapter Securing the SCOOTER The selection lever drive push mode is in drive mode position D...
Страница 26: ...erefore observe chapter Secur ing the SCOOTER 2 Remove the front basket Therefore observe chapter Front basket 3 Remove the seat Therefore observe chapter Seat 4 Swivel down the steering col umn There...
Страница 27: ...icle Front basket Therefore observe chapter Front basket Seat Therefore observe chapter Seat Rear panel Therefore observe chapter Removing the batteries Batteries Therefore observe chapter Removing th...
Страница 28: ...ing the battery cover 2 In order to prevent loosing the ball grip it should be replaced after the battery cover has been removed 4 First lift of the rear panel 3 then store it in a protected and safe...
Страница 29: ...revetment 1 Unplug the connections 3 of the back lights To pull them off hold onto the connection plugs Do not pull on the cables Note The plug is secured by a spring lock that has to be unlocked by...
Страница 30: ...lift the seat tube 3 the fold the rear chassis 4 toward the back Afterwards press the front chas sis over the seat tube 3 slightly down and place it on the floor 2 Folding down the steering column 1...
Страница 31: ...g bolt to connect the front and rear chassis is at the end of the safety wire The connection cables are not damaged Inserting the rear chassis First put the drive into drive mode 1 Lift the front chas...
Страница 32: ...ws at the side of the main plug to the for safety 5 Re establish the plugged connec tion of the tail lights 3 The plug must catch when be ing established Conduct a slight pulling test on the plug Rais...
Страница 33: ...n mounting the batteries Danger of cable damage 2 Reconnect the battery cable 2 on both sides Insert the plugs as far as possi ble Conduct a slight pulling test on the plug 3 Replace the battery lid 3...
Страница 34: ...e Turning the seat The seat can be turned for an easier transfer to or from the seat 2 In order to disengage the seat locking device press the lever at the side 3 upward Attention Do not reach between...
Страница 35: ...anger of squashing the fin gers Attaching the seat In order to insert the seat 3 press the lever at the side 2 upward Attention Grab sideways under the seat sur face in order to lift the seat Do not r...
Страница 36: ...can be steplessly adjusted after loosening the respective clamping screw 2 Maximally lift the arm supports up ward up to the marker After the height adjustment retighten the clamping screw 2 Adjusting...
Страница 37: ...oward the back 2 Adjusting the headrest height After activating the locking spring 3 the height of the head support can be adjusted After adjusting the height of the head support release the locking s...
Страница 38: ...hen crossing an obstacle or driv ing on a rising gradient Attention Support castors do not provide suf ficient protection against tipping over in certain situations Insurance licence plate Mount the i...
Страница 39: ...n a handicapped trans port vehicle Fastening the retaining strap Pull both belt halves to the front and slide the catch halves together so that they latch together 1 Afterwards conduct a pulling test...
Страница 40: ...and maintenance results in a limita tion of the product liability Maintenance The following maintenance schedule gives you a guide for carrying out the maintenance They do not give information about...
Страница 41: ...t workshop Danger of accidents Especially before driving in the dark Lighting Check the lighting equipment and reflec tors for flawless func tioning Carry out test yourself or with a helper Every 2 we...
Страница 42: ...y 2 months depending on dis tance covered Check tyre profile Minimum tread 1 mm Carry out a visual check yourself or with a helper If the tyre profile is worn down or if the tyre is dam aged consult a...
Страница 43: ...43 Tyre damage on pneumatic tyres For repairing tyre damage we rec ommend the use of a foam car tridge that is available in special ity shops Afterwards look up a specialist workshop as soon as pos si...
Страница 44: ...ve bulb Note Have a defective bulb in the front replaced in a specialist workshop Hold onto the new bulb with a dry cloth Adjusting the headlights The housing of the light 1 must be adjusted so that t...
Страница 45: ...into the socket against the spring turn clockwise bayonet catch and pull it out of the lamp socket Mounting Insert a new spherical bulb For this push the sideward pin bayo net catch into the recess o...
Страница 46: ...1 46 Rear light The rear and indicator lights 1 are equipped with long living LED tech nology Note In case of a failure we recommend to contact a specialist workshop...
Страница 47: ...se Note Have a defective fuse replaced by a specialist workshop Separate the plugs of the electrical connections Note The plugged connections are se cured by spring locks that have to be unlocked by p...
Страница 48: ...is set to push mode Move the selection lever for the drive push mode into the drive mode position and make sure it clicks into place Malfunction in the electronics Have it repaired by the specialist w...
Страница 49: ...recorded in the op erating manual A draft for further inspection certifi cates can be copied from the mainte nance and service manual when re quired It then has to be added to the operating manual Pro...
Страница 50: ...les Nominal load of 75 kg Without repeated acceleration Level firm driving surface The kilometric performance is greatly reduced by frequent uphill driving poor drive battery charge condi tion low amb...
Страница 51: ...ery fuse 2 x 80 A Charging control system fuse 10 A Lighting Headlight bulb Filament bulb 12 V 15 W P26S Front indicator Filament bulb 12V 10W BA15s Tools The following tools are required to replace a...
Страница 52: ...640 mm Width over arm supports 590 800 590 mm Height 1250 1310 mm Seat height 45 52 5 45 cm Seat turnable 360 Seat depth 45 cm Seat width 45 66 45 cm Seat inclination 3 Back support height 45 cm Back...
Страница 53: ...Watt The following values indicated in brackets are valid for increased user weight of more than 130 kg up to 150 kg and are not within the norm EN 12184 Performance mechanical view Kilometric perform...
Страница 54: ...se gradient 7 12 Static tilting safety in all directions 12 22 Weights max permissible total weight 260 kg Permitted axle load front 80 kg Permitted axle load rear 180 kg max permissible user weight 1...
Страница 55: ...Do not lift the SCOOTER at the arm supports or leg supports Removable parts are not suitable for car rying Drive mode Push mode Push only on level surfaces Indication for charging socket Attachment po...
Страница 56: ...r week Permitted user weight Permitted total weight Permitted axle loads Permissible rising gradient Permissible falling gradient Permitted final speed The product is licensed as a seat inside a handi...
Страница 57: ...ate Place date Signature Recommended safety inspection 5th year at least every 12 months Stamp of specialist dealer Next safety inspection in 12 months Date Place date Signature Recommended safety ins...
Страница 58: ...for surface damages tyres of the wheels dam ages due to loosened screws or nuts as well as worn out attachment holes due to frequent assembly work Furthermore damage to the drive and electronics caus...
Страница 59: ...the specialist dealer Serial no SN Delivery note no Model Stamp of specialist dealer Next safety inspection in 12 months Date Place date Signature Warrantee Guarantee section Please fill out Copy if...
Страница 60: ...ealer MEYRA GmbH Meyra Ring 2 D 32689 Kalletal Kalldorf Tel 49 5733 922 311 Fax 49 5733 922 9311 info meyra de www meyra de MEYRA 205 324 501 status 2015 11 Subject to technical modifications Original...