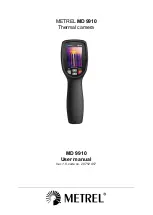
METREL MD 9910
Quick Start Guide
7
The IR thermal Imaging Display
1. Current Emissivity setting
2. Battery indicator
3. Hot temperature point reading
4. Cold temperature point reading
5. Centre crosshair
6. Lowest temperature crosshair
7. Highest temperature crosshair
8. Image freeze/hold icon
9. Centre temperature point reading
10.
“OK” button
11.
“LOCK” button
12. Current temperature unit
13. Scene Low Temperature
14. Palette scale
15. Scene High Temperature
16. Time clock
Control Buttons and Trigger
Became familiar with the operation of the control buttons and the trigger as
described below.
POWER / BACK / LOCK button
Press and hold >2 seconds to cycle the meter power ON or OFF. Short press to exit
a menu screen. Also used to lock the current scene temperature range. Icon
“ ” will
appear on the display above the button when this option is available.
OK / MENU button
Short press to access the Settings Menu, to confirm an edit, or to save an image
when prompted. An
“OK” icon appears on the display above the button when this
option is available.
UP and DOWN navigation arrow buttons
Scroll the Settings Menu or select a menu item setting.
TRIGGER / LED flashlight
Short press will take a snapshot of the current image. Short press again to discard
image and return to live image mode. Long press will turn the LED flashlight on,
repeated long press will turn it off.
Measure, Save, Delete, and Review IR Images
Point the thermal camera toward the object or area of interest.
Pull the trigger to capture the image. Press OK / MENU button to save image.
Press POWER / BACK / LOCK
button
to share the image.
“Save” and “share”
options are indicated on screen.
To review an image see the chapter Settings Menu..
To delete images from the internal memory, access the Settings Menu and
delete the stored images as described in the chapter Settings Menu..
WARNING:
All images are deleted when the internal memory is erased.


