


95-7504
2
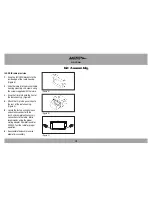
Dash Disassembly
Kit Preparation
1.
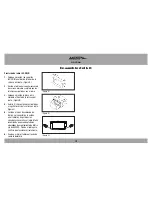
Unclip and remove display trim
panel above radio. (Figure A)
Note:
Open glove box and start in
middle of panel working towards
drivers side first, because last
connection on far passenger side
is a hook.
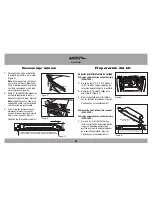
2.
Remove (2) Phillips screws exposed
at the top of radio, then unclip and
remove radio. (Figure B)
Note:
The display is attached to
radio brackets and will be removed
at same time as radio.
3.
Remove (2) Phillips screws on the
back of the display trim panel,
securing the display trim. Unclip
and remove. (Figure C)
Continue to kit preparation
Display Brackets/Pocket Assembly
Automatic Climate Control Vehicles
(2006-2009)
1.
Using the (2) 3/8” #10 bolts, and (2)
#10 nuts, attach the display retention
brackets to the display unit.
2.
Remove the (2) Phillips screws in the
sub dash. (Figure A)
3.
Mount the display into the sub-dash
using the screws removed in step 2
.
Continue to kit assembly
Manual Climate Control Vehicles
(2004-2009)
Automatic Climate Control Vehicles
(2004-2005)
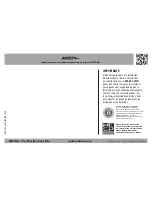
1.
Using the (2) Phillips screws removed in
step 3 of Dash Disassembly secure the
display replacement pocket to the back
of the display trim panel. (Figure B)
Continue to kit assembly
CLOCK SE
T
LOAD
FM1/2
AM
CD
TAPE/MD
(Figure B)
(Figure C)
HOOK
(Figure A)
REAR VIEW - DISPLAY REPLACEMENT PANEL
DISPLAY REPLACEMENT POCKET
MOUNTED IN DISPLAY TRIM PANEL
(Figure A)
REAR VIEW - DISPLAY REPLACEMENT PANEL
DISPLAY REPLACEMENT POCKET
MOUNTED IN DISPLAY TRIM PANEL
(Figure B)


