
Gas Ranges (30361-00) 13/32
food. Any other use of the appliance is considered
improper.
The installation and adaptation to other types of
gas must be done by qualified and authorized
installers.
In case of breakdown close the gas cut-off cock
upstream from the appliance.
Sealed components must not be tampered with.
For repairs consult only authorized service centres
and ask for original spare parts only.
The manufacturer declines any responsability
if such obligations are not observed.
Carefully read this booklet and keep it in a safe
place. Before using the appliance carefully clean
all the surfaces that will come in contact with food.
USE
Cooker hob burners
The open-flame pilot burners must be ignited
manually (eg. with a match).
The open burner knob has following references:
●
off
pilotburner
maximum flame
minimum flame
Open burner ignition
– Push down the knob and turn it to position .
– Maintain the knob pushed down and light the
pilotburner flame (operate on piezoelectric
igniter push-button, if available). Hold knob in
for about 20 seconds then release it and check
that the flame stays alight (if the pilot flame
turns off repeat the operation).
– Turn the knob to any desired position between
and .
Open burner extinction
– Turn knob to position .
– To extinguish pilot burner turn it to position
●
.
Gas oven
The gas oven knob has following references:
●
off
140
MINIMUM cooking temperature
200
MEDIMUM cooking temperature
300
MAXIMUM cooking temperature
Gas oven burner ignition
– Push down the knob and turn it to the desired
cooking temperature (ex. 200
°
C).
– Maintain the knob pushed down and operate on
piezoelectric igniter push-button to light the
connect the gauge pipe.
– Carry out the measurement with appliance on.
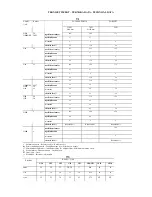
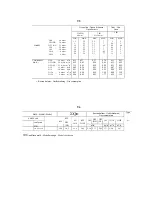
_ If the inlet pressure are not within the limits
indicated in Table T3 , interrupt the operation
of the appliance and contact the gas delivery
body.
– Disconnect the gauge pipe and screw down seal
screw.
ANALYSIS
OF
SEVERAL
FAILURES
Difficult or lacking pilot ignition
– Insufficient gas inlet pressure.
– Obstructed nozzle or main.
– Defective gas cock.
– Defective piezoelectric igniter, ignition spark
plug or cable.
Extinction of pilot burner flame during operation
– Defective or insufficiently heated thermo-
couple, or poorly connected to the gas cock.
– Defective gas cock.
Difficult or lacking burner ignition
– Insufficinet gas inlet pressure.
– Obstructed nozzle.
– Defective gas cock.
Difficult or lacking temperature adjustment
– Defective gas cock.
REPLACEMENT
OF
PARTS
SUBJECT
TO
CHANGE
Sealed components must not be tampered
with. After each intervention, if necessary,
check for the absence of gas leaks.
Burner, Pilotburner, Thermocouple, Ignition spark
plug of cooking hob
– Remove control panel of appliance, grates, drip
tray, burners, trays and replace the component.
Gas cock, cooking hob
– Remove control panel of appliance and replace
the component.
Gas cock, Piezoelectric igniter of gas heated oven
– Remove control panel of appliance and replace
the component.
Burner, Thermocouple, Ignition spark plug of gas
heated oven
– Remove control panel of appliance, oven floor
and replace the component.
Door seals
– The push-fit seals are located around the edges of
the door. Remove and replace them.
USE AND MAINTENANCE
WARNINGS
The appliance is for professional use and must be
used by trained personnel. It is for the cooking of






![Dacor RNR30NC[-C] Installation Instructions Manual preview](http://thumbs.mh-extra.com/thumbs/dacor/rnr30nc-c/rnr30nc-c_installation-instructions-manual_496435-01.webp)


