


15
•
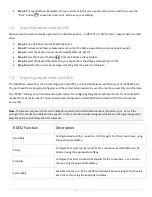
Step 2:
Press the Datum Selection button( ) to choose a datum (datum 1 in this example).
•
Step 3:
Press the X' and Y' value buttons to zero the center point of the selected feature as a datum.
4.7
Presetting a feature location
A part datum can also be established by presetting a position directly on any feature's X and Y coordinates.
To preset part coordinates:
•
Step 1:
Select the desired feature from the Feature list. In this example a probed circle is selected.
•
Step 2:
Press the Datum Selection button( ) to choose a datum (datum 1 in this example).
•
Step 3:
Long-press any DRO Zeroing Button(screen or keypad) to access the preset screen.
•
Step 4:
Press each desired coordinate field to select it (highlighted in orange).
•
Step 5:
Use the keypad to enter the desired reference coordinate values. The “Cancel” key can be used to delete
any incorrectly entered values.
•
Step 6:
Press the Return arrow to display the Home screen. The preset datum coordinates will be displayed.
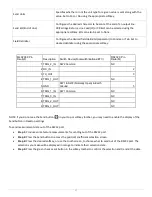
4.8
Using Two Datums
To establish two zero points first follow the steps outlined above to set an initial part datum(XY origin).
•
Step 1:
Now create or measure the feature that you wish to establish as your secondary datum. While that
feature is displayed in the feature detail screen, zero the X/Y coefficients.
•
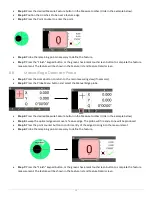
Step 2:
Press the datum icon( )in the upper tool bar. The datum indicator will now display ‘2’. All features
measured subsequently will be displayed relative to reference ‘2’. Additionally, any feature measured previous
to the new datum will also now be relative to the new datum “2”, the reference frame system is always fully
“floating”.