Page
42
of
64
4.8 Feed Roller Tension
4.8.1 Checking Feed Roller Tension
When the pistol is fully assembled, connect an airline to the drive motor.
Pass a length of the wire to be sprayed through the pistol and close the drive rollers.
Start the drive motor and adjust the speed to give a medium feed rate.
Holding the pistol in one hand, take a firm grip of the wire in the other and attempt to hold
back the wire and stop the wire feed.
If the feed rollers start to slip on the wire and allow the feed to be slowed or stopped, the
feed roller tension is insufficient and should be adjusted.
NOTE:
The correct feed roller tension is the minimum which prevents roller slip in this test.
DO NOT
apply excessive tension as this may damage the wire surface and increase wear on
the pistol drive and nozzle components.
4.8.2 Adjusting Feed Roller Tension
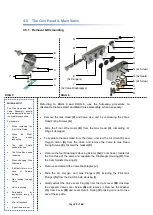
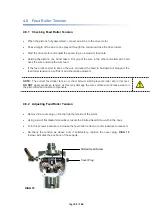
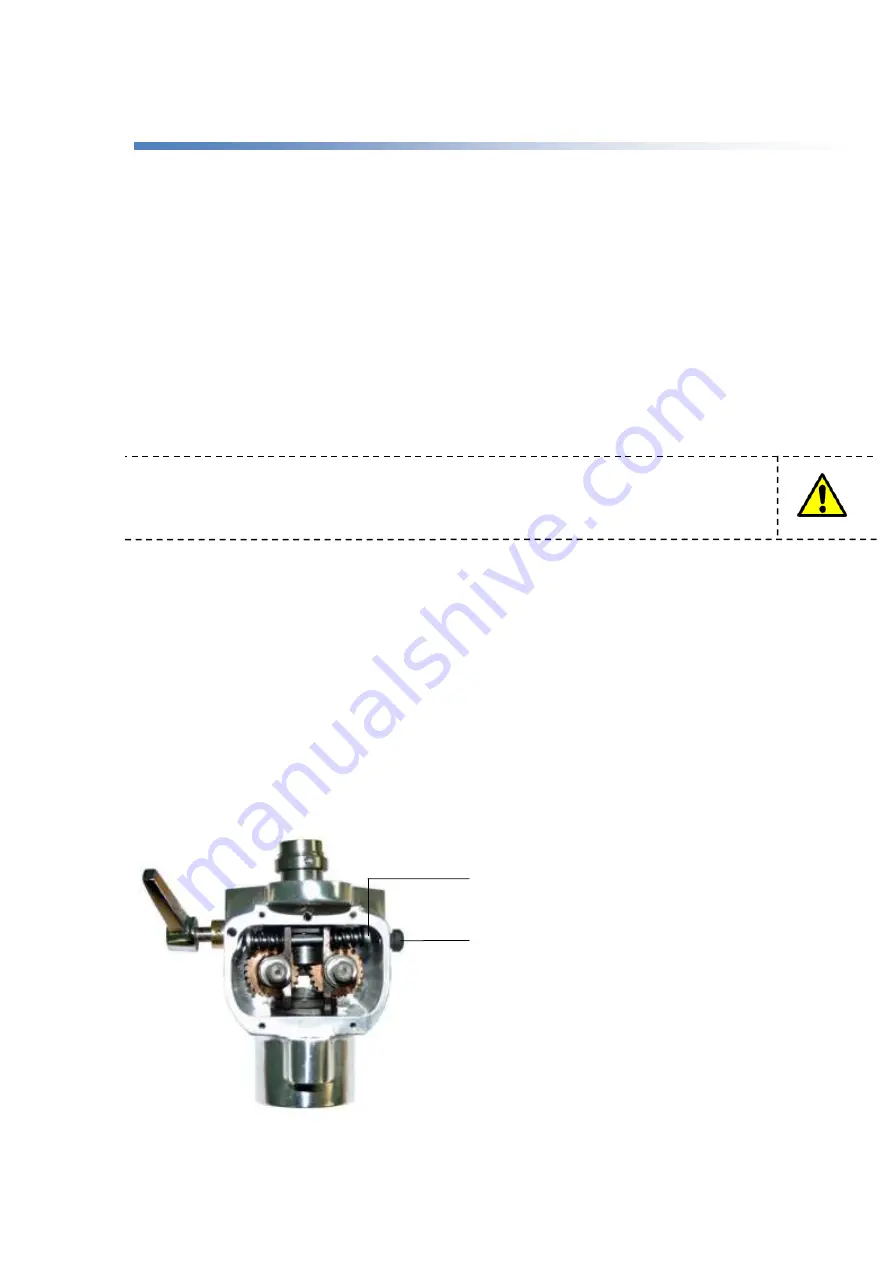
Remove the cover plug on the top right hand side of the pistol.
Using a small flat bladed screwdriver, locate the Slotted Head Screw within the body.
Turn this screw clockwise to increase the feed roller tension or anti-clockwise to reduce it.
Re-check the tension as above and, if satisfactory, replace the cover plug.
DIAG 18
(below) indicates the positions of these parts.
DIAG 18
Cover Plug
Slotted Head Screw
Содержание MK 73
Страница 1: ...Page 1 of 64 ssue 21 11 11 ...
Страница 43: ...Page 43 of 64 SECTION 5 FAULT FINDING 5 1 Troubleshooting 5 1 2 Flowmeter Troubleshooting ...
Страница 48: ...Page 48 of 64 SECTION 6 WIRE DISPENSING 6 1 Wire Swift 6 1 1 Operating Instructions 6 1 2 Wire Straightener ...
Страница 58: ...Page 58 of 64 SECTION 8 INFORMATION TABLES 8 1 Flowmeter Settings 8 2 Nozzle Selection Chart ...
Страница 61: ...Page 61 of 64 Notes ...
Страница 62: ...Page 62 of 64 ...
Страница 63: ...Page 63 of 64 ...

