ENGLISH
12
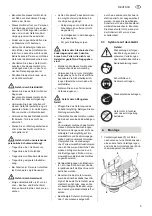
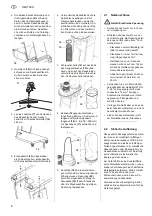
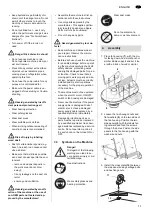
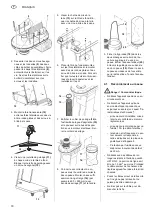
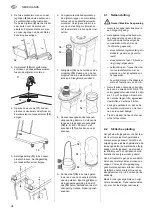
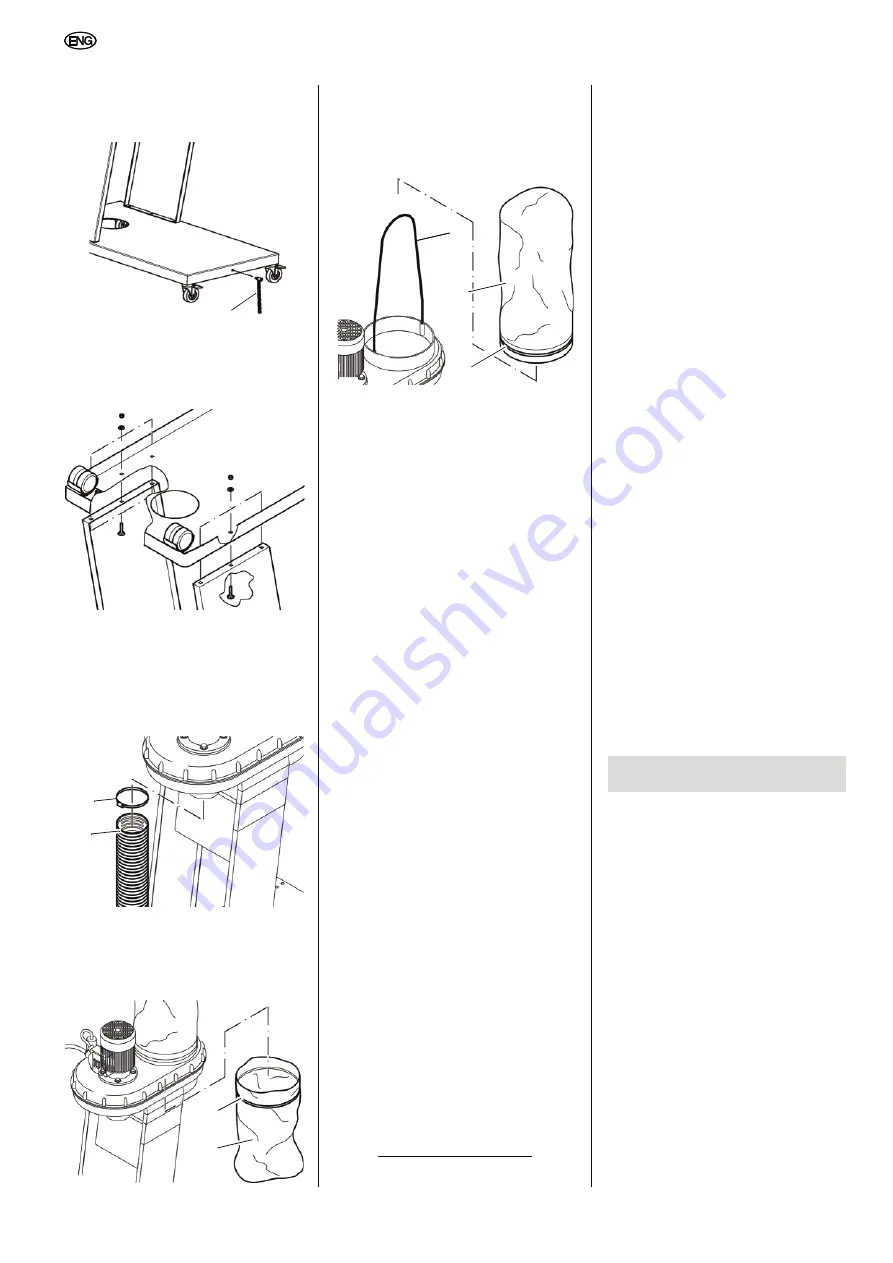
4. Screw one castor
(11)
to each cor-
ner of the bottom panel. Secure
each castor with a hex nut
(12)
.
5. Screw the earthing chain
into
the bottom panel. Secure the earth-
ing chain with a hex flange nut.
6. Place the thus prepared bottom
panel on the side panels and secure
with carriage bolts and hex flange
nuts. Then check all screws and
nuts for tightness and place ma-
chine with the castors on the floor.
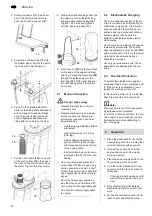
7. Put the hose clamp
(14)
on one end
of the suction hose
(15)
, then push
the hose on the suction port below
the motor. Tighten the hose clamp.
8. Clamp dust collection bag under the
fan opening. Fit a sufficiently long
and wide dust collection bag
(16)
(eg 600 × 900 mm) and tighten it
with the tightening strap
(17)
.
9. Insert the rod
(18)
into the two holes
on the edge of the upper dust bag
opening. Thread the clamp ring
(20)
through the guide sewn into the
dust bag
(19)
. Fit the dust bag over
the dust bag opening. Tighten the
clamp ring.
4.1
Mains Connection
B
Danger! High voltage
•
Operate this machine in dry sur-
roundings only.
•
Operate machine only on a power
source meeting the following re-
quirements (see also “Technical
Specifications”):
– outlets properly installed, earthed
and tested.
– outlet protected by a 10A fuse
(time-lag);
– mains voltage and system fre-
quency conform to the voltage
and frequency shown on the ma-
chine´s name plate;
– fuse protection by a residual cur-
rent device (RCD) of 30 mA sen-
sitivity.
•
Use only oil-resistant extensions
cords class H07 RN-F. Lead cross-
section should be at least 1.0 mm
2
.
Protect the power supply cable from
heat, aggressive liquids and sharp
edges.
•
Run the power supply cables in a
way that they do not interfere with
your work and will not get damaged.
•
Do not pull on power supply cable
to unplug.
4.2
Electrostatic Charging
The entire extraction system of the ma-
chine is constructed of electrically non-
conductive components. If the suction
hose is connected to electrically con-
ductive parts (eg metal dust chutes or
suctions pipes), they need to be
earthed to dissipate possible electro-
static energy.
On the machine no plastic parts may be
replaced by metal parts. The suction
hose in particular must not be retrofitted
with a metal spiral. In this context small
metal parts like screws and hose
clamps are harmless.
Use only genuine spare parts. These
spare parts are designed for the ma-
chine.
4.3
Overload Protection
To protect the electric motor against
overloads it has a motor protection built
in. If the motor is overheated or over-
loaded the machine will shut off.
In this case the motor can be restarted
after a few minutes of cooling down.
3
Note:
If the machine is shut OFF repeatedly
by a tripped motor protection
(2 – 3 times) within a short time, the ma-
chine needs to be checked by a quali-
fied electrician, before attempting to
turn it ON again.
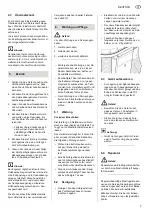
1. Place the dust extractor next to the
woodworking machine in a way that
it will not interfere with your work.
2. Connect the suction hose to the
dust extraction port of the wood-
working machine.
3. Place the power supply cable on the
floor and plug it into an outlet.
4. Turn the motor ON and wait a few
seconds, until the fan has reached
fuill speed.
– If the upper dust bag does not fill
with air after a few seconds, pull
it up.
5. Only now start the woodworking
machine and commence with your
work.
6. Let the dust extractor postrun for at
least 10 seconds after the wood-
13
14
15
16
17
18
19
20
5.
Operation
Содержание SPA 1200
Страница 51: ...51 1 2 3 5 1 4 6 1 2 3 4 5 6...
Страница 53: ...53 A B A A A A 3 3...
Страница 54: ...54 1 7 2 9 8 3 10 4 11 12 5 13 6 7 14 15 8 16 600 900 17 9 18 20 19 4 7 8 9 10 11 12 13 14 15 16 17 18 19 20...
Страница 55: ...55 4 1 B 10 A 30 H07 RN F 1 0 mm2 4 2 4 3 3 2 3 1 2 3 4 5 6 10 3 A 1 2 3 6 1 5 6...
Страница 57: ...57 9 220 240 1 50 Hz 0 55 3 600 740 3 900 1600 2500 100 100 3 65 22 EN 60335 2 69 LWA LPA A A A 98 25 85 5 3...


