background image


51 

FIN 

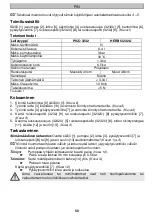
Valmistelut 


Ota huomioon luvussa "Turvallisuus" annetut ohjeet. 
Laitteen on oltava pystysuorassa asennossa. 
Vesijohdosta täytettäessä ei johto tai letku saa ulottua sisälle säiliöön. 

1.  Vedä  mäntäpainemittarin  [14]  punaista  kahvaa  ylös  niin  kauan,  kunnes  säiliö  on 

paineeton. 

(Kuva 4) 

2.  Kierrä pumppu [2] irti säiliöstä. 

(Kuva 5)


Suositus  sumutusnesteen  sekoittamiseksi  laitteessa  tai  esisekoittamiseksi  erillisessä 

säiliössä:  Täytä  1/3  vettä  säiliöön,  lisää  siihen  sitten  sumutusainetta  ja  täytä  sitten 

täyteen vedellä. 


Käytettäessä  HERBISIDEILLE  ei  tällä  sumuttimella  tulisi  enää  levittää 

kasvinsuojeluaineita. 

3.  Täytä sumutusnestettä säiliöön [1].

 (Kuva 6)


4.  Tarkista täyttökorkeus säiliön asteikosta [15]. 

(Kuva 6)


5.  Kierrä pumppu [2] säiliöön. 

(Kuva 7)


6.  Paina kahvallinen männänvarsi [16] alas ja kierrä vartta myötäpäivään. 


Kahvallinen männänvarsi on vapautettu lukituksesta. 

(Kuva 8) 

7.  Luo haluamasi paine 

(


Taulukko 2) säiliössä

.


(Kuva 9)


Maksimipaineen ei tulisi ylittää 3 baaria (punainen viiva mäntäpainemittarissa, kuva 9). 

Jos maksimipaine ylittyy, varoventtiili reagoi ja päästää ylipaineen pois. 

8.  Paina kahvallinen männänvarsi [16] alas ja kierrä vartta myötäpäivään. 

(Kuva 10)


Kahvallinen männänvarsi on lukittu. 

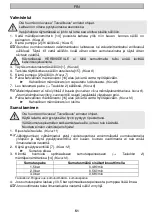
Sumuttaminen 


Ota huomioon luvussa "Turvallisuus" annetut ohjeet. 
Käytä laitetta vain pystyssä tai hyvin pystyyn ripustettuna. 
Vältä sumutuspisaroiden karkaamista alueille, joita ei tule käsitellä. 
Noudata aineen valmistajan ohjeita! 

1.  Ripusta laite olalle. 

(Kuva 11)


Jälkitippumisen  välttämiseksi  pidä  ruiskutusputkea  ensimmäisellä  sumutuskerralla 

ylöspäin  ja  käytä  pysäytysventtiiliä  niin  kauan,  kunnes  suuttimesta  ei  tule  enää 

ilmansekaista nestettä. 

2.  Käytä pysäytysventtiiliä [7]. 

(Kuva 12) 


Sumutus alkaa. 

3.  Kiinnitä 

huomiota 

optimaaliseen 

sumutuspaineeseen 

(


Taulukko 

2

)


mäntäpainemittarissa [14] 

(Kuva 10)

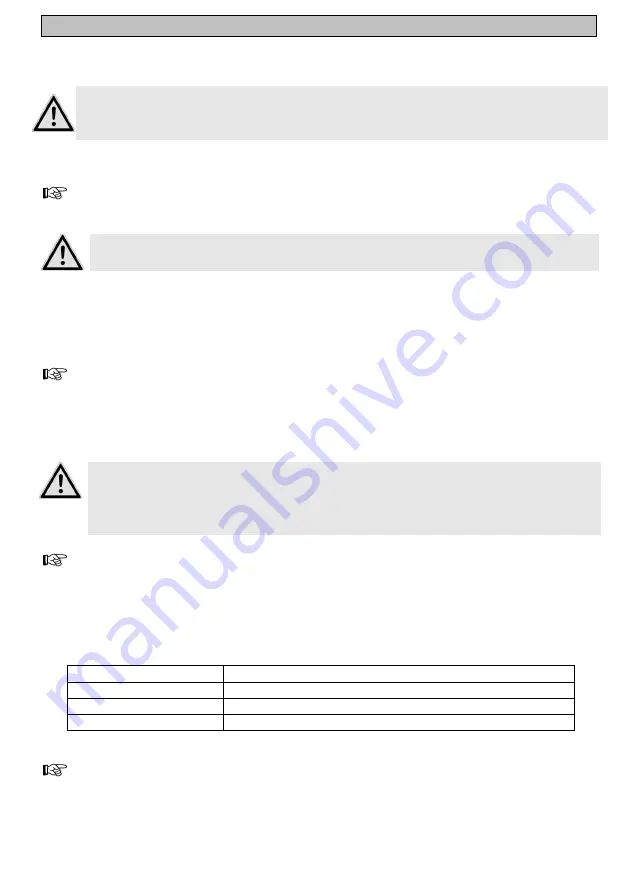
Taulukko 2. Riippuvuus: sumutusmäärä - sumutuspaine 

4.  Jos sumutuspaine laskee yli 0,5 bar optimaalisesta paineesta, pumppaa lisää ilmaa. 

Jos suuttimesta tulee ilmansekaista nestettä, säiliö on tyhjä. 

Sumutuspaine 

Sumutusmäärä sisäkartiosuuttimella


1,5 bar 

0,49 l/min 

2,0 bar 

0,56 l/min 

3,0 bar 

0,69 l/min 

Содержание HERBI 3232U

Страница 1: ...rnstStockburgerGmbH LudwigsburgerStra e71 D71691Freiberg Neckar Tel 4971412720 Fax 497141272100 E mail info mesto de Internet http www mesto de PICO HERBI 3232 3232U D A CH Gebrauchsanleitung 6 GB IRL...

Страница 2: ...2 Ersatzteile Spare Parts Pi ces de Rechange Varaosat Reserve onderdelen Varuosade Pezzi di ricambio Reservdelar Reservedele PICO 3232 HERBI 3232U...

Страница 3: ...3 1 2 3 4 5 6 7 2 2 5 3 4 1 2 6 7 8 9 6 6 6 6 6 15 8 10 3 7 14 9 7 8 3232 11 13 12 5 3 13 1 3232U 9 3 3...

Страница 4: ...4 8 9 10 11 12 13 14 15 16 7 16 2 14 7 16 2 7 16 5 8 7 9 1 1 3232U 2 3232 18 17...

Страница 5: ...5 16 17 18 19 20 20 20 19 16 2 19 12 13 13 12 8 5 9 8 21 22 23 3232U 3232 16 3232U 3232 9...

Страница 6: ...ler Die Spr hger te d rfen ausschlie lich im Au enbereich und in gut durchl fteten R umen verwendet werden Zum Zeitpunkt der Herstellung sind keine sch dlichen Einwirkungen auf das Ger t der vom Bunde...

Страница 7: ...llen in der Umgebung wenn Sie brennbare Fl ssigkeiten zerst uben Lassen Sie das Ger t nicht in der Sonne stehen Stellen Sie sicher dass das Ger t nicht ber die maximale Betriebstemperatur erw rmt wird...

Страница 8: ...3 Schieben Sie den Schlauch 3 auf das Abstellventil 7 und sichern ihn mit der berwurfmutter Abb 3 4 Schrauben Sie das Spritzrohr 3232 9 bzw Spritzrohr 3232U 8 auf das Abstellventil 7 Abb 3 5 Montieren...

Страница 9: ...h lter Abb 9 Max Druck sollte 3 bar nicht berschreiten roter Strich am Kolbenmanometer Abb 9 Wird der max Druck berschritten spricht das Sicherheitsventil an und l sst den berdruck ab 8 Dr cken Sie di...

Страница 10: ...t Nach 50 maligem Gebrauch mindestens einmal j hrlich Schrauben Sie die Pumpe 2 aus dem Beh lter Abb 6 Bauen Sie die Pumpe 2 auseinander a Entriegeln Sie die Kolbenstange mit Griff 16 b Ziehen Sie die...

Страница 11: ...auschen Fl ssigkeit dringt aus der Pumpe Ventilscheibe 21 verschmutzt oder defekt Abb 19 Ventilscheibe reinigen oder austauschen Kolbenmanometer zeigt keinen Beh lterdruck an Sicherheitsventil bl st z...

Страница 12: ...chnung oder den Kassenzettel ber den Kauf des Ger tes Ausgenommen von der Garantie sind Verschlei teile Dichtungen O Ringe Manschette usw und Defekte die auf Grund unsachgem en Gebrauchs und h herer G...

Страница 13: ...instructions for using the product before each application The spraying devices may be used outdoors or in well ventilated rooms only At the time of manufacture there are no known harmful effects to t...

Страница 14: ...s in the environment if you spray combustible liquids Do not leave the device in the sun Ensure that the device is not heated beyond the maximum operating temperature Table 1 Protect the device from f...

Страница 15: ...he tube 3 into the fixture 10 and secure it with the cap nut Fig 3 3 Push the hose 3 onto the shut off valve 7 and secure it with the cap nut Fig 3 4 Screw the spray wand 3232 9 or spray wand 3232U 8...

Страница 16: ...gauge Fig 9 If the maximum pressure is exceeded the safety valve will engage and release the excess pressure 8 Press the piston rod with handle 16 down and turn it clockwise Fig 10 Piston rod with han...

Страница 17: ...ump 2 a Unlock the piston rod with handle 16 b Pull the piston rod with handle 16 out of the cylinder tube up to the stop and turn it counterclockwise Fig 13 c Disconnect the piston rod with handle 16...

Страница 18: ...too early Piston pressure gauge 14 is defective Have the piston pressure gauge repaired The nozzle does not spray even though pressure is present Filter 20 Fig 18 and or nozzle 13 Fig 17 is clogged Cl...

Страница 19: ...cash register receipt for purchase of the device The warranty does not include wearing parts seals O rings diaphragm etc or defects which have occurred due to improper use or unforeseeable circumstan...

Страница 20: ...it lors de chaque utilisation Les pulv risateurs doivent tre utilis s uniquement l ext rieur et dans des locaux bien ventil s Au moment de la fabrication il n y a aucun effet nocif connu sur l apparei...

Страница 21: ...pulv risez pas de liquides inflammables proximit de sources d inflammation Ne laissez pas l appareil expos au soleil Assurez vous que l appareil n est pas chauff au del de la temp rature maximale de...

Страница 22: ...ble 3 sur la soupape d arr t 7 et bloquez le avec l crou raccord Fig 3 4 Vissez le tube de pulv risation 3232 9 ou 3232U 8 sur la soupape d arr t 7 Fig 3 5 Montez l cran de pulv risation 3232U 5 sur l...

Страница 23: ...Tableau 2 dans le r servoir Fig 9 Ne pas d passer la pression maximale de 3 bars trait rouge sur le manom tre piston fig 9 Si la pression maximale est d pass e la soupape de s curit se d clenche et v...

Страница 24: ...de protection et vous m me Maintenance et nettoyage Respectez les indications du chapitre S curit Apr s 50 utilisations au moins une fois par an D vissez la pompe 2 du r servoir Fig 6 D montez la pom...

Страница 25: ...e soupape 21 est encrass ou d fectueux Fig 19 Nettoyer le disque de soupape ou le remplacer Le manom tre piston n indique aucune pression du r servoir La soupape de s curit souffle trop t t Le manom t...

Страница 26: ...sse concernant l achat de l appareil Sont exclus de la garantie les pi ces d usure joints d tanch it joints toriques manchette etc et les d fauts qui sont mettre sur le compte d une utilisation non co...

Страница 27: ...De spuiten mogen uitsluitend buiten en in goed geventileerde ruimtes worden gebruikt Op het tijdstip van de productie zijn er geen schadelijke invloeden op het apparaat bekend van door de Duitse Voed...

Страница 28: ...n versproeit Laat het apparaat niet in de zon staan Controleer of het apparaat niet tot boven de maximale bedrijfstemperatuur wordt verwarmd Tabel 1 Bescherm het apparaat tegen vorst en ammoniak Blaas...

Страница 29: ...telmoer afb 3 3 Steek de slang 3 op het uitzetventiel 7 en borg deze met de wartelmoer afb 3 4 Schroef de sproeibuis 3232 9 resp sproeibuis 3232U 8 op het uitzetventiel 7 afb 3 5 Monteer het spatscher...

Страница 30: ...rode streep op de zuigermanometer afb 9 Indien de maximale druk wordt overschreden wordt het veiligheidsventiel geactiveerd Dit zorgt ervoor dat de overdruk verdwijnt 8 Druk de zuigerstang met de hand...

Страница 31: ...fdstuk Veiligheid in acht Na 50 malig gebruik echter minstens eenmaal per jaar Schroef de pomp 2 uit het reservoir afb 6 Haal de pomp 2 uit elkaar a Ontgrendel de zuigerstang met de handgreep 16 b Tre...

Страница 32: ...uit de pomp Ventielschijf 21 vuil of defect afb 19 Ventielschijf schoonmaken of vervangen Zuigermanometer geeft geen reservoirdruk aan veiligheidsventiel blaast te vroeg af Zuigermanometer 14 defect Z...

Страница 33: ...kassabon met betrekking tot de aankoop van het apparaat te overleggen Uitgezonderd van garantie zijn de aan slijtage onderhevige onderdelen pakkingen O ringen manchet enz en defecten die op grond van...

Страница 34: ...aciones del fabricante de los productos Los pulverizadores deben utilizarse exclusivamente en exteriores y en habitaciones bien ventiladas En el momento de la fabricaci n no se conocieron efectos da i...

Страница 35: ...nflamables en los alrededores al pulverizar l quidos inflamables No deje el aparato bajo el sol Aseg rese de que el aparato no se caliente por encima de la temperatura m xima de funcionamiento Tabla 1...

Страница 36: ...esconexi n 7 y aseg rela con la tuerca de racor Fig 3 4 Atornille el tubo de inyecci n 3232 9 o tubo de inyecci n 3232U 8 en la v lvula de desconexi n 7 Fig 3 5 Monte el deflector de pulverizaci n 323...

Страница 37: ...el dep sito Fig 9 La presi n m xima no deber a superar los 3 bares raya roja en el man metro de mbolo Fig 9 En caso de que se sobrepase la presi n m x la v lvula de seguridad reacciona y elimina la p...

Страница 38: ...impie el equipo de protecci n individual y l vese Mantenimiento y cuidados Tenga en cuenta las indicaciones del cap tulo Seguridad Despu s de 50 utilizaciones al menos una vez al a o Desenrosque la bo...

Страница 39: ...sco de v lvula 21 sucio o defectuoso Fig 19 Limpie o sustituya el disco de v lvula El man metro de mbolo no indica presi n alguna del dep sito La v lvula de seguridad se descarga demasiado pronto Man...

Страница 40: ...compra del aparato Se excluyen de la garant a las piezas de desgaste juntas anillos t ricos manguito etc y defectos que se hayan producido por una utilizaci n inadecuada o en caso de fuerza mayor DEC...

Страница 41: ...tore della sostanza utilizzata Gli spruzzatori possono essere utilizzati esclusivamente in aree esterne e in ambienti ben aerati Al momento della fabbricazione non era noto nessun influsso dannoso sul...

Страница 42: ...zo di liquidi infiammabili Non lasciare l apparecchio al sole Accertarsi di non surriscaldare l apparecchio oltre la temperatura d esercizio massima consentita Tabella 1 Proteggere l apparecchio dal g...

Страница 43: ...ndi con il dado a risvolto fig 3 4 Avvitare la lancia di spruzzatura 3232 9 risp 3232U 8 sulla valvola d arresto 7 fig 3 5 Montare lo schermo 3232U 5 sulla lancia di spruzzatura 3232U 8 dopodich l ane...

Страница 44: ...one massima non dovrebbe superare 3 bar trattino rosso sul manometro a pistone fig 9 In caso di superamento della pressione massima si attiva la valvola di sicurezza che scarica di conseguenza la pres...

Страница 45: ...protetto dai raggi solari e dal gelo fig 14 Pulire l attrezzatura per la protezione personale e s stessi dopo l uso Pulizia e manutenzione Osservare le avvertenze riportate nel capitolo Sicurezza Dop...

Страница 46: ...tuire il manicotto Fuoriuscita di liquido dalla pompa Disco della valvola 21 sporco o difettoso fig 19 Pulire o sostituire il disco della valvola Il manometro a pistone non indica nessuna pressione ne...

Страница 47: ...la fattura o la ricevuta relativa all acquisto dell apparecchio La garanzia non copre comunque i componenti soggetti alla normale usura guarnizioni O Ring manicotto ecc e difetti attribuibili ad un i...

Страница 48: ...hyvin tuuletetuissa tiloissa Valmistuksen ajankohtana ei ole tiedossa mit n vahingollisia vaikutuksia laitteeseen k ytett ess Saksan liittovaltion viraston BVL n hyv ksymi kasvinsuojeluaineita Asiato...

Страница 49: ...V lt syttymisl hteit ymp rist ss kun sumutat palamiskykyisi nesteit l j t laitetta seisomaan aurinkoon Varmista ett laite ei l mpene yli maksimin k ytt l mp tilan Taulukko 1 Suojaa laitetta j tymisel...

Страница 50: ...u 3 pys ytysventtiilille 7 ja varmista kiinnitys hattumutterilla Kuva 3 4 Kierr ruiskutusputki 3232 9 tai ruiskutusputki 3232U 8 pys ytysventtiilille 7 Kuva 3 5 Asenna ruiskutussuojus 3232U 5 ruiskutu...

Страница 51: ...i ylitt 3 baaria punainen viiva m nt painemittarissa kuva 9 Jos maksimipaine ylittyy varoventtiili reagoi ja p st ylipaineen pois 8 Paina kahvallinen m nn nvarsi 16 alas ja kierr vartta my t p iv n Ku...

Страница 52: ...annetut ohjeet 50 k ytt kerran j lkeen v hint n kerran vuodessa Kierr pumppu 2 irti s ili st Kuva 6 Pura pumppu 2 osiin a Vapauta kahvallinen m nn nvarsi 16 lukituksesta b Ved kahvallinen m nn nvarsi...

Страница 53: ...5 Vaihda mansetti Pumpusta vuotaa nestett Venttiilin aluslevy 21 likainen tai viallinen Kuva 19 Puhdista tai vaihda venttiilin aluslevy M nt painemittarissa ei n y s ili painetta Varoventtiili puhalta...

Страница 54: ...teen ostosta Takuun piiriin eiv t kuulu kuluvat osat tiivisteet O renkaat mansetti jne eiv tk viat jotka johtuvat asiattomasta k yt st tai ylivoimaisesta esteest EY konedirektiivin 2006 42 EY liitteen...

Страница 55: ...55 GR MESTO MESTO PICO 3232 HERBI 3232U HERBI 3232U BVL 30 C STO...

Страница 56: ...56 GR 1 MESTO 1...

Страница 57: ...PICO 3232 PICO 3232 PICO 3232 PICO 3232 HERBI 3232U 5 l 6 4 l 3 bar 30 C 1 3 kg 6 5 kg 40 cm 48 cm 0 04 l 1 0 l min 5 N 1 1 6 1 2 2 3 10 3 3 3 7 3 4 3232 9 3232U 8 7 3 5 3232U 5 3232U 8 11 12 13 3 1...

Страница 58: ...58 GR 1 14 4 2 2 5 1 3 3 1 6 4 15 6 5 2 7 6 16 8 7 2 9 3 bar 9 8 16 10 1 11 2 7 12 O 3 2 14 10 2 1 5 bar 0 49 l min 2 0 bar 0 56 l min 3 0 bar 0 69 l min...

Страница 59: ...59 GR 4 0 5 bar 1 14 4 2 16 3 2 6 4 5 14 6 1 2 14 50 2 6 2 a 16 b 16 13 c 16 2 13 18 15 a 16 16 b 2 19 16 c 16 16 19 16 2 1 13 12 17 20 7 8 9 18 17 22 15 20...

Страница 60: ...60 GR 2 5 MESTO 2 17 15 18 15 21 19 14 20 18 13 17 12 17 22 23 20 23 22 20...

Страница 61: ...61 GR 3 MESTO MESTO 2006 42 II 1A MESTO Spritzenfabrik Ernst Stockburger GmbH Ludwigsburger Stra e 71 D 71691 Freiberg 3232 1201 2006 42 E Rolf Rehkugler Freiberg 07 07 2014 Bernd Stockburger...

Страница 62: ...s podem ser usados no exterior e em reas bem arejadas No momento do fabrico n o eram conhecidas influ ncias prejudiciais sobre o aparelho pelos produtos fitossanit rios permitidos pela Ag ncia Federal...

Страница 63: ...m veis evite fontes de igni o nas proximidades N o deixe o aparelho exposto ao sol Certifique se de que a temperatura do aparelho n o ultrapassa a temperatura m xima de servi o Tabela 1 Proteja o apar...

Страница 64: ...capa fig 3 3 Coloque a mangueira 3 na v lvula de corte 7 e imobilize a com a porca de capa fig 3 4 Enrosque o tubo aspersor 3232 9 ou o tubo aspersor 3232U 8 na v lvula de corte 7 fig 3 5 Monte o res...

Страница 65: ...n o deve ultrapassar 3 bar risco vermelho no man metro de mbolo fig 9 Se a press o m x for ultrapassada a v lvula de seguran a reage e deixa sair a sobrepress o 8 Pressione a biela do mbolo com a peg...

Страница 66: ...Respeite as indica es no cap tulo Seguran a Ap s a 50 utiliza o pelo menos uma vez por ano Desenrosque a bomba 2 do dep sito fig 6 Desmonte a bomba 2 a Desbloqueie a biela do mbolo com pega 16 b Puxe...

Страница 67: ...liquido da bomba O disco da v lvula 21 est sujo ou defeituoso fig 19 Limpe ou substitua o disco da v lvula O man metro de mbolo n o indica qualquer press o do dep sito A v lvula de seguran a acciona...

Страница 68: ...tamos da factura ou do tal o de compra do aparelho Exclu das da garantia est o pe as de desgaste anilhas O rings guarni o etc e defeitos resultantes de uma utiliza o inadequada e pelo uso de for a exc...

Страница 69: ...dkem v voje specializovan ho na ni en plevelu herbicidy V asov m okam iku v roby nejsou zn m dn kodliv p soben ochrann ch prost edk rostlin p ipu t n ch Spolkov m adem BVL Neodborn pou it m e zp sobit...

Страница 70: ...ti v tru nebo do vodstva Pokud se rozpra uj ho lav kapaliny vyhn te se z paln m zdroj m v okol Nenech vejte st t p stroj na slunci Ujist te se e nen p stroj zah t v c ne je p pustn maxim ln provozn te...

Страница 71: ...ist te ji p evle nou matic Obr 3 3 Hadici 3 zasu te do vyp nac ho ventilu 7 a zajist te ho p evle nou matic Obr 3 4 Rozpra ovac turbici 3232 9 pop rozpra ovac turbici 3232U 8 na roubujte na vyp nac ve...

Страница 72: ...k by nem l p ekro it 3 bary erven ryska na p stov m manometru obr 9 P i p ekro en max tlaku zareaguje pojistn ventil a vypust p etlak 8 Stiskn te p stnici s rukojet 16 dol a oto te j ve sm ru pohybu h...

Страница 73: ...kujte p stnici rukojet 16 b T hn te p stnici s rukojet 16 a nadoraz z v lcov trubky a oto te j proti sm ru pohybu hodinov ch ru i ek Obr 13 c Odd lte p stnici s rukojet 16 a v lcovou trubku 2 Obr 13 N...

Страница 74: ...sobn ku Pojistn ventil p li brzy vyfukuje Defektn p stov manometr 14 P stov manometr nechejte opravit Tryska nerozpra uje tlak je v ak k dispozici Filtr 20 Obr 18 nebo a tryska 13 Obr 17 jsou ucpan Fi...

Страница 75: ...adn stvrzenku o koupi za zen Ze z ruky jsou vylou eny rychleopot ebiteln d ly t sn n krou ky O man eta atd a defekty kter vznikly na z klad neodborn ho pou it nebo vy moci PROHL EN O SHOD podle sm rni...

Отзывы: