background image

Practical advice

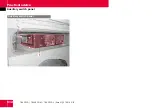
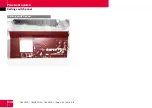
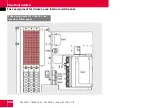
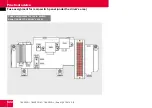
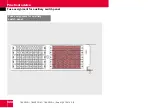
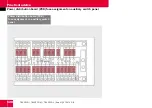
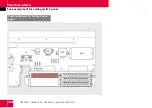
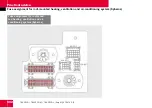
Fuse assignment for auxiliary switch panel

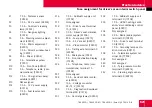
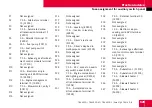
F48

7.5 A - Sidewall heater 4
(53F04)

F49

15 A - Roof mixing circuit
pump (53F16)

F50

15 A - Lavatory, winter-
proofed (80F10)

F51

Not assigned

F52

15 A - Heater for heating-oil
filter (54F05)

F53

5 A - Modular switch field
(61F02)

F54

5 A - Electronic ignition
switch terminal 30 (08F06)

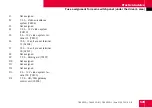
F55

Not assigned

F56

Not assigned

F57

5 A - Multiplex system MUX 1
(04F27)

F58

5 A - Multiplex system MUX 2
(04F28)

F59

5 A - Multiplex system MUX 3
(04F29)

F60

5 A - Multiplex system MUX 4
(04F30)

F61

5 A - Multiplex system MUX 5
(04F31)

F62

5 A - Standalone multiplex
system SMUX (04F36)

F63

5 A - Instrument cluster
(61F03)

F64

15 A - Lighting strip (31F05)

F65

15 A - Lighting strip (31F06)

F66

20 A - Auxiliary heating unit
(54F01)

F67

20 A - Auxiliary heating unit
(54F02)

F68

15 A - Central locking
(82F01)

F69

7.5 A - Alternator voltage
sensor (01F20)

F70

5 A - Tachograph (60F07)

526

TRAVEGO / TRAVEGO M / TRAVEGO L (Euro VI)/07.2014 GB

Содержание TRAVEGO

Страница 1: ...d diagrams may differ from the equipment on your bus The Driver s Operating Instructions the Operating Instructions and the Mainten ance Record are important documents and must always be carried in th...

Страница 2: ...Mercedes Benz Omnibusse...

Страница 3: ...detachable option 31 Connecting the power supply 32 Trailer coupling maintenance 32 Refuelling diesel fuel 32 BlueTec exhaust gas cleaning system 34 AdBlue service product 36 Filling with AdBlue 37 Di...

Страница 4: ...d emergency equipment 91 Location of the fire extinguish ers 92 Location of the first aid kits 92 Tow bar location option 93 Location of spare mirror option 93 Reversing aid display in the exterior mi...

Страница 5: ...y release device 159 Air suspension safety precau tions 160 Raising lowering the bus 161 Normal level 162 Activating deactivating axle load transfer for trailing axle 3 axle buses only 163 Activating...

Страница 6: ...Door II pushbutton 180 Emergency valve reset pushbutton option 180 Hazard warning lamps pushbut ton 180 Normal level kneeling pushbut ton 181 Pushbutton for raising lowering the bus 181 Hillholder and...

Страница 7: ...e control option 239 Distance sensor for distance cruise control ART 241 Overview of distance cruise control ART controls 242 Function description distance cruise control ART 243 Activating distance c...

Страница 8: ...duration 294 Switches controllers in the driver s rest area 296 Opening locking 299 Door pushbuttons in the driver s area 300 Anti entrapment protection re versing in the door closing direction 301 Pr...

Страница 9: ...Using the boiler option again after a malfunction 342 Other malfunctions 343 Switching off the galley 344 On board kitchenette with 40 cup coffee machine 347 General information 350 Instructions for...

Страница 10: ...he sausage heater 407 Descaling the sausage heater 407 Switching on the 2 carafe filter system 407 Brewing 1 2 a carafe of coffee 10 cups of coffee 408 Brewing 1 carafe of coffee 20 cups of coffee 409...

Страница 11: ...creen tyre pressure monit or 470 Tyre tread 472 Tyre condition 472 Tyre age 472 Invisible tyre damage 473 Tyre load capacity top speed of tyres and types of tyres 473 Retreaded tyres 474 Tyre pressure...

Страница 12: ...ceiling switch panel 530 Fuse assignment for roof moun ted heating ventilation and air conditioning system Spheros 532 Handling fuses 533 Disconnecting vehicle batteries 534 Recharging vehicle batteri...

Страница 13: ...uiries M00_00 0315 01 No Designation Value 1 Vehicle designa tion 2 Headlamp basic setting 3 Headlamp basic setting 4 Vehicle Identi fication Number VIN 5 Permissible gross vehicle weight No Designati...

Страница 14: ...e vehicle 2 Right hand drive vehicle 3 Body type 3 Complete bus xxxxxx Sequential number M00_00 0573 71 Vehicle identification number 1 is also marked on the skeleton in the front right doorway It can...

Страница 15: ...measures 9 Storage space for hand luggage 9 Driver s rest area safety precautions 10 Windscreen wiper system safety precautions 10 Safety precautions for the air conditioning system 10 Operation of a...

Страница 16: ...of symbols Note Notes about important additional informa tion Caution Warning notes about damage that may occur in the event of non compliance Danger Warning notes for risks to persons Environmental...

Страница 17: ...that have not been granted the relevant certificate may result in the operating permit being invalidated We recommend that you have work or modifications carried out by an OMNIplus Service Partner EU...

Страница 18: ...mind that your bus will cover a distance of 14 metres every second at a speed of only 50 km h Danger Please observe local legal requirements governing the use of mobile phones or on board telephones...

Страница 19: ...cceleration throttle pedal posi tion Malfunctions and defects in import ant system components These in clude for example light brakes Reactions and operating modes of the vehicle in special driving si...

Страница 20: ...vehicle These include for example the Telematic System Fleetboard Washing the outside of the bus in an automatic vehicle wash M88_00 0004 01 Before the bus is washed make sure that the roof hatches d...

Страница 21: ...y heating is in operation has recently been in operation or has been operated by the instant heating button preset timer Danger Risk of fire and burns Regeneration of the diesel particulate filter is...

Страница 22: ...ms that are op erated with refrigerant R 134 a are la belled with appropriate stickers and or plates on the compressor Never mix R 134 a refrigerant and the corresponding Triton SE 55 refrigerator oil...

Страница 23: ...fire and burns There is a risk of fires and burns due to the high exhaust temperatures and the hot exhaust pipe for the auxiliary heating For this reason do not stop or park the bus over ignitable mat...

Страница 24: ...12 TRAVEGO TRAVEGO M TRAVEGO L Euro VI 07 2014 GB...

Страница 25: ...n for the journey daily tasks 14 Preparation for the journey weekly tasks 15 Additional maintenance tasks dependent on bus use 16 General bus care and maintenance 16 Care and cleaning 17 TRAVEGO TRAVE...

Страница 26: ...te a fault or defect The ventilation openings in the headlamps allow this moisture to evaporate soon after the bus has pulled away Check the luggage compartment flaps for secure locking Check the emer...

Страница 27: ...necessary Note Refer to the Practical advice section of the Operating Instructions Checking the coolant level of the engine and heating system Note Refer to the Specifications for Service Products Ch...

Страница 28: ...indic ated in the Maintenance Record Note Refer to the Practical advice section General bus care and maintenance Carry out the work specified in the Maintenance Record Caution Regular maintenance of t...

Страница 29: ...instructions for and notes on vehicle care and cleaning in the Operation section Note The following stipulations for exterior cleaning must be observed Use a suffi cient amount of fresh water Dry rubb...

Страница 30: ...18 TRAVEGO TRAVEGO M TRAVEGO L Euro VI 07 2014 GB...

Страница 31: ...ith a trailer 30 Ball hitch trailer coupling fixed option 31 Ball hitch trailer coupling and open jaw trailer coupling detachable option 31 Connecting the power supply 32 Trailer coupling maintenance...

Страница 32: ...rake system safety precautions 47 Emergency braking 47 Braking and stopping 48 Brakes with anti locking protection 48 Applying the parking brake 49 Releasing the parking brake 50 Emergency braking in...

Страница 33: ...velling the skibox option 60 Additional operating instructions for the skibox option 61 Note on maintenance work 62 Care and cleaning 62 Cleaning the headlamp plastic cover lenses 64 Care cleaning of...

Страница 34: ...iod do not drive the bus for long distances at the same road speed same rpm Varying engine speeds and therefore varying loads demanded of the entire drive train are favourable to the running in of the...

Страница 35: ...d hold the start stop button in as far as the stop A starting attempt takes place uninterrupted for approx imately 40 seconds Note After a maximum of 3 starting attempts wait about 3 minutes before tr...

Страница 36: ...risk Objects could fall and get caught between the pedals if you were to accelerate or brake suddenly with the result that you would no longer be able to brake depress the clutch ped al or accelerate...

Страница 37: ...will stay closed and the vehicle will creep at idling speed This works in the 1st and 2nd gears Caution The least wearing on the clutch is idle creeping In stop start traffic therefore the brake pedal...

Страница 38: ...ted coolant tem perature e g after hill climbing Leave the engine running at idling speed for ap proximately 1 to 2 minutes to allow the exhaust gas turbocharger to cool down Towing Danger Only author...

Страница 39: ...d air the supply pressure of the external source of compressed air must be no less than 11 bar Only then will all pressure circuits be charged Caution Do not charge in excess of 12 5 bar Components of...

Страница 40: ...switched to position 2 while the front axle is raised The wheels on the driven axle may lock Failure to comply could result in brake intervention by the ABS ASR system which could cause the rear axle...

Страница 41: ...ns issued by the trailer manufacturer Note If the trailer coupling is a detachable coupling the operating instructions is sued by the trailer coupling manufacturer must be observed Note It is prohibit...

Страница 42: ...out by accelerat ing The gradient climbing capabilities from a standstill refer to sea level When driv ing in mountainous areas you should bear in mind that the power output of the engine and thus it...

Страница 43: ...ble option Note Observe the operating instructions issued by the trailer manufacturer Note Observe the operating instructions issued by the trailer coupling manufacturer Secure the trailer against rol...

Страница 44: ...hreadlocking paint is damaged the trailer coupling must be checked and resecured by a Service Partner It is pro hibited to use the trailer coupling until then Refuelling diesel fuel The vehicle has a...

Страница 45: ...ic and harmful to health For this reason make sure that the fuel does not come into contact with skin eyes or clothing that you do not inhale fuel vapours and that children are kept away from the fuel...

Страница 46: ...ity of the vehicle operators to ensure that the Ad Blue supply tank is regularly replen ished Filling and operating the bus with AdBlue is mandatory for compliance with emission regulations and is thu...

Страница 47: ...protective clothing Wear safety goggles Work on the exhaust gas aftertreat ment system should not be com menced until approximately 4 minutes have passed as individual lines con tinue to be flushed e...

Страница 48: ...atten tion without undue delay If you have swallowed AdBlue immediately rinse your mouth out with water and then drink plenty of water Seek medical atten tion without undue delay Change out of clothi...

Страница 49: ...t gas cleaning system The vehicle warranty will be invalidated if damage to the exhaust gas cleaning system is found to have been caused by constituents dissolved out of non ap proved storage containe...

Страница 50: ...pears on the dis play screen The yellow alert displays the icon and the message AdBlue Reserve The driver can acknow ledge yellow alert 1 at any time using the OK button on the steering wheel AdBlue i...

Страница 51: ...sage Mo torleistung reduziert Engine power reduced The driver can acknow ledge the yellow alert at any time using OK button 2 on the steering wheel M47 00 0142 71 Add AdBlue to the supply tank Note Th...

Страница 52: ...ong as no flashing yellow or constant red malfunction alert appears it can also be sufficient to alter the load profile e g take the bus for a drive on the motor way in order to ensure that automatic...

Страница 53: ...The time needed for manual regeneration is dependent on the temperature of the exhaust system Note If the yellow event window and its mes sage are disregarded there is a risk of engine power output b...

Страница 54: ...fulfilled the green indicator lamp goes out prematurely and re generation is aborted Note It restarts automatically when all neces sary operating conditions are fulfilled again For this reason avoid i...

Страница 55: ...pushbutton goes out Catalytic converter protection function In very rare cases e g frequent low load operation with relatively low exhaust temperatures unburnt fuel could col lect in the exhaust syst...

Страница 56: ...ss parked regeneration Do not leave the bus parked up at a filling station on dry grass or on harvested crop fields The hot exhaust system could otherwise cause the highly flammable material to ignite...

Страница 57: ...the parking brake or ac tivate the regeneration blocking function by pressing the lower section of the Re generation blocking pushbutton Note Engine speed drops to idling speed if the process is abort...

Страница 58: ...ies out a self test and provides audible notification of the current operating status or the presence of a hardware fault Note A brief one off audible signal buzzer in the control panel 4 indicates th...

Страница 59: ...arly cautious driving style Have the malfunction rectified as soon as possible by an OMNIplus Service Partner Danger The braking characteristics of the bus have changed if a red warning level mal func...

Страница 60: ...leration is achieved Note The retarder is deactivated automatically for the duration of an ABS control inter vention Danger The anti locking protection of ABS does not relieve the driver of the respon...

Страница 61: ...ied ABS can no longer perform its intended function risk of skidding Note If the ignition is switched off without the parking brake engaged a warning tone will sound and a red alert will be displayed...

Страница 62: ...and move hand lever 1 as far as the stop towards the released position a M42 00 0839 71 Indicator lamp 1 must go out Note To guarantee a faultless release of the parking brake there must be sufficien...

Страница 63: ...ed position b and hold it in the desired position to prevent it from automatically return ing to released position a Danger If it is necessary to perform emergency braking using the parking brake do n...

Страница 64: ...indicated by a yellow alert and the Brake pads symbol on the display screen Under partial braking the braking pres sures are adapted between the front axle and rear axle as a function of the brake pa...

Страница 65: ...ectronic Stability Program ESP in this section Brake Assist Brake Assist interprets a dangerous situ ation from the speed with which the brake pedal is depressed and immedi ately generates maximum bra...

Страница 66: ...s brake is active Danger RISK OF ACCIDENT The Electronic Sta bility Program ESP does not relieve the driver of the responsibility for adopting a driving style which takes traffic and road conditions i...

Страница 67: ...lectively braking individual wheels applying the brakes at all wheels Note Indicator lamp 1 flashes while the Elec tronic Stability Program ESP is interven ing Note Dynamic handling control FDR is act...

Страница 68: ...he case of 3 axle buses equipped with RAS the 3rd axle is regu lated separately as necessary Handling in the event of oversteering M42_25_0002_01 The bus breaks out at the rear axle The bus deviates f...

Страница 69: ...Stability Program ESP Danger RISK OF ACCIDENT The bus may skid out of control if acceleration skid control ASR has been switched off and the drive wheels start to spin Note It is recommended that acc...

Страница 70: ...r Residual current devices fitted in the bus must be function tested at regular inter vals The following safety precautions are an absolute requirement if the 230 400 V system is to be supplied by an...

Страница 71: ...88_00 0019 01 The skibox is fitted to the bus by pinning the four swivel bearings on the left and right hand side of the outer frame to the bearing pedestals on the bus using pins secured with split p...

Страница 72: ...firmly seated and correctly secured by split pin 2 Danger All lighting equipment must be checked for correct operation before the bus is driven In addition it is necessary to check that the rear fogla...

Страница 73: ...cure with securing split pins Additional operating instructions for the skibox option Danger The permissible gross vehicle weight must not be exceeded Observe the instruc tions on the sticker inside t...

Страница 74: ...ockets and unscrewing the bayonet fitting Note on maintenance work Note All maintenance work is described in a separate manual For further information please consult your EvoBus Service Part ner Care...

Страница 75: ...ourself and others Caution Do not work with high pressure cleaners or steam cleaners in the region of axle seals e g hubs drive flange and axle breathers In automatic vehicle washes make sure that the...

Страница 76: ...p cover lenses are made from a plastic material polycarbonate and painted with a clear coat Caution Wipe with a damp sponge to clean the plastic cover Do not use an abrasive product or a dry cloth as...

Страница 77: ...ld then lose control of your bus and cause an accident which could result in injury to yourself and others For heavy soiling use a cleaner for light alloy wheels Note Alcoa Dura Bright wheels need onl...

Страница 78: ...foam beyond repair Caution To avoid a bleaching out of colours use only pH neutral care and cleaning agents Note These notes on care also apply to clean ing of the ceiling Care cleaning of fabric cove...

Страница 79: ...f the fabric using a soft brush without applying pressure Removing stains Caution Remove dirt as soon as possible to pre vent permanent stains or damage to the covers Remove as much dirt as possible u...

Страница 80: ...on use and the level of dirt Basic cleaning weekly Vacuum the covers along the nap of the fabric without applying pressure Caution Do not use rubber vacuum nozzles or rubber attachments These could pu...

Страница 81: ...rm soap solution into the dirt in circular movements from the out side in Apply light pressure when doing this Note Always clean up the dirt from the outside in to prevent it from being dispersed in t...

Страница 82: ...arter Remove coarse dirt with a very soft brush or a vacuum cleaner Caution Do not use a sharp edged vacuuming nozzle or too hard a brush otherwise you could damage the leather beyond repair Moisten a...

Страница 83: ...ng a hairdryer set to medium heat keep ing it moving in a circular motion at a distance of 30 cm to 40 cm Caution The leather covers must be completely dry before they are sat on again Perman ent pres...

Страница 84: ...72 TRAVEGO TRAVEGO M TRAVEGO L Euro VI 07 2014 GB...

Страница 85: ...t cluster 86 DTCO tachograph 88 Tachograph display 90 Door pushbuttons in the driver s area 90 Tools and emergency equipment 91 Location of the fire extinguishers 92 Location of the first aid kits 92...

Страница 86: ...Seat belt reminder display 99 Exterior flaps on the TRAVEGO M L 100 Layout and function description fire extinguishing system option 101 Operating and malfunction displays fire extinguishing system o...

Страница 87: ...At a glance TRAVEGO TRAVEGO M TRAVEGO L Euro VI 07 2014 GB 75...

Страница 88: ...At a glance Driver s area overview Driver s area overview 76 TRAVEGO TRAVEGO M TRAVEGO L Euro VI 07 2014 GB...

Страница 89: ...ans mission shift sys tem and continu ous brake en gine brake and retarder 114 9 Steering column switch for light and wiper func tions 112 10 Right hand steer ing wheel buttons 11 Left hand steering w...

Страница 90: ...At a glance Switches on the left section of the instrument panel 78 TRAVEGO TRAVEGO M TRAVEGO L Euro VI 07 2014 GB...

Страница 91: ...ch option 173 8 Video system reversing camera washer system switch option 173 9 Active Brake As sist OFF pushbut ton option 173 10 Lane assistant warning system pushbutton op tion 174 11 Acceleration...

Страница 92: ...air out 177 21 Rear roof hatch pushbutton air in air out 177 22 Driver s power window pushbut ton 178 23 Diesel particulate filter DPF regen eration 178 24 Driver s seat mi crophone switch option 179...

Страница 93: ...At a glance TRAVEGO TRAVEGO M TRAVEGO L Euro VI 07 2014 GB 81...

Страница 94: ...At a glance Switches on the right section of the instrument panel Switches on the right section of the instrument panel 82 TRAVEGO TRAVEGO M TRAVEGO L Euro VI 07 2014 GB...

Страница 95: ...oor II pushbutton 180 31 Emergency valve reset pushbutton option 180 32 Not assigned 33 Hazard warning lamps pushbutton 180 34 Not assigned 35 Normal level kneeling push button 181 36 Pushbutton for r...

Страница 96: ...At a glance Switches below the driver s window Switches below the driver s window 84 TRAVEGO TRAVEGO M TRAVEGO L Euro VI 07 2014 GB...

Страница 97: ...shbutton option 182 41 Steering column adjustment switch 183 42 Driver s area light ing switch 183 43 Reading lamps switch 183 44 Passenger com partment lighting switch positions I II 184 45 Night lig...

Страница 98: ...At a glance Instrument cluster Instrument cluster 86 TRAVEGO TRAVEGO M TRAVEGO L Euro VI 07 2014 GB...

Страница 99: ...level indicator lamp 10 Emission relevant fault malfunction display MIL 11 Tachograph indic ator lamp 12 Active Brake As sist deactivated indicator lamp 13 ESP OFF indicator lamp 14 Main beam indic a...

Страница 100: ...At a glance DTCO tachograph DTCO tachograph 88 TRAVEGO TRAVEGO M TRAVEGO L Euro VI 07 2014 GB...

Страница 101: ...inserted company card control card or workshop card For details see Access rights for tachograph cards in the manufacturer s operat ing instructions 5 Key panel driver 2 Note Activity button driver 2...

Страница 102: ...r total distance 4 Display for trip distance Door pushbuttons in the driver s area Door pushbuttons for front right door 1 and centre right door 2 with integrated warning lamp and emergency valve rese...

Страница 103: ...til emergency valve reset pushbutton 3 has been pressed M68 00 0578 71 Tools and emergency equipment The vehicle tool kit and emergency equipment are located in the stowage compartment over the front...

Страница 104: ...e extinguisher tested by an authorised person if necessary Location of the first aid kits M86_00 0274 71 There are first aid kits in the luggage rack on the left and right hand side above the first ro...

Страница 105: ...he mirror For Removing the exterior mirror fit ting the emergency mirror refer to the Practical advice section of the Operat ing Instructions Reversing aid display in the exterior mirror option M82_00...

Страница 106: ...verse gear is en gaged and the system is fully functional the red LED must light up for approxim ately 0 5 seconds If the red LED flashes twice every 6 seconds there is a mal function in the system Da...

Страница 107: ...per evident seal from bracket 2 The emergency hammer is ready for use If the vehicle is equipped with an electronic anti theft alarm system option this symbol appears on the display screen in conjunct...

Страница 108: ...At a glance Driver s rest area Driver s rest area 96 TRAVEGO TRAVEGO M TRAVEGO L Euro VI 07 2014 GB...

Страница 109: ...n flaps 2 Intercom connection to the driver 3 Interior light 4 Not assigned 5 Not assigned 6 Air conditioning switch op tion 7 Switch for ventilation blower speed I and II 8 Heating controller TRAVEGO...

Страница 110: ...At a glance Windscreen washer reservoir Windscreen washer reservoir 98 TRAVEGO TRAVEGO M TRAVEGO L Euro VI 07 2014 GB...

Страница 111: ...To remove the cover loosen the quick release locks anti clockwise Seat belt reminder display Seat belt reminder display M54_00 0978 01 With the ignition switched on and the doors closed Fasten seat b...

Страница 112: ...At a glance Exterior flaps on the TRAVEGO M L Exterior flaps on the TRAVEGO M L 100 TRAVEGO TRAVEGO M TRAVEGO L Euro VI 07 2014 GB...

Страница 113: ...ain components Ex tinguisher tank detection agent tank detection line extinguisher lines and ex tinguisher nozzles A trigger valve is fitted to the extinguish er tank The trigger valve is connected to...

Страница 114: ...sibility of fire damage cannot therefore be completely ruled out even if the fire extinguishing system is functioning correctly Danger Under unfavourable circumstances the fire extinguishing system ma...

Страница 115: ...his icon on the display screen in con junction with a red warning level mal function A warning signal sounds Danger Risk of accident If this alert is displayed bring the vehicle to an immediate halt r...

Страница 116: ...104 TRAVEGO TRAVEGO M TRAVEGO L Euro VI 07 2014 GB...

Страница 117: ...and continuous brake engine brake and retarder 114 Steering wheel buttons 115 Overview of steering wheel buttons and display screen 116 Left hand steering wheel buttons 118 Right hand steering wheel b...

Страница 118: ...l using the driver s rest area kitchenette intercom option 151 Initiating an outgoing call using the driver s area intercom option 152 Answering an incoming call using the driver s area intercom optio...

Страница 119: ...r trailing axle 3 axle buses only 163 Activating deactivating the bus stop brake 164 Important information on the steering system 165 Turning the steering wheel when the bus is stationary 165 Switchin...

Страница 120: ...ssure point ac tivates ignition position 1 radio po sition Selected consumer units can be switched on Note Gently pressing start stop button 1 again and no further than the first pres sure point activ...

Страница 121: ...itch 1 The red LED in the switch goes out Danger After the adjustable steering column has been adjusted the driver must check that all instruments and indicator lamps are still visible M46 00 0201 71...

Страница 122: ...turn the rotary light switch from A to 2 without delay Otherwise there would be a risk of accident if the headlights were to switch off temporarily Daytime driving lights As soon as the engine is swit...

Страница 123: ...if the headlights were to switch off tem porarily Note When the rotary light switch is in position A neither the front foglamps nor the rear foglamp can be switched on Note In respect of rear foglamp...

Страница 124: ...ovide courtesy lighting whenev er the complete vehicle is unlocked or locked The courtesy lighting illuminates the area around the bus so that people can find their way more easily Note The switch off...

Страница 125: ...es 6 Wipe and wash Press the sleeve on the switch stalk inwards towards the steer ing column With windscreen wipers switched off wind screen wipe and wash 7 Windscreen wipers Turn the sleeve on the sw...

Страница 126: ...sensor sensit ivity refer to the Driver s area controls section of the Operating Instructions Steering column switch for transmission shift system and continuous brake engine brake and retarder M54 0...

Страница 127: ...ing wheel buttons Steering wheel buttons The steering wheel buttons are used to control what is displayed on the display screen They can also be used to change various settings TRAVEGO TRAVEGO M TRAVE...

Страница 128: ...Driver s area controls Overview of steering wheel buttons and display screen Overview of steering wheel buttons and display screen 116 TRAVEGO TRAVEGO M TRAVEGO L Euro VI 07 2014 GB...

Страница 129: ...ontrols Overview of steering wheel buttons and display screen 1 Display screen 2 Left hand steering wheel but tons 3 Right hand steering wheel buttons 4 Signal horn TRAVEGO TRAVEGO M TRAVEGO L Euro VI...

Страница 130: ...Driver s area controls Left hand steering wheel buttons Left hand steering wheel buttons 118 TRAVEGO TRAVEGO M TRAVEGO L Euro VI 07 2014 GB...

Страница 131: ...Next main menu In the input window to select the next value to increase or reset a value Previous menu window In the input window to go up one menu line Next menu window In the input window to go dow...

Страница 132: ...Driver s area controls Right hand steering wheel buttons Right hand steering wheel buttons 120 TRAVEGO TRAVEGO M TRAVEGO L Euro VI 07 2014 GB...

Страница 133: ...vate and set current speed limit speed to increase set speed limit speed To activate and resume stored speed limit speed to reduce set speed limit speed To deactivate the variable speed limiter Tempos...

Страница 134: ...Driver s area controls Display screen Display screen 122 TRAVEGO TRAVEGO M TRAVEGO L Euro VI 07 2014 GB...

Страница 135: ...addition to the displayed event window an indicat or lamp may also light up in status area 5 in the instru ment cluster If you are able to acknowledge the event window by pressing the OK button on th...

Страница 136: ...ent dis plays The active main menu appears in light blue 1 Trip information 2 Driver assistance 3 Vehicle 4 Notifications 5 Information 6 Settings Menu structure Note The menu structure comprises 6 ma...

Страница 137: ...rature submenu M68 00 0474 71 In the Geschwindigkeit Zeit Temperat ur Speed time temperature submenu all available information on speed time and temperature is displayed 1 Vehicle speed Displays the c...

Страница 138: ...submenu dis plays all available information on fuel AdBlue range and current fuel con sumption Note Fuel consumption 3 is displayed in l 100 km or in l h with the vehicle stationary 1 Fuel range rema...

Страница 139: ...otal submenu M68 00 0605 71 In the Ab Reset Gesamt After reset Total submenu all available information on distance travelled fuel consumption and time since the last total reset is dis played 1 OK Res...

Страница 140: ...istance travelled Displays the distance travelled since in drive reset 3 Driving time Displays the driving time since in drive reset 4 Average speed Displays the average speed since in drive reset 5 A...

Страница 141: ...e As the distance from the lane marking decreases the colour of the lane marking changes from white to yellow and then to red 1 Speed in km h Speed of vehicle in front 2 Distance in m Distance from ve...

Страница 142: ...safe mode can be activated and dis played Note Refer also to Operating the GO 250 8 PowerShift failsafe mode with the steering wheel keypad in the Transmission shift systems section 1 To activate tran...

Страница 143: ...hrzeug Vehicle main menu dis plays all available information on flaps doors and operating pressures temperat ures and voltages T ren und Klappen Doors and flaps submenu M68 00 0487 71 The T ren und Kl...

Страница 144: ...y pressure 3 Auxiliary consumers supply pressure K hlmittel Coolant submenu M68 00 0489 71 The K hlmitteltemperatur Coolant tem perature submenu displays the current coolant temperature 1 Motor Engine...

Страница 145: ...the tyre and the charge state of the sensor battery can also be displayed Note If the pressure in a tyre is too low or the temperature is too high the colour of the display changes from white to yello...

Страница 146: ...the actual pressure temperature and state of charge of the tyre pressure sensor in the front right wheel 4 Meldungen Notifications main menu In the Meldungen Notifications menu all active stored oper...

Страница 147: ...unction 2 Air cleaner clogged 3 Note Red alerts yellow alerts and service noti fications grey are displayed here Note Refer also to the Practical advice sec tion Ereignisse Events submenu M68 00 0496...

Страница 148: ...xt message submenu option M68 00 0500 71 In the Textmeldung Text message submenu it is possible to view worded notifications Pressing OK button 1 enables further texts to be displayed 5 Information ma...

Страница 149: ...n menu it is possible to change settings for the clock language and driver assist ance systems bus and basic settings Datum Uhrzeit Date time submenu M68 00 0503 71 The Datum Uhrzeit Date time sub men...

Страница 150: ...itch off delay 3 and the volume of the turn signal buzzer 4 Note Select the desired option using the selec tion buttons on the left hand side of the steering wheel Regensensor Rain sensor submenu M68...

Страница 151: ...arrow buttons 2 and 3 set the desired switch off delay and confirm with OK 1 Blinkersummer Turn signal buzzer M68 00 0508 71 To set the volume of the turn signal buzzer Note Using arrow buttons 2 and...

Страница 152: ...between various units of measurement Note Make your selection using arrow button 2 Select Grundeinstellungen Einheiten Basic settings Units M68 00 0516 71 Select your preferred display Note Confirm w...

Страница 153: ...opens the settings menu for vari ous systems To activate Attention Assist M68 00 0524 71 Activate Attention Assist by pressing OK button 2 on the steering wheel Note If tick 3 is displayed this means...

Страница 154: ...e to creep forwards independ ently when the service brake is released with the engine idling without the driver having to use the accelerator pedal The vehicle crawls along at idling speed until the d...

Страница 155: ...ir urgency The system then verifies whether the supply pressures for the various compressed air circuits are at acceptable levels If so the bus graphic in the Fahrzeug Vehicle main menu is then displa...

Страница 156: ...isplay with bus stationary M68 00 0487 71 The driver is shown the Fahrzeug Vehicle main menu if any of the doors or flaps are open The menu is also displayed immediately after the ignition is switched...

Страница 157: ...ight arrow button 3 on the steering wheel The driver is able to acknow ledge red alerts using OK button 2 on the steering wheel but not until the vehicle has been brought to a halt and the parking bra...

Страница 158: ...y the driver using OK button 2 on the steering wheel Pop up window 1 closes when the alert is acknowledged For as long as the alert remains active it contin ues to be displayed in the Ereignisse Event...

Страница 159: ...op up window is open the content of the pop up window changes accordingly To adjust the volume press the plus or minus button on the steering wheel Note If the plus or minus button is pressed and held...

Страница 160: ...he plus or minus button is pressed and held the volume increases or decreases until the button is released Note As the change of volume comes into ef fect immediately the driver is given an audible ac...

Страница 161: ...is pressed within 10 seconds To adjust the volume press the minus or plus button on the steering wheel Note If the plus or minus button is pressed and held the volume increases or decreases until the...

Страница 162: ...lume using the left or right outer button respectively At the call station in the driver s rest area it is possible to block incoming calls Pressing and holding the rel evant button is followed by an...

Страница 163: ...ef fect immediately the driver is given an audible acknowledgement at the new volume To end the call press the hang up the telephone button on the steering wheel Initiating an outgoing call using the...

Страница 164: ...e Intercom is highlighted in dark blue Using the arrow buttons on the steer ing wheel select the desired inter com handset in the bus M68 00 0540 71 An attempt is made to establish a call connection w...

Страница 165: ...gress Tele fon Telephone and the connec ted party are displayed in the pop up window The driver can end the call by pressing the hang up the tele phone button on the steering wheel Note Using the left...

Страница 166: ...r the call by pressing pick up the telephone but ton 2 on the steering wheel M68 00 0540 71 While a call is in progress Tele fon Telephone and the connected party 1 are displayed in the pop up window...

Страница 167: ...plus Service Part ner Establish a Bluetooth link between the mobile phone and the radio unit in the bus Note The ignition starter switch must be ON If this is the first time that an at tempt has been...

Страница 168: ...ecent Bluetooth link Note If a different mobile phone is used it is necessary to establish a new Bluetooth link The telephone control unit in the bus always searches for the most recent Bluetooth link...

Страница 169: ...is possible to select the phone book entry you wish to call An attempt is made to establish a call connection with this phone book entry when the pick up the tele phone button on the steering wheel is...

Страница 170: ...on M54 00 2006 71 Whenever a connection attempt is received by the mobile phone Tele fon Telephone pop up window 1 opens and the messages Einge hender Anruf Incoming call 2 and Unbekannter Name Unknow...

Страница 171: ...n name 3 is therefore displayed instead Parking brake and emergency release device Parking brake valve 1 combined with the emergency release device for brake spring cylinders Caution The parking brake...

Страница 172: ...driven axle have been structurally designed in such a way as to ensure that the bus remains man oeuvrable when the suspension air bags have been depressurised In this condition the full weight of the...

Страница 173: ...ated in response to a single press of the button with the door closed It is possible to interrupt or reverse the lowering process by pressing the Normal level pushbutton Danger It is prohibited to low...

Страница 174: ...l level before driving up zigzag roads for example Note The corresponding symbol appears on the instrument cluster display screen whenev er the bus has been raised or lowered Caution The vehicle may n...

Страница 175: ...suspension air bags are then vented of air by an overflow valve Note The pull away aid cannot be activated unless the ignition starter switch is ON and the bus is travelling at a speed of below 12 mp...

Страница 176: ...than 15 Danger Always apply the parking brake correctly before you leave the driver s area Press the bus stop brake pushbutton The wheels on the driven axle are braked with reduced pressure Note The...

Страница 177: ...r it often does so completely unexpectedly the driver could wrongly assume that the steering system has been blocked However the bus does remain steerable provided the driver ap plies the necessary fo...

Страница 178: ...Switching on the panorama camera option Switch on the panorama camera us ing this switch An image of the area to the front of the bus is displayed on the monitors inside the bus M82_00 0122 71 There m...

Страница 179: ...bling pushbutton option 172 Lavatory multichannel audio system enabling switch option 173 Video system reversing camera washer system switch option 173 Active Brake Assist OFF pushbutton option 173 La...

Страница 180: ...on air in air out 177 Driver s power window pushbutton 178 Diesel particulate filter DPF regeneration 178 Driver s seat microphone switch option 179 Bus stop brake emergency release switch option 179...

Страница 181: ...g column adjustment switch 183 Driver s area lighting switch 183 Reading lamps switch 183 Bus stop brake pushbutton option 184 Passenger compartment lighting switch positions I II 184 Night lighting s...

Страница 182: ...in motion Additional effort would then be required in order to steer Furthermore the power supply to all important electrical consumers e g bus lighting ABS electronic transmission shift system etc w...

Страница 183: ...ressed Pushbutton for windscreen heat ing option driver s window heating mirror heating Press upper section of switch The wind screen heating is activated and the as sociated LED in the pushbutton lig...

Страница 184: ...ressed The wash function will also be activated whenever the windscreen washer system is operated Inverter option Upper section of switch pressed 230 V inverter switched on Kitchenette attendant call...

Страница 185: ...tion refer to the Lavatory section of the Operating Instructions Video system reversing camera washer system switch option Upper section of switch pressed Pan orama camera active Lower section of swit...

Страница 186: ...ated by the yellow ESP off and TC off warning lamp Pressing the pushbut ton again or switching the ignition starter switch to OFF and back to ON reactiv ates the function For notes on safety and opera...

Страница 187: ...the screen and an LED in the pushbutton indicate whether the axle load transfer is active For notes on safety and operation refer to the Driver s area controls sec tion of the Operating Instructions S...

Страница 188: ...t flap circuit on one side of the bus is unlocked and one of the luggage compartment flaps is open The LED in the rocker switch provides the driver with a confirmation of the state LED lit luggage com...

Страница 189: ...pos ition The roof hatch closes if the lower section of the pushbutton is pressed for longer than 1 second Rear roof hatch pushbutton air in air out It is possible to move the front and rear roof hatc...

Страница 190: ...e window s range of movement should be kept clear of all obstructions e g any part of your body while the pushbutton is being pressed particularly during closing Diesel particulate filter DPF regenera...

Страница 191: ...lock Danger Make absolutely sure that the parking brake is applied before you operate the bus stop brake emergency release switch The bus could otherwise roll away For further notes on safety and op e...

Страница 192: ...ion of the Operating Instructions Emergency valve reset pushbutton option If the emergency valve reset pushbut ton is pressed while the ignition starter switch is ON the emergency valve that has been...

Страница 193: ...n refer to the Driver s area controls sec tion Hillholder and bus stop brake Upper section of switch pressed Hillholder active Lower section of switch pressed Bus stop brake active When the bus stop b...

Страница 194: ...a stop on a steep uphill or downhill gradient of more than 15 or pull into a bus stop on a steep uphill or downhill gradient of more than 15 Do not activate the bus stop brake unless the vehicle is s...

Страница 195: ...can be switched on and off Reading lamps switch With the lower section of the switch pressed the driver can switch on the reading lamps as additional lighting for the vehicle interior provided the ign...

Страница 196: ...whenev er you come to a stop on a steep uphill or downhill gradient or pull into a bus stop on a steep uphill or downhill gradi ent Do not activate the bus stop brake unless the vehicle is stationary...

Страница 197: ...switch Using this switch it is possible to switch on the LED night lighting provided the side lamps are switched on ADR pushbutton option This pushbutton is used to switch on the accident data recorde...

Страница 198: ...186 TRAVEGO TRAVEGO M TRAVEGO L Euro VI 07 2014 GB...

Страница 199: ...river s seat controls option 192 Operation of the jump seat 194 Adjusting a passenger seat 195 Removing a seat squab 196 Fitting a seat squab 196 Using the driver s seat belt 196 Operating the jump se...

Страница 200: ...Note The following descriptions provide a brief overview of the control elements The manufacturer s operating instructions provided must be observed in all cases Danger In the event of a frontal coll...

Страница 201: ...Driver s seat passenger seats TRAVEGO TRAVEGO M TRAVEGO L Euro VI 07 2014 GB 189...

Страница 202: ...Driver s seat passenger seats Grammer driver s seat control elements Grammer driver s seat control elements 190 TRAVEGO TRAVEGO M TRAVEGO L Euro VI 07 2014 GB...

Страница 203: ...Height adjustment Note Pull lever up upwards ad justment press lever down downwards adjustment 6 Damper setting Note The damper setting can be continuously adjusted between soft and hard 7 Rapid lowe...

Страница 204: ...Driver s seat passenger seats ISRI 6860 875 driver s seat controls option ISRI 6860 875 driver s seat controls option 192 TRAVEGO TRAVEGO M TRAVEGO L Euro VI 07 2014 GB...

Страница 205: ...b and backrest heat ing 5 Lowering Note Lower the seat by press ing the rocker switch down Move the seat to the adjusted height by pressing the rocker switch up 6 Damper adjustment Note Handle up mini...

Страница 206: ...move stop lever 1 in the direction of the arrow and fold down the seat cush ion using grab handle 2 The jump seat cannot be stopped in the horizontal position You must hold down the seat cushion unti...

Страница 207: ...push back on the backrest with your upper body Release lever 3 when the backrest is at the desired posi tion Note There are several backrest positions between the vertical normal position and the til...

Страница 208: ...ng the driver s seat belt Note The driver s seat that was fitted during production has an integrated belt system Consequently the user information and instructions apply only to the factory fit ted be...

Страница 209: ...g the jump seat seat belt Fastening the seat belt make sure the seat belt is not twisted position it tightly over your pelvis and lock it so that you can hear it engage in the belt lock Danger This se...

Страница 210: ...Driver s seat passenger seats Passenger seat service set Passenger seat service set 198 TRAVEGO TRAVEGO M TRAVEGO L Euro VI 07 2014 GB...

Страница 211: ...uch but ton option 3 Loudspeaker on off soft touch button Stop button stop request option 4 Reading lamp 5 Loudspeaker Note Loudspeaker volume control at the passenger s seat is also available as an o...

Страница 212: ...200 TRAVEGO TRAVEGO M TRAVEGO L Euro VI 07 2014 GB...

Страница 213: ...Transmission shift system safety precautions 203 Transmission shift system GO 250 8 system description 204 Selector lever of GO 250 8 transmission shift system 206 Operating the GO 250 8 PowerShift tr...

Страница 214: ...ift sys tems However the time that is needed for a gear change in the transmission while synchronisation takes place is al most the same in physical terms This means that to engage the next gear the d...

Страница 215: ...ld begin to roll back e g on an uphill gradi ent Note For as long as both the accelerator pedal and the brake pedal remain fully released the clutch will stay closed and the vehicle will creep at idli...

Страница 216: ...ft program upshifts take place at higher engine speeds Although this offers faster acceleration it also results in higher fuel consumption As the basis for selecting the appropri ate gear the intellig...

Страница 217: ...Transmission shift systems TRAVEGO TRAVEGO M TRAVEGO L Euro VI 07 2014 GB 205...

Страница 218: ...Transmission shift systems Selector lever of GO 250 8 transmission shift system Selector lever of GO 250 8 trans mission shift system 206 TRAVEGO TRAVEGO M TRAVEGO L Euro VI 07 2014 GB...

Страница 219: ...c conditions permitting Have the compressed air system checked and re paired at a qualified specialist workshop which has the necessary specialist know ledge and tools to carry out the work re quired...

Страница 220: ...it is possible to toggle between the Basic and Dynamic shift programs by briefly pressing button 4 Note For journeys on arduous terrain it is ad visable to select manual mode in order to avoid undesir...

Страница 221: ...indicator as soon as the transmission neutral position is selected Note If the bus is coasting in transmission neutral position N turn driving direc tion switch 1 forwards vehicle coasting forwards or...

Страница 222: ...ing effect if the bus starts to move without a gear having been selected Do not allow the bus to roll against the direction of travel of the gear that is currently engaged The bus starts to move clutc...

Страница 223: ...and simultaneously release the park ing brake Danger The bus may roll away if you do not de press accelerator pedal 5 Danger There is no engine braking effect if the bus starts to move without a gear...

Страница 224: ...parking brake 4 until you can feel the torque in the drive train There would otherwise be a risk of the bus rolling backwards Accelerating Note Whenever the maximum engine speed for the current drivin...

Страница 225: ...in automatic drive mode Gearshifts in automatic drive mode Note All upshifts and downshifts are carried out automatically These take place in re sponse to the driving situation engine load accelerator...

Страница 226: ...the transmission will shift into the ideal gear M54 00 1897 72 To shift up pull the selector lever up 2 until resistance can be felt The PowerShift transmission shift system shifts up a gear Pull the...

Страница 227: ...hieved The extent of the downshift depends on the lever position actual gear gradient and retarder temper ature Danger The engine braking effect is interrupted for the duration of the gearshift The bu...

Страница 228: ...e bus Danger It is not possible to park the bus with a gear engaged The PowerShift transmis sion shift system always selects transmis sion neutral position N after the ignition has been switched off I...

Страница 229: ...at all times Note Under specific circumstances the en gine could stall particularly if the bus is brought to a halt under heavy braking Note A malfunction in the system is indicated on the instrument...

Страница 230: ...dicated by an icon appearing in the centre of the display screen in con junction with a red or yellow warning level malfunction display Danger The bus must be stopped immediately traffic conditions p...

Страница 231: ...ed out Note If the accelerator pedal is not depressed within the next 10 seconds it will be ne cessary to select the gear again Note A gearshift cannot take place while the bus is in motion This means...

Страница 232: ...220 TRAVEGO TRAVEGO M TRAVEGO L Euro VI 07 2014 GB...

Страница 233: ...rive brake cruise control 232 Overview of cruise control controls 234 Activating drive brake cruise control 235 Setting the speed tolerance in overrun mode 238 Distance cruise control option 239 Dista...

Страница 234: ...deactivation of Active Brake Assist automatic 255 Deactivating Active Brake Assist ABA manually 256 Sequence of events when emergency braking initiated by Active Brake Assist ABA 258 Function descrip...

Страница 235: ...ystems Table of contents Deactivating the lane assistant warning system 272 Attention Assist system description 273 Attention Assist function description 273 TRAVEGO TRAVEGO M TRAVEGO L Euro VI 07 201...

Страница 236: ...afe and ap propriate Caution In the case of buses with manual transmission the driver has to change gear manually in order to regulate engine speed when the bus is being accelerated or decelerated by...

Страница 237: ...from one country to another Automatic speed limiter Functions Speed limiter active Speed limiter warning message Speed limiter active M54_00 1967 71 The automatic speed limiter constantly monitors th...

Страница 238: ...is possible to accelerate the bus up to the speed set using the accelerator pedal Danger The speed limiter limits the set speed automatically The speed limiter is unable to interpret road and traffic...

Страница 239: ...Driving systems TRAVEGO TRAVEGO M TRAVEGO L Euro VI 07 2014 GB 227...

Страница 240: ...Driving systems Overview of variable speed limiter Temposet controls Overview of variable speed limiter Temposet controls 228 TRAVEGO TRAVEGO M TRAVEGO L Euro VI 07 2014 GB...

Страница 241: ...ble to exceed the stored limit speed e g when overtaking To do this depress the accelerator pedal briefly bey ond the full throttle position as far as the stop As soon as the overtaking man oeuvre is...

Страница 242: ...nd the cur rent speed is set as the limit speed Note Using button 8 it is possible to recall a previously stored limit speed M54_00 1970 71 A pop up window containing speed limiter symbol 1 and the se...

Страница 243: ...urrent distance 4 to the vehicle in front and its speed 5 provided the vehicle is in range of the sensor Note The actual distance to a vehicle in front and its speed are displayed even if the variable...

Страница 244: ...ason do not activate combined drive brake cruise con trol on slippery road surfaces in fog or in difficult road and traffic conditions You could fail to recognise dangers in good time and endanger you...

Страница 245: ...Driving systems TRAVEGO TRAVEGO M TRAVEGO L Euro VI 07 2014 GB 233...

Страница 246: ...Driving systems Overview of cruise control controls Overview of cruise control controls 234 TRAVEGO TRAVEGO M TRAVEGO L Euro VI 07 2014 GB...

Страница 247: ...king performance of the retarder remains sufficient for this to be possible Whenever necessary shift down and reduce speed manually Note It is possible to exceed the stored speed e g when overtaking T...

Страница 248: ...and press button 6 Note Drive brake cruise control is now active and the current speed is maintained even if the accelerator pedal is released Note It is possible to resume a previously stored speed b...

Страница 249: ...he new value M54_00 1976 71 In buses with distance cruise con trol option the Fahrerassistenz Driver assistance main menu also displays the current distance 4 to the vehicle in front and its speed 5 p...

Страница 250: ...fted to the neutral position for longer than 5 seconds A short warning signal will sound Setting the speed tolerance in overrun mode Note The speed tolerance is the maximum al lowable difference betwe...

Страница 251: ...ments the functions of conventional cruise control drive brake cruise control with a dis tance control function When there is no vehicle in front distance cruise control operates in the same way as co...

Страница 252: ...se control works only in response to vehicles travelling in front It does not respond to stationary obstacles on the road e g broken down vehicles or traffic congestion If a stationary obstacle is enc...

Страница 253: ...rectly in unfavourable weather condi tions e g snow slush or if the sensor cover has been heavily soiled Note Clean the cover in the front bumper occa sionally Note Check the cover for damage Replace...

Страница 254: ...Driving systems Overview of distance cruise control ART controls Overview of distance cruise control ART controls 242 TRAVEGO TRAVEGO M TRAVEGO L Euro VI 07 2014 GB...

Страница 255: ...tart traffic In conjunction with the brake system it supplements the integrated continuous braking function equipped as standard Distance cruise control uses a radar sensor to detect traffic up to 200...

Страница 256: ...deactivated automatically if you are driving slower than 15 km h on a downhill uphill gradient steeper than 10 you are driving slower than 5 km h and no vehicle has been detected in front with stop a...

Страница 257: ...ntinu ous brakes either by cruise control or by the driver using the retarder lever while cruise control is active depressing the service brake pedal will not cause cruise control to switch off i e wh...

Страница 258: ...e cruise control pop up window 1 opens The current road speed 2 is set and now shown as the stored cruising speed together with sym bol 3 for the driving system which is displayed in the form of an op...

Страница 259: ...e selected value is set as the new cruising speed M46 00 0200 71 Press OFF button 1 Distance cruise control is deactiv ated The driving system s operating display symbol in the lower perman ent displa...

Страница 260: ...ish to activate distance cruise control while the bus is stationary do this only on major roads such as dual car riageways and not in urban traffic This function is not designed for use in urb an traf...

Страница 261: ...o secure the vehicle against rolling away To pull away briefly depress the ac celerator pedal or press button 8 The bus pulls away and adapts its speed to that of the vehicle in front but no higher th...

Страница 262: ...tely 60 metres at a speed of approximately 100 km h and approximately 30 metres at a speed of 50 km h Note Distance cruise control must be activated refer to Activating distance cruise con trol M46 00...

Страница 263: ...To close the input window press the OK button Note The specified distance selected is stored automatically after 3 seconds Vehicle ahead detected M54_00 1976 71 Whenever the distance cruise control ra...

Страница 264: ...y obstacle is encountered the bus will not be braked automatically Only a distance warning may be displayed Danger Distance cruise control decelerates the bus automatically to maintain the set dis tan...

Страница 265: ...istance cruise control ART brake request M54_00 1977 71 This warning appears on the display screen in conjunction with a yellow warning level malfunction if distance cruise control detects that the ma...

Страница 266: ...t The driver is always responsible for the speed driven for initiating braking or evasive manoeuvres in good time and for maintaining a safe distance from the vehicle in front If Active Brake Assist c...

Страница 267: ...ng the service brake Active Brake Assist cannot always interpret complex driving situations un equivocally If in a non critical situation a visual and or audible warning is issued or partial braking i...

Страница 268: ...ment cluster Active Brake Assist is not available There will be no automatic braking of the bus in a critical situation Danger Responsibility for the safe control and operation of a vehicle always lie...

Страница 269: ...Driving systems TRAVEGO TRAVEGO M TRAVEGO L Euro VI 07 2014 GB 257...

Страница 270: ...ms Sequence of events when emergency braking initiated by Active Brake Assist ABA Sequence of events when emer gency braking initiated by Active Brake Assist ABA 258 TRAVEGO TRAVEGO M TRAVEGO L Euro V...

Страница 271: ...ng level Critical situation ABA warning level Very critical situ ation partial brake application Emergency braking full brake applic ation Cancelling emergency braking End of emergency braking Distanc...

Страница 272: ...een in conjunction with icon 1 1 and red alert 3 Note At the same time an intermittent warning tone sounds continuously ABA warning level Very critical situation partial brake application M54_00 1978...

Страница 273: ...continue to be displayed Partial braking is cancelled M54_00 1978 71 Red alert 1 continues to be displayed on the display screen together with icon 1 1 and red alert 3 until the hazard ous situation i...

Страница 274: ...t End of emergency braking 1 2 A warning tone also sounds Danger If the vehicle has been emergency braked to a halt it will continue to be held sta tionary for a further 3 seconds by the service brake...

Страница 275: ...warning tone sounds and yellow alert 3 is displayed Note Active Brake Assist is not available which means that the vehicle would not be braked automatically in a critical situation Danger If Active B...

Страница 276: ...ve Active Brake Assist checked and repaired at a qualified specialist workshop which has the necessary specialist knowledge and tools to carry out the work required EvoBus recommends an OMNIplus Servi...

Страница 277: ...deactivated Icon indicating end of emergency braking M54_00 1981 71 This alert 1 appears when the emer gency braking application has ended Alert 1 displays icon 1 1 and the mes sage Notbremsung beend...

Страница 278: ...ion to traffic conditions when cornering M54_00 1005 01 Exit sliproads driving on a different line hard shoulders Danger Distance cruise control and Active Brake Assist may not always detect vehicles...

Страница 279: ...parked on the hard shoulder M54_00 1007 01 Vehicles cutting in Danger Vehicles that cut into your lane without maintaining a safe distance will not be detected by distance cruise control until they ha...

Страница 280: ...71 Snaking roads Danger On snaking roads distance cruise control and Active Brake Assist may not always detect vehicles in front unequivocally The distance sensor may not detect that the vehicle in f...

Страница 281: ...uired in time even though it may have already encroached into your lane Where vehicles leave your lane a delayed visual loss of the target could result in brief warnings and braking being initiated ev...

Страница 282: ...effect that the distance to this vehicle B decreases temporarily Often this behaviour cannot be perceived by the driver e g stopping at traffic lights or at the back end of a traffic jam Important inf...

Страница 283: ...d is covered by snow sand or stones if there are shadows or if the markings on the road are complex or dif ficult to distinguish e g on construction sites or on tight bends In these condi tions the la...

Страница 284: ...ting the lane assistant warning system Note The lane assistant warning system is automatically set to standby when the bus is started The system is activated from a speed of 45 mph 70 km h M54 00 1944...

Страница 285: ...In addition to driving speed and longitud inal and lateral acceleration for example the system also evaluates steering wheel movements turn signal and pedal use and other driver inputs as well as ex t...

Страница 286: ...tors vibrate same motors used by the lane assistant warning system the on board computer displays a yel low event window 1 with the mes sage ATTENTION ASSIST Pause Take a break The driver can acknowle...

Страница 287: ...Driving systems Attention Assist function description Note Refer to the Driver s area controls sec tion TRAVEGO TRAVEGO M TRAVEGO L Euro VI 07 2014 GB 275...

Страница 288: ...276 TRAVEGO TRAVEGO M TRAVEGO L Euro VI 07 2014 GB...

Страница 289: ...senger compartment 285 Activating the air conditioning 286 Switching on air recirculation mode in the driver s area and passenger compartment 287 Activating the reheat function 288 Activating the auxi...

Страница 290: ...control in heating or cooling mode the driver s window should remain closed while the vehicle is in mo tion Note The openings below the spare wheel in the compartment must not be sealed or covered by...

Страница 291: ...Heating ventilation air conditioning TRAVEGO TRAVEGO M TRAVEGO L Euro VI 07 2014 GB 279...

Страница 292: ...Heating ventilation air conditioning Heating ventilation air conditioning HVAC control panel Heating ventilation air conditioning HVAC control panel 280 TRAVEGO TRAVEGO M TRAVEGO L Euro VI 07 2014 GB...

Страница 293: ...rflow can be regulated manually as desired using the adjustment slide on the air vent itself 2 1 Air distribution to the footwell 2 2 Air distribution to the footwell and windscreen 2 3 Air distributi...

Страница 294: ...hanger and reheated by the heat exchanger for the heating system This pro cess condenses water out of the air passed through the system The air directed to passengers or the driver is thereby dehumidi...

Страница 295: ...eed in the driver s area M83 00 0864 71 Press button 4 on the control panel Note The LED in the pushbutton starts to flash The blower speed currently set is represented by bar graph 1 on the display s...

Страница 296: ...for the passenger compartment can now be changed using rocker switch 12 or Note Press the upper or lower section of but ton 12 repeatedly until Komfort 3 Comfort optimum value on the display screen tu...

Страница 297: ...appears on the display screen automatic regulation in the passenger compartment has been deactivated Manually regulating the blower speed in the passenger compart ment M83_00 0117 01 Press button 9 o...

Страница 298: ...ng up In ad dition when the air conditioning sys tem is activated the symbol above appears in the Betriebsmeldungen Operating notifications submenu on the display screen and the roof hatches are close...

Страница 299: ...7 on the control panel The symbol above appears in the Operating notifications submenu on the instrument cluster display screen The LED in button 7 lights up In addition the roof hatches close auto ma...

Страница 300: ...limited to a period of ap proximately 30 minutes To switch it off press the reheat button again LED off If this symbol appears on the display screen current temperature con ditions are preventing act...

Страница 301: ...tside tem perature is at least 6 C below the set point value selected passenger compart ment Note With the ignition starter switch OFF it is possible to switch the auxiliary heat ing unit on directly...

Страница 302: ...et timer menu selection mode Note In selection mode rocker switch 12 can be used to select the switch on duration or timer programs 1 3 Note The driver can close the pop up win dow at any time using t...

Страница 303: ...orrect the hours it is possible to move on to change the minutes by pressing button 10 M83 00 0869 71 The minutes can be adjusted using rocker switch 12 If it is not ne cessary to correct the minutes...

Страница 304: ...n display when saving Note The changes are stored when you press button 10 OK on reaching the last weekday Sunday The display reverts to selection mode automatically and it is now possible to select t...

Страница 305: ...r Risk of poisoning and asphyxiation The auxiliary heating must not be used in en closed spaces such as garages or work shops due to the risk of poisoning and asphyxiation Timer and preselection mode...

Страница 306: ...ch is ON M83 00 0873 71 Screen display when deactivating the switch on times Note The driver can close the pop up win dow at any time using the left arrow button on the steering wheel In addi tion it...

Страница 307: ...in crements of 10 Note The auxiliary heater switch on duration is programmed once and then applies to all three switch on times Note Recommended switch on duration 30 40 minutes A longer switch on du...

Страница 308: ...Heating ventilation air conditioning Switches controllers in the driver s rest area Switches controllers in the driver s rest area 296 TRAVEGO TRAVEGO M TRAVEGO L Euro VI 07 2014 GB...

Страница 309: ...itch for ventilation blower speed I and II 7 When the switch is pressed the blower for ventilating the driver s rest area oper ates at half speed or full speed depend ing on the switch position Note T...

Страница 310: ...298 TRAVEGO TRAVEGO M TRAVEGO L Euro VI 07 2014 GB...

Страница 311: ...ht door 304 Unlocking the door circuit by key remote option 305 Unlocking the luggage compartment flaps using the pushbuttons in the driver s area 305 Locking door 1 306 Locking by key remote 307 Emer...

Страница 312: ...Danger If the display flashes correct operation of the doors is no longer guaranteed Do not move the bus if a warning lamp in the door pushbutton lights up or a yel low or red alert is shown on the di...

Страница 313: ...atutory limit Danger If an object or a person becomes trapped during the opening procedure it is pos sible to switch the door valve back to closing mode by pressing the door push button again The door...

Страница 314: ...alert then appears for the malfunctioning door As soon as the yellow alert has been ac knowledged the bus view appears and the door concerned is highlighted red In addition a red emergency valve symbo...

Страница 315: ...ot go out have the door system checked by an OMNIplus Service Partner Danger This icon also appears in the display if the bus is moving faster than 3 km h and door I front right or door II centre righ...

Страница 316: ...dle 2 to the right at the same time arrow position 3 Turn the key and handle 2 back to their initial position and remove the key Press exterior pushbutton 5 Note The fuel filler flaps are unlocked at...

Страница 317: ...ng unlocked if it was unlocked by accident If the luggage com partment flaps are still unlocked approx imately 43 minutes after the ignition was switched to OFF forced locking will be initiated to con...

Страница 318: ...the front right door insert the key into lock 1 turn it clock wise and turn handle 2 to the left arrow position 4 Turn the key and handle 2 back to their initial posi tion and remove the key Note Wit...

Страница 319: ...y Note A buzzer will sound for 10 seconds if an attempt is made to lock the bus even though the bus doors luggage compart ment flaps or driver s window have not been closed and locked The anti theft a...

Страница 320: ...anti theft alarm system is not primed red LED in the driver s area does not flash Note The driver s window and service covers are neither closed nor locked automatic ally these have to be closed or lo...

Страница 321: ...ncy valve front right door Note 3 2 Exterior emergency valve centre right door Note 3 3 Interior emergency valve centre right door Turn interior emergency valve 3 1 3 3 or exterior emergency valve 3 3...

Страница 322: ...ought to a halt and the parking brake has been applied M54 00 1989 71 As soon as the red alert has been acknowledged the bus view ap pears and the door concerned is highlighted red In addition a red e...

Страница 323: ...sed air supply for spare wheel M00_00 0575 71 Open the front cover of the bus us ing lever 1 in the front right door way Remove the spare wheel M40_00 0073 01 Take the hose with tyre connection 2 from...

Страница 324: ...cy exits front and rear roof hatches are unlocked as soon as the bus is unlocked by the central locking system the lock at door 1 is unlocked or whenev er the ignition starter switch is switched to ON...

Страница 325: ...ent of emer gency operation or if an exterior handle on one of the emergency exit roof hatches is in locked con dition with the ignition starter switch switched to ON The red alert dis plays this icon...

Страница 326: ...314 TRAVEGO TRAVEGO M TRAVEGO L Euro VI 07 2014 GB...

Страница 327: ...bus 321 Filling the fresh water tank outside the bus 322 Checking and cleaning the fresh water filter 322 Drawing water from the water tap 323 Switching on the sausage heater 323 Cleaning the sausage...

Страница 328: ...inter operation 334 Draining the fresh water tank 335 Draining the water lines 335 Draining the boiler 336 Draining the siphon 337 Replacing fuses 337 Malfunctions 340 Using the sausage heater again a...

Страница 329: ...journey Danger Use only clean drinking water Danger To prevent the growth of microbes in wa ter left inside the system the entire sys tem must be drained refer to Winter operation if the kitchenette a...

Страница 330: ...ile the bus is in motion Danger Objects being thrown out of the kit chenette can cause injuries The person using the kitchenette must secure loose objects safely while the bus is in motion First use o...

Страница 331: ...utes for the boiler to fill It is advisable to flush the boiler with fresh water To do this draw approximately 2 to 3 litres of hot water Start the engine to heat the boiler length of the heating phas...

Страница 332: ...ing button 3 on the galley control pan el The galley lighting on the left above the washbasin comes on The LED in button 3 on the control panel lights up The galley is open and ready for use Note If b...

Страница 333: ...used to fill with water contain ers funnels hoses etc must be sterile Note It is recommended that fresh water tank 4 be cleaned manually via caps 4 1 and 4 2 and or that it be flushed thor oughly with...

Страница 334: ...rinking water via cap 4 2 Close cap 4 2 firm and tight Fit fresh water tank 4 into the bus and secure using tensioning straps 4 4 Connect quick release coupling 5 to fresh water tank 4 Checking and cl...

Страница 335: ...oxim ately 20 cm Switching on the sausage heater Galley switched on Fresh water tank filled and connec ted Danger There is a risk of scalding when using the sausage heater Hot steam can rise which may...

Страница 336: ...s Danger Never use the sausage heater without water Note Excess water may run out via overflow pipe 1 Fill the sausage heater tank with ap proximately 4 cm cold or hot water Add the sausages to the sa...

Страница 337: ...t a temperature of 40 60 80 or 95 C LED 17 2 indicates the set temperature Note LED 17 2 flashes while the sausage heater is heating and lights up when the set temperature has been reached M86_00 0336...

Страница 338: ...lean water and wipe the saus age heater tank dry to avoid scaling Clean the overflow pipe with bottle cleaner at regular intervals Note Clean the sausage heater tank with a commercially available stai...

Страница 339: ...pty before the brewing process begins Note The coffee filter must equate to size 1 x 6 commercially available Add the amount of coffee powder according to taste e g 1 teaspoon per cup The coffee machi...

Страница 340: ...Brewing 1 carafe of coffee 20 cups of coffee M86_00 0173 71 Remove filter 11 from the filter holder Insert filter paper and add as much coffee powder as required Note Judge the amount of coffee powder...

Страница 341: ...6_00 0142 02 Disconnect the hose at quick release coupling 5 Hold the hose in a container of de scaler Note Use only descalers that are suitable for domestic appliances The descaler must not attack pl...

Страница 342: ...tion There is a risk of scalding when dispens ing hot water There is a possibility of hot steam rising which could result in severe scalding of the face arms and hands Do not dispense hot water unless...

Страница 343: ...esh water tank filled and connec ted Boiler filled Caution There is a risk of overheating and thermal damage if the boiler is operated with no water Never operate the boiler without water M86_00 0178...

Страница 344: ...To dispense hot water into a cup press hot water dispensing button 20 Caution Outflow of hot water risk of scalding Hot water continues to flow while hot water dispensing button 20 is pressed Setting...

Страница 345: ...r dispenser begin to scale up Hold the hose in a container of de scaler at least 2 litres Note Use only descalers that are suitable for domestic appliances The descaler must not attack plastics and al...

Страница 346: ...g hot water dispens ing button 20 and drain it Note Repeat the last step until the water no longer tastes or smells of descaler or vin egar Winter operation Galley switched on Over winter drain the fr...

Страница 347: ...tight Fit fresh water tank 4 into the bus and secure using tensioning straps 4 4 Connect quick release coupling 5 to fresh water tank 4 The fresh water tank is completely drained Draining the water l...

Страница 348: ...water lines are completely drained Draining the boiler Caution There is a risk of overheating if the boil er is operated with no water Do not start the engine while the boiler is being drained M86_00...

Страница 349: ...te The siphon is located under the washbas in in the lavatory M86_00 0039 01 Dismantle siphon 14 of kitchenette waste water drain at union nuts 14 1 and empty Fill the siphon with windscreen anti free...

Страница 350: ...all fuse slots are necessar ily occupied in every bus Furthermore fuses may occupy unassigned slots be cause they are protecting special custom er options or retrofitted equipment for example M54 00...

Страница 351: ...r pump 10 A Note 31 Sausage heater 25 A Note 32 Electronics 5 A Note 33 Coffee machine 40 A M86_00 0181 71 Exchange the defective boiler fuse Note The fuses for the boiler are located under the plasti...

Страница 352: ...an rectify yourself Using the sausage heater again after a malfunction M86_00 0337 71 The overheating protection is triggered if the sausage heater is operated with no water The red LED in button 17 3...

Страница 353: ...hed off at the master switch on the instrument panel the current program is cleared and it is necessary to restart the coffee machine Empty the carafe and refill the filter M86_00 0182 71 Overheating...

Страница 354: ...pliance does not dispense wa ter Note Fill the fresh water tank with water Or replace fuse 36 Or have the water pump exchanged by Customer Service M86_00 0179 71 The overheating protection is triggere...

Страница 355: ...he boiler Or the overheating protection has been triggered Reactivate by pressing in but ton 24 Water flows out of the dispenser when the boiler is heating Note No malfunction because water expands du...

Страница 356: ...low Note Fill the fresh water tank with water Check the water supply connection Check the filter for clogging Or replace fuse 30 Or have the water pump replaced by the after sales service Switching of...

Страница 357: ...ing off the galley M86_00 0169 71 Fit cover 2 and use lock 2 1 to secure The galley is locked away M54 00 1931 71 Press galley master switch 1 The LED in master switch 1 goes out The galley is switche...

Страница 358: ...346 TRAVEGO TRAVEGO M TRAVEGO L Euro VI 07 2014 GB...

Страница 359: ...henette 355 Filling the fresh water tank inside the bus 356 Filling the fresh water tank outside the bus 358 Checking and cleaning the fresh water filter 358 Drawing water from the water tap 359 Switc...

Страница 360: ...e fresh water tank 374 Draining the water lines 374 Draining the boiler 375 Draining the 40 cup coffee machine 376 Draining the siphon 377 Replacing fuses 377 Malfunctions 380 Restoring boiler operati...

Страница 361: ...te with 40 cup coffee machine Table of contents Using the 2 carafe filter system again after a malfunction 383 Other malfunctions 384 Switching off the kitchenette 385 TRAVEGO TRAVEGO M TRAVEGO L Euro...

Страница 362: ...g systems at regular intervals or after oper ation has been restored A sodium hypo chloride solution from camping and cara vanning retailers is particularly suitable observe the manufacturer s instruc...

Страница 363: ...or babies in particular Danger The rules below for handling microwave ovens must be adhered to in order to reduce the risk of microwaves causing burning electric shocks radiation and fire Only use sui...

Страница 364: ...so that steam generated by cooking can escape Microwaveable bags and sealed plastic bags should be cut open or pierced to prevent them exploding during cooking and possibly causing injuries Plastic co...

Страница 365: ...journey This includes Boiler for hot water preparation Coffee machine for brewing coffee Sausage heater for preparing saus ages Any other use cannot be considered use for the intended purpose Approve...

Страница 366: ...until green LED 5 lights up The boiler has been filled and bled and can now be switched on using control button 9 to draw hot water Note To avoid scale and steam do not turn control knob 9 to maximum...

Страница 367: ...h 1 The LED in master switch 1 lights up M86_00 0140 01 Release folding cover on lock 2 1 by unlocking and pressing it Pull handle 2 2 Fold the upper part of the folding cover down by handle 2 3 Dange...

Страница 368: ...lighting come on and indicator lamp 3 lights up The kitchenette is open and ready for use Note If indicator lamp 3 on the control panel does not light up there is insufficient on board voltage to oper...

Страница 369: ...aps 4 1 and 4 2 and or that it be flushed thor oughly with fresh water The fresh water lines should then also be flushed with fresh water by drawing cold hot water and switching on the coffee machine...

Страница 370: ...esh water tank 4 Fill fresh water tank 4 with pure drinking water via cap 4 2 Close cap 4 2 firm and tight Fit fresh water tank 4 into the bus and secure using tensioning straps 4 4 Connect quick rele...

Страница 371: ...r from the water tap Galley switched on Fresh water tank filled and connec ted M86_00 0377 71 Open rotary knob 6 to draw cold water from tap 7 Open rotary knob 5 to draw hot water from tap 7 Danger Ou...

Страница 372: ...order to make sure that the boiler contains water The boiler has been filled with water and bled To switch on the boiler turn control knob 9 clockwise Green LED 8 above control knob 9 lights up and th...

Страница 373: ...ase coupling 5 Note How frequently the galley should be de scaled depends on the water quality but the boiler should be descaled immediately if there is a noticeable increase in the length of the heat...

Страница 374: ...he boiler turn control knob 9 fully clockwise position 3 LED 8 lights up and the water con taining descaler is heated Wait until LED 8 goes out The contents of the boiler have been heated Note The boi...

Страница 375: ...r vin egar Switching on the sausage heater Galley switched on Fresh water tank filled and connec ted Danger There is a risk of scalding when using the sausage heater Hot steam can rise which may cause...

Страница 376: ...Never use the sausage heater without water Note Excess water may run out via overflow pipe 12 Fill the sausage heater tank half full approximately 2 3 litres with cold or hot water Add the sausages t...

Страница 377: ...ff by turning the control knob fully anti clockwise position 0 until the heater has cooled down M86_00 0149 01 At the end of the heating phase re move the lid Danger The sausage heater is hot and gene...

Страница 378: ...ean water and wipe the saus age heater tank dry to avoid scaling Clean the overflow pipe with bottle cleaner at regular intervals Note Clean the sausage heater tank with a commercially available stain...

Страница 379: ...a risk of serious burns Do not pour the coffee until it is safe to do so Danger Do not switch on the coffee machine un less its tank has been filled with water risk of overheating M86_00 0377 71 Pull...

Страница 380: ...out filter holder 19 Pivot the 40 cup coffee machine into the galley until it engages M86_00 0378 71 Open tap 1 to fill the 40 cup coffee machine with water Note The minimum amount of water to fill th...

Страница 381: ...lose filter holder 19 and lid 18 and place it on the riser pipe in the machine M86_00 0008 01 Position lid 18 and lock ring 17 on top and engage by turning anti clockwise Note Lug 17 1 must be positio...

Страница 382: ...phase because a new brewing process would begin when the machine were switched back on coffee quality would be degraded Push tap 23 down to pour coffee Lock it in the vertical position for continuous...

Страница 383: ...offee machine Galley switched on Note Regular cleaning after each use ensures optimum coffee quality and full taste Clean the filter holder using a com mercially available washing up liquid and a brus...

Страница 384: ...in valve with clean water Descaling the coffee machine Note How frequently the galley should be de scaled depends on the water quality but the coffee machine should be descaled immediately if performa...

Страница 385: ...lter holder of the 40 cup cof fee machine using only a commercially available washing up liquid and a brush Connect the hose to fresh water tank 4 Flush with fresh water To do this brew several carafe...

Страница 386: ...if the caps are difficult to turn Close cap 4 1 firm and tight Fit fresh water tank 4 into the bus and secure using tensioning straps 4 4 Connect quick release coupling 5 to fresh water tank 4 The fre...

Страница 387: ...water Switch off the boiler before draining it Note The drain plug is located on the bottom left behind the folding cover of the galley M86_00 0306 71 Pull out hose 36 on the left hand side behind th...

Страница 388: ...ing hose clamp 36 2 Slide hose 36 back into the galley The boiler is completely drained Draining the 40 cup coffee machine M86_00 0159 02 Position residual drain valve 37 over drainage basin 38 Turn r...

Страница 389: ...ti freeze mat no A 001 986 45 71 11 down to 30 C and then reas semble it Replacing fuses Danger Risk of fire Do not use fuses with a higher than spe cified amperage The result would be damage to the e...

Страница 390: ...all fuse slots are necessar ily occupied in every bus Furthermore fuses may occupy unassigned slots be cause they are protecting special custom er options or retrofitted equipment for example M54 00 1...

Страница 391: ...pump 10 A Note 31 Sausage heater 25 A Note 32 Electronics 5 A Note 33 Coffee machine 40 A M86_00 0181 71 Exchange the defective boiler fuse Note The fuses for the boiler are located under the plastic...

Страница 392: ...inal 15 5 A Note 35 D engine 5 A Note 36 Water pump 10 A Note 37 Boiler 50 A Malfunctions This section describes malfunctions that you can rectify yourself Restoring boiler operation following a malfu...

Страница 393: ...ivate the overheating protection by pressing button 11 behind the control panel M86_00 0162 01 The boiler does not heat up Note Replace fuse 44 to rectify the malfunc tion Insufficient hot water flow...

Страница 394: ...he malfunction Reactivate the overheating protection by pressing button 13 4 on the control panel Using the 40 cup coffee machine again after a malfunction Heating is switched off by a temper ature li...

Страница 395: ...al No water level in the water level glass even though the coffee ma chine is full Note Lower inlet opening blocked Clean the inlet opening from the inside remove the water level glass if necessary Wa...

Страница 396: ...rafe 35 behind the control panel M86_00 0162 01 2 carafe filter system fills with water but does not brew Note Replace fuse 43 to rectify the malfunc tion Other malfunctions M86_00 0162 01 The control...

Страница 397: ...ogy M86_00 0377 71 No water or irregular flow Note Fill the fresh water tank with water Or replace fuse 41 Or have the water pump replaced by the after sales service Note In the case of on board kitch...

Страница 398: ...the control panel Fold the upper folding cover upwards through 90 and press against the guide rails Pull the entire folding cover upwards by the upper folding cover The kitchenette is locked away M54...

Страница 399: ...on the galley 395 Filling the fresh water tank inside the bus 396 Filling the fresh water tank outside the bus 397 Checking and cleaning the fresh water filter 398 Drawing water from the water tap 399...

Страница 400: ...409 Manual operation of the 2 carafe filter system 410 Descaling the coffee machine 411 Winter operation 412 Draining the fresh water tank 413 Draining the water lines 413 Draining the boiler 414 Dra...

Страница 401: ...e with 2 carafe filter system Table of contents Using the 2 carafe filter system again after a malfunction 421 Other malfunctions 422 Switching off the kitchenette 423 TRAVEGO TRAVEGO M TRAVEGO L Euro...

Страница 402: ...g systems at regular intervals or after oper ation has been restored A sodium hypo chloride solution from camping and cara vanning retailers is particularly suitable observe the manufacturer s instruc...

Страница 403: ...or babies in particular Danger The rules below for handling microwave ovens must be adhered to in order to reduce the risk of microwaves causing burning electric shocks radiation and fire Only use sui...

Страница 404: ...so that steam generated by cooking can escape Microwaveable bags and sealed plastic bags should be cut open or pierced to prevent them exploding during cooking and possibly causing injuries Plastic c...

Страница 405: ...s journey This includes Boiler for hot water preparation Coffee machine for brewing coffee Sausage heater for preparing saus ages Any other use cannot be considered use for the intended purpose Approv...

Страница 406: ...panel until cold water flows out of the tap The boiler has been filled and bled and can now be switched on using button 9 to draw hot water Before first use clean the sausage heater tank the lid and...

Страница 407: ...1 by unlocking and pressing it Pull handle 2 2 Fold the upper part of the folding cover down by handle 2 3 Danger Since the counter protrudes into the steps area the kitchenette should be switched of...

Страница 408: ...ter for kitchenette requirements must be renewed every day If the fresh water is stored in the water tank for a long peri od of time an additive Micropur mat no 0 971 407 000 in accordance with the ma...

Страница 409: ...th the manufacturer s instructions to neutralise this aftertaste Note The fresh water tank is located in the luggage compartment in front of the lav atory and in the right hand luggage com partment to...

Страница 410: ...raps 4 4 Connect quick release coupling 5 to fresh water tank 4 Checking and cleaning the fresh water filter M86_00 0376 71 The fresh water filter is located be hind cover 2 Unscrew knurled screws 1 t...

Страница 411: ...o flow while button 6 is pressed Press button 7 to draw hot water from tap 8 Danger Outflow of hot water danger of scalding Hot water continues to flow while button 7 is pressed Note No hot water can...

Страница 412: ...order to make sure that the boiler contains water The boiler has been filled with water and bled Press button 9 to switch on the boiler The LED in button 9 lights up and the water is heated Note Press...

Страница 413: ...oiler thermostat is located behind the removable control panel M86_00 0146 02 Set thermostat 10 Note To set a lower temperature for the boiler turn thermostat 10 anti clockwise Note To set a higher te...

Страница 414: ...is able to descale the boiler twice a year Hold the hose in a container of de scaler at least 10 litres Note Use only descalers that are suitable for domestic appliances The descaler must be non aggre...

Страница 415: ...er have been heated Note The boiler has a capacity of approximately 5 litres and it takes approximately 20 minutes for the water to heat up to a set temperature of 80 C M86_00 0147 01 Press button 7 t...

Страница 416: ...connec ted Danger There is a risk of scalding when using the sausage heater Hot steam can rise which may cause serious burns to the face arms and hands Keep at a safe distance and remove hot sausages...

Страница 417: ...sausages to the sausage heater tank and replace the lid on the sausage heater tank Note When adding sausages there is a risk of hot water splashing and causing burns to the face arms and hands Add the...

Страница 418: ...ating phase re move the lid Danger The sausage heater is hot and generates steam risk of scalding Do not remove overflow pipe 12 until the water in the tank has cooled sufficiently that there is no lo...

Страница 419: ...th descaler Leave the descaler to work observe the information issued by the manu facturer Note For heavy scaling it is possible to operate the sausage heater containing descaler for approximately 30...

Страница 420: ...arafes of coffee Brewing 1 2 a carafe of coffee 10 cups of coffee M86_00 0151 01 Remove left hand filter 25 Insert filter paper and add as much coffee powder as required Note Add coffee powder to tast...

Страница 421: ...osition Place an empty carafe 26 under left hand filter 25 M86_00 0154 01 Press button 31 on the control pan el The LED in button 31 lights up The brewing process begins An electronic signal sounds wh...

Страница 422: ...5 01 Press button 32 on the control pan el The LED in button 32 lights up The brewing process begins An electronic signal sounds when brewing has finished The LED in button 32 goes out Manual operatio...

Страница 423: ...ilter sys tem is completely drained Descaling the coffee machine Note How frequently the galley should be de scaled depends on the water quality but the coffee machine should be descaled immediately i...

Страница 424: ...lter holder of the 40 cup cof fee machine using only a commercially available washing up liquid and a brush Connect the hose to fresh water tank 4 Flush with fresh water To do this brew several carafe...

Страница 425: ...if the caps are difficult to turn Close cap 4 1 firm and tight Fit fresh water tank 4 into the bus and secure using tensioning straps 4 4 Connect quick release coupling 5 to fresh water tank 4 The fr...

Страница 426: ...o water Switch off the boiler before draining it Note The drain plug is located on the bottom left behind the folding cover of the galley M86_00 0306 71 Pull out hose 36 on the left hand side behind t...

Страница 427: ...Slide hose 36 back into the galley The boiler is completely drained Draining the 2 carafe filter system Note The 2 carafe filter system is automatically drained after every brewing process Proceed as...

Страница 428: ...ti freeze mat no A 001 986 45 71 11 down to 30 C and then reas semble it Replacing fuses Danger Risk of fire Do not use fuses with a higher than spe cified amperage The result would be damage to the e...

Страница 429: ...all fuse slots are necessar ily occupied in every bus Furthermore fuses may occupy unassigned slots be cause they are protecting special custom er options or retrofitted equipment for example M54 00...

Страница 430: ...pump 10 A Note 31 Sausage heater 25 A Note 32 Electronics 5 A Note 33 Coffee machine 40 A M86_00 0181 71 Exchange the defective boiler fuse Note The fuses for the boiler are located under the plastic...

Страница 431: ...minal 15 5 A Note 35 D engine 5 A Note 36 Water pump 10 A Note 37 Boiler 50 A Malfunctions This section describes malfunctions that you can rectify yourself Restoring boiler operation following a malf...

Страница 432: ...ivate the overheating protection by pressing button 11 behind the control panel M86_00 0162 01 The boiler does not heat up Note Replace fuse 44 to rectify the malfunc tion Insufficient hot water flow...

Страница 433: ...ing button 13 4 on the control panel Using the 2 carafe filter system again after a malfunction A continuous tone indicates that the fresh water tank is empty Note Fill the fresh water tank Press any...

Страница 434: ..._00 0162 01 The control panel is not working Note Either the fuse or the control panel is defective Replace fuse 42 or have the control panel repaired by the after sales service Galley light does not...

Страница 435: ...4 Switching off the kitchenette Note All appliances must be switched off be fore the kitchenette can be switched off M86_00 0141 01 Switch off the kitchenette lighting using button 3 on the control p...

Страница 436: ...424 TRAVEGO TRAVEGO M TRAVEGO L Euro VI 07 2014 GB...

Страница 437: ...430 Filling the soap dispenser 430 Adding paper hand towels 431 Adding toilet paper 431 Opening the basin undercabinet 431 Changing waste bags 432 Filling the fresh water storage tank 432 Emptying th...

Страница 438: ...Whenever the lavatory is locked from the inside the extractor fans for the holding tank and lavatory cabin switch on and WC occupied symbol 2 appears in the passenger com partment display M86 00 0428...

Страница 439: ...splayed on the display screen in the driver s area in conjunction with this icon M86 00 0432 71 In an emergency press red pushbut ton 1 once M54 00 2011 71 A yellow alert appears on the display screen...

Страница 440: ...as a chemical toilet Note If the lavatory is to be used as a chem ical toilet the holding tank must be filled with a certain amount of sanitary chem ical after each time it has been emptied To do thi...

Страница 441: ...impeller pump For this reason always ensure that there is a sufficient level of sanitary chemical fluid in the system Turn switch 1 back to the right to switch back to water flushing opera tion The l...

Страница 442: ...not of drinking water quality Note The waste water reaches the solid waste container via a system of hoses Filling the soap dispenser Open the cover by raising it slightly and pulling it towards you N...

Страница 443: ...s as shown on the inside of the dispenser Adding toilet paper M86_00 0032 01 Squeeze toilet paper holder 7 to remove and replace it Opening the basin undercabinet M86_00 0033 01 Remove toilet paper ho...

Страница 444: ...036 01 Open the right service cover to the front of the centre right door To fill the fresh water storage tank connect a supply line between coupling 10 1 and an external water supply and open shut of...

Страница 445: ...resh water storage tank M86_00 0036 01 To empty the fresh water storage tank take the filler hose from the holder and open shut off valve 10 2 on the coupling 10 1 Let the water run out Note The fresh...

Страница 446: ...compressed air tap 1 clock wise to the AUF OPEN position Press auxiliary pushbutton 2 Note Compressed air tap 1 is located behind the WC service cover Environmental protection Dispose of sewage in an...

Страница 447: ...run empty Note Operate the pumps using the pushbuttons 3 or 4 until all of the water has run out Reconnect the lines Empty the solid waste container M86_00 0039 01 Unscrew the siphon odour trap 14 in...

Страница 448: ...be expelled from the CC pump as the cover is opened The residues are caustic and must not be allowed to come into contact with skin eyes or clothing Rinse affected areas immediately and thoroughly wi...

Страница 449: ...ck option 452 Safety precautions for work carried out in the engine compartment 453 Removing the drive belts OM 470 453 Fitting the drive belts OM 470 455 Removing the drive belts OM 471 459 Fitting t...

Страница 450: ...e taken in the event of a flat tyre or a wheel change 477 Fitting snow chains 478 Removing the spare wheel from the spare wheel cover 479 Positioning the jack 480 Removing the wheel trims 481 Removing...

Страница 451: ...the prevention of damage to buses or components during electric welding work 501 Electrical system illustration shows TRAVEGO 2 axle model as an example 504 Battery isolating switch with switch off a...

Страница 452: ...panel 530 Fuse assignment for roof mounted heating ventilation and air conditioning system Spheros 532 Handling fuses 533 Disconnecting vehicle batteries 534 Recharging vehicle batteries 536 Switching...

Страница 453: ...emergency mirror option 548 Maintenance tasks for the air conditioning system in the bus filter maintenance 550 Scopes of maintenance for the air conditioning system 551 Bleeding the coolant circuit f...

Страница 454: ...tem information Symbol Description Alternator 1 malfunction Symbol Description Alternator 2 malfunction Alternator 3 malfunction No battery charge No battery charge al ternator 1 No battery charge al...

Страница 455: ...Symbol Description Ready to depart in trans mission shift system failsafe mode Clutch overload Continuous brake preselected Continuous brake in oper ation No continuous brake torque Retarder via brak...

Страница 456: ...ed Symbol Description Trailer ABS fault Depress brake pedal Traction control Auxiliary consumers compressed air supply pressure too low or sensor failure Compressed air supply air intake filter dirty...

Страница 457: ...Brake lamp malfunction Symbol Description Reversing lamp malfunc tion Light sensor malfunction Window defrost set to MAX Washer fluid level Rain sensor Rain sensor speed 1 Rain sensor speed 2 Rain se...

Страница 458: ...id extended Service call Disabled passengers space stop request AC compressor in opera tion Smog air recirculation mode for driver s area and passenger compart ment Driver s area air recircula tion mo...

Страница 459: ...Blue fluid level too low Lavatory emergency call Water tank level too low WC holding tank near to overflow Water tank 1 empty Water tank 2 empty Roof hatch open Luggage compartment flap open Symbol De...

Страница 460: ...fuel pump The pump will switch off after 85 seconds M47_00 0121 71 Engine oil level display M68 00 0547 71 Information about the engine oil level is displayed on display screen 1 Oil level alerts are...

Страница 461: ...n the sections that follow Caution Only the use of low ash oils specified on MB service products sheet 228 51 is per mitted Oil level alerts Oil level alerts are displayed to the driver directly by me...

Страница 462: ...be measured unless the engine is switched off and the ignition starter switch is in the ON position The current oil level can be checked no soon er than 5 minutes after engine switch off Caution The b...

Страница 463: ...00 km Caution The bus must be level when the oil level is measured If the oil level is measured with the bus on an incline an incorrect oil level will be displayed on the display screen and a yellow o...

Страница 464: ...it approximately 10 minutes to allow the oil to collect in the oil sump Note The oil level must be visible between the minimum and maximum markings At filler opening 2 add the top up volume required i...

Страница 465: ...bus has broken down and it is ne cessary to replace a drive belt but no suitable gauge is available for checking the tension of the new belt drive the bus to the nearest OMNIplus Service Partner as so...

Страница 466: ...compressor Note Required tools 1 2 tommy bar M01_00 0134 71 Fit the 1 2 tommy bar into the socket on tensioning pulley 2 1 pull the tensioning pulley down in the dir ection of the arrow using the tomm...

Страница 467: ...oning pulley 4 1 pull the tensioning pulley down in the dir ection of the arrow using the tommy bar and hold in place Remove the drive belt from the belt pulleys Fitting the drive belts OM 470 Danger...

Страница 468: ...earest OMNIplus Service Part ner to have the drive belt tension adjus ted correctly using a tension meter and to have the screws tightened to the correct torque Tighten lock nut 1 2 of the tension ing...

Страница 469: ...ofile is aligned with the pulley profile Tighten the tensioning screw until the required belt tension has been achieved Caution The drive belt tension must not be too high under any circumstances It m...

Страница 470: ...f the arrow using the tommy bar and hold in place Lay drive belt 2 on the tensioning pulley Caution Make sure that the belt profile is aligned with the pulley profile Note Tensioning pulley 2 1 is spr...

Страница 471: ...crew 3 1 using lock nut 3 2 Secure the tensioning lever mounting to the carrier using securing screws 3 3 Removing the drive belts OM 471 Danger Do not carry out work in the engine com partment unless...

Страница 472: ...Practical advice Removing the drive belts OM 471 460 TRAVEGO TRAVEGO M TRAVEGO L Euro VI 07 2014 GB...

Страница 473: ...elt tension measuring point Removing the fan drive belt M01_00 0132 71 Loosen lock nut 3 2 of adjustment screw 3 1 on the belt tensioner car rier Unscrew adjustment screw 3 1 Loosen screws 3 3 securin...

Страница 474: ...71 Loosen lock nut 1 2 and loosen the screws at the alternator hinge point 1 5 1 6 and at the tensioning spindle Loosen clamp nut 1 1 until the drive belt is lying loosely on the belt pul leys Remove...

Страница 475: ...n removed If the engine is at normal operating temperature give it sufficient time to cool down risk of burns Danger During assembly do not use force e g with the use of an assembly lever when pulling...

Страница 476: ...Practical advice Fitting the drive belts OM 471 464 TRAVEGO TRAVEGO M TRAVEGO L Euro VI 07 2014 GB...

Страница 477: ...Manually lay new drive belt 1 on the belt pulleys for the alternator and air conditioning compressor Caution Make sure that the belt profile is aligned with the pulley profile Tighten tensioning nut...

Страница 478: ...hold in place Lay drive belt 4 on tensioning pulley 4 1 Caution Make sure that the belt profile is aligned with the pulley profile Note Tensioning pulley 4 1 is spring loaded the drive belt is therefo...

Страница 479: ...and at the ten sioning spindle Fitting the refrigerant compressor drive belt M01_00 0134 71 Manually lay new drive belt 2 on the belt pulleys for the crankshaft and on the idler pulley and belt pul le...

Страница 480: ...ave the drive belt tension adjus ted correctly using a tension meter Secure the position of adjustment screw 3 1 using lock nut 3 2 Secure the tensioning lever mounting to the carrier using securing s...

Страница 481: ...of a coolant specified on MB Specifications for Service Products sheet 325 5 or 326 5 G40 is permitted The colour of the coolant is pink Note For notes on bleeding the heating sys tem coolant circuit...

Страница 482: ...is too high this res ults in a longer braking distance poorer tyre grip and increased tyre wear Caution Caps on the tyre inflation valves pro tect the valve inserts from moisture and dirt The caps on...

Страница 483: ...ident Have the correct nominal pressure set in the on board computer at a qualified spe cialist workshop Note If radio transmitting equipment e g ra dio headphones two way radios is being operated ins...

Страница 484: ...causing an accident thereby injuring your self and other people Tyre condition Before setting off check the tyres on the bus for external signs of damage foreign objects in the tyre tread foreign obj...

Страница 485: ...could then lose control of your bus and cause an accident which could res ult in injury to yourself and others For this reason use only the tyre types and sizes approved for your bus model and observe...

Страница 486: ...cal advice Retreaded tyres Retreaded tyres It is advisable to use only tyres and wheels that EvoBus has tested and ap proved specifically for your vehicle 474 TRAVEGO TRAVEGO M TRAVEGO L Euro VI 07 20...

Страница 487: ...Practical advice TRAVEGO TRAVEGO M TRAVEGO L Euro VI 07 2014 GB 475...

Страница 488: ...Practical advice Tyre pressures table 295 80 R 22 5 Tyre pressures table 295 80 R 22 5 476 TRAVEGO TRAVEGO M TRAVEGO L Euro VI 07 2014 GB...

Страница 489: ...n cerned is the decisive point of reference for the precise tyre pressures to be set in accordance with the current axle load Safety measures to be taken in the event of a flat tyre or a wheel change...

Страница 490: ...Observe legal requirements and the in stallation instructions provided by the manufacturer Note Only RUD MATIC MAXI chains are permit ted Note Snow chains may be fitted more easily especially at the r...

Страница 491: ...not be sealed or covered by objects as trouble free operation of the heating ventilation and air conditioning system would no longer be guaranteed The front cover opens forwards gently Note If the co...

Страница 492: ...jack are available on board Use in accordance with intended use Danger Secure the bus against rolling away apply the parking brake Also chock at least one front wheel if there is a defective wheel on...

Страница 493: ...e duration of the wheel fitting removal procedure to provide protection in case the jack should fail Removing the wheel trims Removing the wheel trims M40_00 0007 01 Insert both hands into the ventila...

Страница 494: ...3 01 Loosen the wheel nuts using the wheel nut wrench from the vehicle tool kit Note Roller bar 3 on top of which the spare wheel is pulled out from the spare wheel cover is suitable as an extension I...

Страница 495: ...ut tension Remove the defective wheel Caution When you remove the wheel take great care not to scrape it over the threads of the wheel bolts This would damage the bolt threads and make it difficult to...

Страница 496: ...port stands are not available the spare wheel or the defective wheel must be placed under the body at a suitable position for the duration of the tyre change to provide protection in case the jack sho...

Страница 497: ...Roller bar 3 on top of which the spare wheel is pulled out from the spare wheel cover is suitable as an extension It can be pulled out of the retaining bracket after the spring pin has been removed D...

Страница 498: ...e ramp Unscrew and remove all wheel nuts apart from three nuts spaced equally apart Do not unscrew the last three wheel nuts until you are sure that the wheel is seated on the wheel bolts without tens...

Страница 499: ...um disc wheel must be fitted during a wheel change if the bus is equipped with aluminium disc wheels Light alloy wheels and pressed steel wheels require a different type of wheel nut Note Disc wheels...

Страница 500: ...t will not be possible to remove the jack Tighten the wheel nuts in a crosswise pattern Tightening torque Wheel nuts 600 Nm Danger Tighten the wheel nuts using the available tool and drive cautiously...

Страница 501: ...g clips Danger Make sure that the wheel trim is seated correctly All retaining clips 3 must be fixed behind clamp ring 4 M40_00 0008 01 Push in the last top retaining clips with the clamp ring detache...

Страница 502: ...essary to reduce the pressure using the pedal operated brake valve until the pressure regulator cuts in again Caution Since the pressure in the system may be too high for inflating a tyre the inflatio...

Страница 503: ...tment flap Start the engine and inflate the tyres to the specified pressure approx imately 8 5 bar then switch off the engine Note Observe the operating display for the sup ply pressure in circuits 1...

Страница 504: ...Practical advice Pneumatic system test ports under the driver s area Pneumatic system test ports under the driver s area 492 TRAVEGO TRAVEGO M TRAVEGO L Euro VI 07 2014 GB...

Страница 505: ...sure TP 4 Driven axle brake supply pres sure TP 5 Brake pressure regulated on the left hand side of the front axle TP 6 Brake pressure regulated on the right hand side of the front axle TP 7 Spring a...

Страница 506: ...Practical advice Pneumatic test ports behind door 2 Pneumatic test ports behind door 2 494 TRAVEGO TRAVEGO M TRAVEGO L Euro VI 07 2014 GB...

Страница 507: ...nd luggage com partment flap to the front of the driven axle TP 13 Brake pressure regulated on the right hand side of the driv en axle TP 14 Brake pressure regulated on the right hand side of the trai...

Страница 508: ...Practical advice Other pneumatic test ports Other pneumatic test ports 496 TRAVEGO TRAVEGO M TRAVEGO L Euro VI 07 2014 GB...

Страница 509: ...re regulator is in the fill position If the pressure regulator has been deactivated idle position blows into the open air reduce the pressure in the compressed air system by oper ating the pedal opera...

Страница 510: ...ad Note Option 2 compressed air connection by means of coupling head 35 behind the front flap and in the engine compartment Note Using an adapter hose suitable for whichever type of connection is fitt...

Страница 511: ...ency release switch Operate switch 2 by pulling it out The bus stop brake function is no longer active Danger Have the malfunction rectified as soon as possible by an OMNIplus Service Partner Electric...

Страница 512: ...s when handling batteries or battery acid Bat tery acid must never come into contact with skin eyes or clothing Rinse off all acid splashes immediately with copious amounts of clean water Seek medical...

Страница 513: ...fore the commencement of panel work weld ing and tin plating Connect the earth connection of the electric welder directly to the part to be welded When doing so make sure that there are no electricall...

Страница 514: ...removed The earth terminal of the welder must not be connected to the trans mission The welding current may cause sparking at the bearing points inside the transmission The result ant changes in cryst...

Страница 515: ...Practical advice TRAVEGO TRAVEGO M TRAVEGO L Euro VI 07 2014 GB 503...

Страница 516: ...cal advice Electrical system illustration shows TRAVEGO 2 axle model as an example Electrical system illustration shows TRAVEGO 2 axle model as an example 504 TRAVEGO TRAVEGO M TRAVEGO L Euro VI 07 20...

Страница 517: ...ore operation always ob serve the instruction label 02 Main switch panel under the driver s area 03 Auxiliary switch panel Note On the TRAVEGO M TRAVE GO L 3 axle on the right hand side at the rear ab...

Страница 518: ...Practical advice Battery isolating switch with switch off authorisation LED Battery isolating switch with switch off authorisation LED 506 TRAVEGO TRAVEGO M TRAVEGO L Euro VI 07 2014 GB...

Страница 519: ...01 Battery isolating switch 1 Switch off authorisation LED Caution If this LED is lit it is prohib ited to turn the battery isolat ing switch to the OFF pos ition Otherwise the exhaust gas aftertreatm...

Страница 520: ...Practical advice Driver s area interior switch panel Driver s area interior switch panel 508 TRAVEGO TRAVEGO M TRAVEGO L Euro VI 07 2014 GB...

Страница 521: ...for consumers in the front section of the bus Note The cover of the driver s area switch panel also houses the electrical system vehicle data CD This CD must remain in the bus since it contains import...

Страница 522: ...Practical advice Main switch panel under the driver s area Main switch panel under the driver s area 510 TRAVEGO TRAVEGO M TRAVEGO L Euro VI 07 2014 GB...

Страница 523: ...el Note Various electronic control units such as the EBS re tarder etc are located here Various fuses 1 are also found here Note The release handle is located on the floor of the bus to the left hand...

Страница 524: ...Practical advice Auxiliary switch panel Auxiliary switch panel 512 TRAVEGO TRAVEGO M TRAVEGO L Euro VI 07 2014 GB...

Страница 525: ...fuses for consumers in the rear section of the bus The auxiliary switch panel is located above the driven axle or the trailing axle on the right hand side Note In 3 axle buses the PDB Power Distribut...

Страница 526: ...Practical advice Ceiling switch panel Ceiling switch panel 514 TRAVEGO TRAVEGO M TRAVEGO L Euro VI 07 2014 GB...

Страница 527: ...g switch panel Note There are also various fuses located on the ceiling switch panel for consumer units in the ceiling This is located in the ceiling duct on the front left TRAVEGO TRAVEGO M TRAVEGO L...

Страница 528: ...trical connection for the roof mounted system heating ventilation air conditioning Electrical connection for the roof mounted system heating ventilation air conditioning 516 TRAVEGO TRAVEGO M TRAVEGO...

Страница 529: ...stem is located on the right hand side in the area above door II or above the on board kit chenette This area is only accessible from the passenger compartment Note Various consumers for the roof moun...

Страница 530: ...Practical advice Battery compartment Battery compartment 518 TRAVEGO TRAVEGO M TRAVEGO L Euro VI 07 2014 GB...

Страница 531: ...ld be observed Note This description is based on the standard assignment of fuses in the bus Bus spe cific assignment may differ from bus to bus Not all fuse slots necessarily have to be assigned on e...

Страница 532: ...Practical advice Fuse assignment for driver s area interior switch panel Fuse assignment for driver s area interior switch panel 520 TRAVEGO TRAVEGO M TRAVEGO L Euro VI 07 2014 GB...

Страница 533: ...20 25 A Fuel pump 15F15 F21 15 A 24 V socket 02F07 F22 15 A Video monitor 70F03 F23 5 A Trailing axle terminal 30 22F08 F24 5 A Microphone 70F3 F25 5 A Front destination display 71F05 F26 5 A Telephon...

Страница 534: ...Practical advice Fuse assignment for main switch panel under the driver s area Fuse assignment for main switch panel under the driver s area 522 TRAVEGO TRAVEGO M TRAVEGO L Euro VI 07 2014 GB...

Страница 535: ...ystem 70F10 F5 5 A 12 V video system ter minal 15 70F32 F6 15 A 12 volt socket terminal 15 02F08 F7 15 A 12 volt socket terminal 30 02F37 F8 Not assigned F9 7 5 A Parking aid 70F07 F10 Not assigned F1...

Страница 536: ...Practical advice Fuse assignment for auxiliary switch panel Fuse assignment for auxiliary switch panel 524 TRAVEGO TRAVEGO M TRAVEGO L Euro VI 07 2014 GB...

Страница 537: ...A Driver s rest area 81F04 F23 7 5 A Driver s day bed in multi purpose room 81F05 F24 Not assigned F25 Not assigned F26 Not assigned F27 Not assigned F28 7 5 A 24 V socket on auxili ary switch panel...

Страница 538: ...ned F57 5 A Multiplex system MUX 1 04F27 F58 5 A Multiplex system MUX 2 04F28 F59 5 A Multiplex system MUX 3 04F29 F60 5 A Multiplex system MUX 4 04F30 F61 5 A Multiplex system MUX 5 04F31 F62 5 A Sta...

Страница 539: ...Practical advice TRAVEGO TRAVEGO M TRAVEGO L Euro VI 07 2014 GB 527...

Страница 540: ...ical advice Power distribution board PDB fuse assignment on auxiliary switch panel Power distribution board PDB fuse assignment on auxiliary switch panel 528 TRAVEGO TRAVEGO M TRAVEGO L Euro VI 07 201...

Страница 541: ...rowave hot water dispenser 80F03 F37 50 A Multiplex system MUX4 04F21 F38 50 A Multiplex system MUX5 04F22 F39 50 A Standalone multiplexer SMUX 04F37 F40 Not assigned F41 30 A Exhaust gas aftertreat m...

Страница 542: ...Practical advice Fuse assignment for ceiling switch panel Fuse assignment for ceiling switch panel 530 TRAVEGO TRAVEGO M TRAVEGO L Euro VI 07 2014 GB...

Страница 543: ...F6 7 5 A Clock terminal 15 65F02 F7 7 5 A Door 2 doorway light ing 42F02 F8 15 A Electrically folding ex terior mirrors 32F12 F9 5 A Video system 70F11 F10 7 5 A Navigation system ter minal 15 76F01...

Страница 544: ...ssignment for roof mounted heating ventilation and air conditioning system Spheros Fuse assignment for roof moun ted heating ventilation and air conditioning system Spheros 532 TRAVEGO TRAVEGO M TRAVE...

Страница 545: ...orator blower right Note All fuses in the roof moun ted heating ventilation and air conditioning system are accessible from the vehicle interior Handling fuses Always carry some spare fuses in the bus...

Страница 546: ...rating as this could lead to damage to the electrical system Danger Always switch the battery isolating switch 01S01 to OFF before work is carried out on the electrical system Disconnecting vehicle b...

Страница 547: ...ted to be fitted never gel batteries All cells of the batteries must be fitted with special caps that are interlinked by vent hoses thereby allowing any gases produced to be directed into the open air...

Страница 548: ...Danger Risk of explosion from oxyhydrogen gas formation Make sure that the area is well ventilated when you are recharging the vehicle batteries Note Check that the charging voltage 24 or 12 V and cha...

Страница 549: ...long as the pushbutton is kept pressed Start the bus in the normal way Release the pushbutton The LED in the pushbutton goes out Note The auxiliary batteries are disconnected from the on board power...

Страница 550: ...to the terminal of the donor battery and then connect the other end of the negative cable to an earthed metal part that is bolted onto the bus skel eton Note As far as possible from the discharged ba...

Страница 551: ...he EBS or ABS ASR system M68 00 0498 71 In the Meldungen Notifications main menu select the Diagnose Diagnostics submenu and confirm with OK button 1 on the steering wheel Note The Integrated Diagnost...

Страница 552: ...Level Control System COM Communication Unit CPC Common Powertrain Controller DCM Door Control Module EAPU Electronic Air Pressure Unit EBS Electronic Brake System ESP Electronic Stability Program EIS...

Страница 553: ...isplayed M54 00 2015 71 This display appears on the display screen Note The fault code 1 and in some cases a corresponding message 2 are displayed M54 00 2014 71 To clear the stored fault codes se lec...

Страница 554: ...e You could be injured by glass splinters from broken bulbs Caution Protect bulbs from moisture during opera tion and do not allow them to come into contact with fluids Caution Marks on the glass dimi...

Страница 555: ...this pur pose Danger It is essential that work relevant to safety or work on safety related systems be car ried out at a qualified specialist work shop Changing bulbs in the headlamps front turn signa...

Страница 556: ...order Changing a front fog lamp bulb Note The front fog lamps are accessible through the front flap release lever located in the front right doorway M82_00 0125 71 Turn bulb holder 1 anti clockwise a...

Страница 557: ...de mounted turn signal M54_00 0105 01 Unscrew securing screws 3 and remove the housing Press bulb 4 in turn it anti clock wise and remove Note Refit in reverse order Changing a bulb in the rear lamp c...

Страница 558: ...interior M54_00 0678 01 Turn base 2 of relevant lamp 3 or 4 45 anti clockwise Press the bulb in turn it anti clock wise and remove Note Refit in reverse order Changing the bulb in the doorway lamp M5...

Страница 559: ...ight hand drive or left hand drive opera tion Please observe the rules and regula tions of the country in which the vehicle is operated Switch off the lighting Danger Bulbs and bulb holders may be hot...

Страница 560: ...ther side of the bus Tools needed for assembly WAF 6 Allen key screwdriver WAF 15 open ended spanner Danger Always make sure that the ladder you use is suitable for the task Secure the ladder against...

Страница 561: ...or arm 5 Remove mirror arm 5 M88_70 0003 01 Unscrew securing screws 1 1 for emergency mirror 1 and remove the emergency mirror Fit the emergency mirror to the at tachment points on the mirror arm and...

Страница 562: ...right side recirculated air filter cassettes 3 Note Recirculated air filter cassettes 3 are each secured by 4 plastic screws quick release locks To open press the screws upwards slightly and turn the...

Страница 563: ...pare wheel flap at the front of the bus lever in entrance of front right door Lift the fresh air filter mat up with both hands approximately 6 mm and then pull it out downwards and towards you Clean t...

Страница 564: ...lways be direc ted perpendicular 90 to the condenser surface Then check condenser fans 4 1 for correct operation air drawn in the opposite direction to the arrow 4 2 Note A dirty condenser causes an i...

Страница 565: ...s on the re frigerant compressor when the com pressor is running after approxim ately 10 15 minutes The oil level should be between the marks min and max Note Refrigerator oil is circulated together w...

Страница 566: ...n motion by an un authorised person Implement the ne cessary safeguards to prevent a fall from the roof safety harness scaffold ladder etc Heat up the vehicle interior to 26 C Switch on the air condit...

Страница 567: ...This program provides all the necessary functions control of re circulation pumps and coolant valves for filling and bleeding the heating system coolant circuit completely M20 00 0144 71 Open sealing...

Страница 568: ...ring and after each program stage M20 00 0144 71 Program stage 1 LEDs in buttons 6 7 8 11 light up engine off Add coolant through opening 2 until the expansion tank is completely filled with coolant P...

Страница 569: ...erials e g grass when the auxiliary heating is in operation has recently been in operation or has been operated by the instant heating button preset timer Danger Risk of poisoning and asphyxiation The...

Страница 570: ...nt circuit and fill up the coolant expansion tank completely with coolant Press rocker switch 12 on the con trol panel the LEDs in buttons 7 and 11 go out and the filling program is ended M20 00 0144...

Страница 571: ...Technical data Table of contents Vehicle data 560 Overview of lighting types 561 TRAVEGO TRAVEGO M TRAVEGO L Euro VI 07 2014 GB 559...

Страница 572: ...O 6 080 mm TRAVEGO M 6 080 mm TRAVEGO L 7 110 mm Wheelbase 2nd 3rd axle TRAVEGO M 1 350 mm TRAVEGO L 1 350 mm Turning circle w to w TRAVEGO 21 110 mm TRAVEGO M 21 320 mm TRAVEGO L 23 800 mm Front over...

Страница 573: ...V 5W glass base Clearance lamps front upper LED Turn signals front and rear lower 24V 21W BA15 yellow Designation Value Turn signals rear upper brake lamps reversing lamps rear foglamps 24V 21W BA15 B...

Страница 574: ...tion Value Night lighting LED Service call lamp LED Doorway lamps 24V 10W fes toon Driver s area light ing 24V 10W halo gen Luggage compart ment lamps LED Lavatory lighting 24V 8W fluor escent tube 56...

Страница 575: ...Safety precautions 11 Auxiliary heating unit Activating 288 289 Activating a programmed switch on time 292 293 Deactivating an activated switch on time 294 Programming switch on times 290 291 Programm...

Страница 576: ...Display screen 116 117 Description 123 Menu structure 124 142 Display screen menu control logic 143 144 Distance cruise control Activating while the bus is in motion 245 247 Activating while the bus...

Страница 577: ...the prevention of damage 501 502 Overview 504 505 Safety precautions 499 Electronic brake system EBS System description 52 Electronic Stability Program ESP Deactivating 57 Function description 55 56...

Страница 578: ...iver s area and passenger compartment 287 Hillholder bus stop brake 83 181 I Identification plate 1 2 Ignition lock 108 Instrument cluster 86 87 Instrument cluster display screen Operating function an...

Страница 579: ...system 102 103 Overview of lighting types 561 562 P Panorama camera 166 Parking brake Applying 49 General information 77 159 Releasing 50 Passenger seat Adjusting 195 Passenger seat service set 198 1...

Страница 580: ...rgency equipment 91 Tow bar 93 Towing 26 28 Trailer coupling Maintenance 32 Trailer towing 29 Power supply 32 Transmission shift system Safety precautions 202 203 Transmission shift system GO 250 8 Po...

Страница 581: ...ed limiter Temposet Activating 229 231 Volume adjustment 147 Driver s rest area on board kitchenette intercom 149 Passenger compartment on board PA system 149 Radio 147 148 Telephone 150 W Wheel trims...

Отзывы: