D2-3
ELECTRICAL ADJUSTMENTS
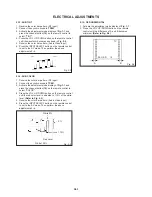
2-13: SUB TINT
1.
2.
3.
4.
5.
6.
Receive the color bar pattern. (RF Input)
Connect the synchro scope to TP803.
Activate the adjustment mode display of Fig. 1-1 and
press the channel button (16) on the remote control to
select "TINT".
Press the VOL. UP/DOWN button on the remote control
until the waveform becomes as shown in Fig. 2-2.
Receive the color bar pattern. (Audio Video Input)
Press the INPUT SELECT button on the remote control
to set to the AV mode. Then perform the above
adjustments 2~4.
Fig. 2-2
2-14: SUB COLOR
1.
2.
3.
4.
5.
6.
Receive the color bar pattern. (RF Input)
Connect the synchro scope to TP801.
Activate the adjustment mode display of Fig. 1-1 and
press the channel button (15) on the remote control to
select "COLOR".
Press the VOL. UP/DOWN button on the remote control
until the red color level is adjusted to 110% of the white
level. (Refer to Fig. 2-3)
Receive the color bar pattern. (Audio Video Input)
Press the INPUT SELECT button on the remote control
to set to the AV mode. Then perform the above
adjustments 2~4.
White 0%
Red Level
White 100%
0%
Fig. 2-3
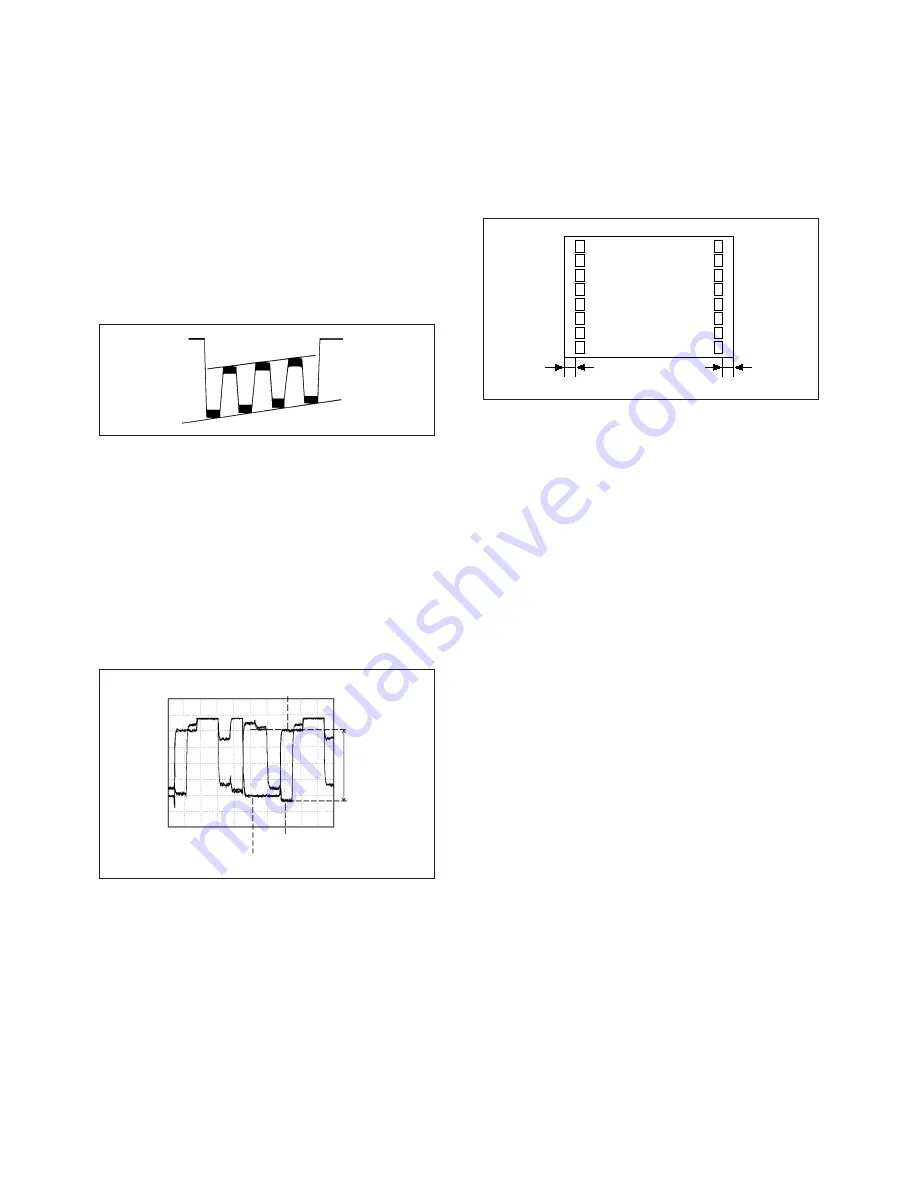
2-15: OSD HORIZONTAL
1.
2.
Activate the adjustment mode display of Fig. 1-1.
Press the VOL. UP/DOWN button on the remote
control until the difference of A and B becomes
minimum. (Refer to Fig. 2-4)
B
A
TV
00 OSD 15
Fig. 2-4
110%
Содержание MVT2136A
Страница 15: ...M546 A5A W045012 SPEC NO O R NO...


