SERVICE MANUAL
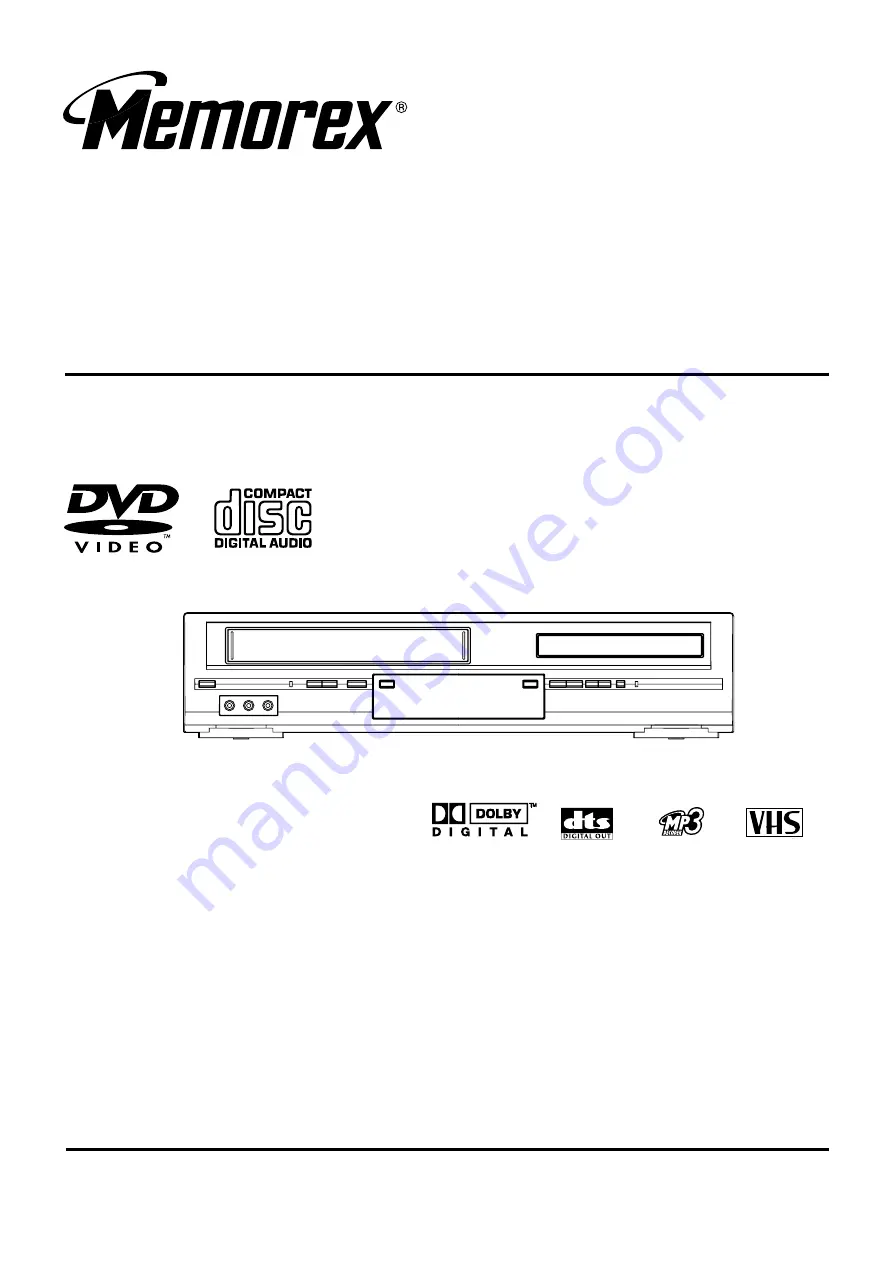
MVD4540C
Design and specifications are subject to change without notice.
ORIGINAL
MFR'S VERSION A
DVD VIDEO PLAYER & VHS VIDEO CASSETTE RECORDER
Страница 1: ...SERVICE MANUAL MVD4540C Design and specifications are subject to change without notice ORIGINAL MFR S VERSION A DVD VIDEO PLAYER VHS VIDEO CASSETTE RECORDER...
Страница 2: ...red Marking The rating sheet and the safety caution are on the rear of the unit PREPARATION OF SERVICING The laser diode used for a pickup head may be destroyed with external static electricity Moreov...
Страница 3: ...transformer for this check Use a leakage current tester Fig 1 or a metering system which complies with Underwriters Laboratories UL 1409 Measure for current from all exposed metal parts of the cabinet...
Страница 4: ...l power company For units intended to operate from battery power or other sources refer to the operating instructions GROUNDING OR POLARIZATION This unit is equipped with a polarized alternating curre...
Страница 5: ...equipment turn off the power and unplug all of the equipment from the wall outlet Failure to do so may cause an electric shock and serious personal injury Read the owner s manual of the other equipmen...
Страница 6: ...DISCHARGE UNIT NEC SECTION 810 20 ANTENNA LEAD IN WIRE GROUNDING CONDUCTORS NEC SECTION 810 21 GROUND CLAMPS POWER SERVICE GROUNDING ELECTRODE SYSTEM NEC ART 250 PART H GROUND CLAMP ELECTRIC SERVICE...
Страница 7: ...move the DVD Deck with no soldering the Laser may be damaged WHEN REPLACING DVD DECK When the removal of the DVD Deck When the installation of the DVD Deck Remove all the soldering on the short circui...
Страница 8: ...SSEMBLY INSTRUCTIONS Remove the screw 1 of the Deck Chassis and remove the Loading Motor Refer to Fig 2 Rotate the Pinch Roller Cam in the direction of the arrow by hand to slacken the Video Tape Rota...
Страница 9: ...i DEMODULATOR TUNER JACK POWER PRINTED CIRCUIT BOARDS DVD VCR OPERATION LOADING MOTOR SW SCHEMATIC DIAGRAMS MPEG MICON DSP MEMORY RF AMP DSP AUDIO VIDEO Y C AUDIO CCD HEAD AMP SYSCON TUNER JACK OPERAT...
Страница 10: ...Front Motor 3 Heads Video Head 4Head FM Audio Head 2Head Audio Control Mono Yes Erase Full Track Erase Yes Erase Normal Audio Track Erase No Tape Rec PAL Speed NTSC SP SLP Play PAL NTSC SP LP SLP Fast...
Страница 11: ...RGB Signal Output Level Audio Signal Input Level Microphone Input Level Line 8 dBm 50k ohm VCR 0dBm 0 775Vrms Output Level Line 8 dBm 1k ohm VCR 0dBm 0 775Vrms 12dBm 1k ohm DVD 20dBFs 0dBFs 2 0Vrms D...
Страница 12: ...sword Lock Unlock Yes Rating Level Yes Other Yes OSD Language Set up Language Yes Output RGB Composite No Open Yes Close Yes No disc Yes Reading Yes Play Yes Still Pause Yes Stop Yes Prohibit Mark Yes...
Страница 13: ...s G 11 OSD Language DVD OSD English French Spanish VCR OSD English French Spanish G 12 Clock Timer Calendar 1990 1 1 2081 12 31 and Timer Timer Events 8 Program 1 Month Back up One Touch Recording Max...
Страница 14: ...ETURN Yes PLAY Yes STOP Yes PAUSE STILL STEP Yes FF Cue SEARCH Yes REW Review SEARCH Yes REC OTR Yes SKIP INDEX Yes SKIP INDEX Yes AUDIO AUDIO SELECT Yes ANGLE COUNTER RESET Yes SUBTITLE ATR Yes PLAY...
Страница 15: ...Search Yes SQPB No CATV Yes Energy Star No MTS SAP Yes CM Skip 30sec x 6 Times No Copy Disc to Tape No G 16 Accessories Owner s Manual Language English Spanish w Guarantee Card Yes Remote Control Uni...
Страница 16: ...Yes Digital Audio DVD Signal Only Video Input Option No Audio Input Option No RF Input Output Yes Euro Scart No AC Inlet No Indicator LED Power No Rec No T Rec No TV VCR No DVD Yes RED VCR Yes RED Sur...
Страница 17: ...p Cabinet Front Cabinet 2 2 2 2 2 Operation PCB C 2 3 3 2 1 2 3 4 5 6 7 8 9 10 Make the short circuit on the position as shown Fig 1 3 using a soldering If you remove the DVD Deck with no soldering th...
Страница 18: ...emove the FE Head Move the Cassette Holder Ass y to the back side Remove the 2 screws 2 Remove the 2 screws 3 Disconnect the following connectors CP101 CP102 CP3001 Remove the VCR Deck in the directio...
Страница 19: ...Locker R 1 2 3 Link Unit 2 4 LINK UNIT Refer to Fig 2 4 Set the Link Unit to the Eject position Unlock the support 1 Remove the A side of the Link Unit first then remove the B side 1 2 3 Fig 2 4 Fig...
Страница 20: ...Tension Band Tension Arm Ass y 3 1 Tension Holder Tension Connect NOTE 1 2 3 In case of the Tension Band installation note the direction of the installation Refer to Fig 2 7 C In case of the Tension...
Страница 21: ...oves Refer to Fig 2 9 A Do not adhere the stains on it When you install the reel clean the shaft and grease it FG 84M If you do not grease noise may be heard in FF REW mode After installing the reel a...
Страница 22: ...ER PINCH ROLLER BLOCK P5 ARM ASS Y Refer to Fig 2 10 A Unlock the support 1 and remove the Cassette Opener Remove the Pinch Roller Block and P5 Arm Ass y 1 2 Fig 2 10 A 1 Cassette Opener P5 Arm Ass y...
Страница 23: ...DD Unit Capstan Belt Fig 2 14 1 2 Capstan Holder 2 2 Fig 2 15 A NOTE In case of the Pinch Roller Cam and Main Cam installation install them as the circled section of Fig 2 15 B so that the each marker...
Страница 24: ...tallation install correctly as the circled section of Fig 2 18 C 1 2 3 A OK NG B P4 Cap Cassette Opener Fig 2 18 B Fig 2 18 C Cassette Guide Post Cassette Guide Post 2 17 Remove the Polyslider Washer...
Страница 25: ...s are needed if the disassemble is done If the repair is needed except listed parts replace the DVD MECHA ASS Y NOTE 1 2 In case of the Main Chassis Ass y install it from 1 to 4 in order Refer to Fig...
Страница 26: ...emove the Pulley Gear Remove the Main Gear Pulley Gear 2 Fig 3 4 A 3 5 CLAMPER ASS Y Refer to Fig 3 5 A Press the Clamper and rotate the Clamper Plate clockwise then unlock the 3 supports 1 Remove the...
Страница 27: ...from 1 to 4 in order Fig 3 7 E Main Chassis Ass y Bottom Side Check Hook Check Hook Check Hook Check Hook Loosen the wire in the direction of the arrow NOTE 1 2 3 4 When pushing the Rack Feed in the d...
Страница 28: ...sing a blower type IC desoldering machine Refer to Fig 4 2 2 Fig 4 2 NOTE Do not add the rotating and the back and forth directions force on the IC until IC can move back and forth easily after desold...
Страница 29: ...8 Thin tip Soldering Iron NOTE When the IC leads are bent during soldering and or repairing do not repair the bending of leads If the bending of leads are repaired the pattern may be damaged So alway...
Страница 30: ...op Frequency Generator Front Loading Switch Frequency Modulation Frequency Sub Carrier Forward Generator Ground High Pass Filter I K L M N O P R S H SW Hz IC IF IND INV KIL L LED LIMIT AMP LM LDM LP L...
Страница 31: ...or Separation Transistor Tracking Trick Playback Test Point Unregulated Volt Voltage Controlled Oscillator Video Intermediate Frequency Vertical Pulse Voltage Display Video Playback Variable Resistor...
Страница 32: ...ion of DVD Refer to the PREPARATION FOR SERVICING NOTE Although the DVD is connected the DVD mode cannot be selected Adjust the PG SHIFTER automatically Refer to the ELECTRICAL ADJUSTMENT CH UP STOP 2...
Страница 33: ...n those parts in contact with the tape Clean the rubber and parts which the rubber touches Replace when rolling becomes abnormal Clean the Head T Brake Band Clutch Ass y Idler Arm Ass y C3 1 CONFIRMAT...
Страница 34: ...elow Audio Control Head 2 TAPE RUNNING SYSTEM When cleaning the tape transport system use the gauze moistened with isopropyl alcohol 3 CYLINDER Wrap a piece of chamois around your finger Dip it in iso...
Страница 35: ...5 6 7 8 9 10 11 12 The unit will now have the correct DATA for the new MEMORY IC ADDRESS is now selected and should blink Using the Tracking or button on the remote step through the ADDRESS until req...
Страница 36: ...000 APJG024A00 APJG100A00 Adapter Dial Torque Gauge 10 90gf cm Dial Torque Gauge 60 600gf cm Post Adjustment Screwdriver X Value Adjustment Screwdriver Master Plane Reel Disk Height Adjustment Jig Tor...
Страница 37: ...N POST POSITION 1 2 3 Set to the PLAY mode Adjust the adjusting section for the Tension Arm position so that the Tension Arm top is within the standard line of Main Chassis While turning the S Reel cl...
Страница 38: ...o the Stop mode While unplug the AC cord when the Pinch Roller Block is on the position of Fig 1 4 A Move the Idler Ass y from the T Reel Install the Torque Gauge JG002E and Adapter JG002B on the T re...
Страница 39: ...r Refer to item 2 1 Confirm and adjust the Audio Control Head Refer to item 2 2 Connect CH 1 of the oscilloscope to TP3002 CH 2 to TP101 and CH 3 to HOT side of Audio Out Jack Playback the VHS Alignme...
Страница 40: ...T PARTS LOCATION GUIDE 1 2 3 4 5 6 7 8 9 10 1 Tension Connect 2 Tension Arm 3 Guide Roller 4 Audio Control Head 5 X value adjustment driver hole 6 7 8 9 10 P4 Post T Brake Spring T Reel S Reel Adjusti...
Страница 41: ...the alignment tape JG001B Press and hold the Tracking Auto button on the remote control more than 2 seconds to set tracking to center Press both CH UP button on the set and the STOP button on the set...
Страница 42: ...2 VCR PCB CD501 OPERATION PCB DVD PCB DVD DECK CD2301 CD2001 CP2601 CP2603 CP2602 CP8101 CD4002 V651 J8003 J8004 J8005 OS651 TU301 OS8001 J8007 J8006 J8008 J8001 CP8001 S501 S502 CP651 CP501 TP101 TP7...
Страница 43: ...DIO L DVD AUDIO R 2 2 I CLK I DAT S 24C04BFJ TB 3 3V 1 9V TR FO SPDL SLED S MUTE ADC IN 5 6 7 TRACK FOCUS_PWM SPINDLE SLED_PWM SPDL_SENS Loading Moter Spindle Moter Sled Moter Pick up DEFECT LINK MIRR...
Страница 44: ...MIX SYNC SEP VCA CLAMP 1 2 FBC Chara INS 6dB P R P R V AGC L101 CLAMP EQ AMP LINE AMP MUTE ALC Y C_CS Y C_DATA Y C_CLK H AMP_SW C ROTARY H SW ENV DET COMP DUMMY_V SYNC C SYNC FRONT_V_IN TUNER_V TO_NOR...
Страница 45: ...TL AT 5 2V TAB SW 35 REC SAFTY SW RESET 77 1 2 3 IC3003 PST3231NR AT 5V SYSTEM RESET 5 6 EEPROM IC3099 S 24C02BFJ TB Y C DATA 54 Y C CLK 53 Y C_DATA Y C_CLK C SYNC 111 C SYNC SCL SDA COMP 101 COMP SEG...
Страница 46: ...SW Q654 SEG8 SW Q655 Q656 Q657 Q658 3G SW Q659 Q660 2G SW Q661 Q662 Q663 Q664 1G SW Q665 SEG7 SW SEG1 SW SEG3 SW SEG2 SW SEG4 SW SEG5 SW SEG6 SW 4G T_SHT_LED SEG9 SEG7 SEG8 SEG5 SEG6 SEG4 3G TV VCR_L...
Страница 47: ...LK IIC_DATA AUDIO_OUT_R ST_SELECT FRONT_A_IN L FRONT_A_IN R HF2 HF_COM FSC HF1 FROM_NORMAL_A TO_NORMAL_A TUNER JACK SYSCON Y C AUDIO CCD HEAD AMP 46 32 36 P CON 5V INPUT SW AMP AMP OUTPUT SW PNR DEM B...
Страница 48: ...TE SW 4 1 DVD VCR SW IC8005 MM1501XNRE 6 2 5 3 Q8005 MUTE SW Q8007 MUTE SW SYS_MUTE Y C VIDEO OUT SW V OUT POWER P CON 5V TUNER JACK BLOCK DIAGRAM Vcc RF_CH_SW 2 Q301 MUTE SW CP8001 2 DVD H Y G 1 3 4...
Страница 49: ...ON 5V SW Q506 M CON POWER SW Q504 M CON 5V SW AT 12 6V OPERATION DISPLAY TUNER JACK P CON 5V P CON 12V AT 5 2V POWER FAIL VCR POWER ON L AT 5V M CON DVD POWER CTL 32V P CON 5V AT 5 2V SYSCON SYSCON SY...
Страница 50: ...C2306 C2314_1 C2310_1 IC2301 C2624 C2625 C2628 C2629 C2633 R2614 R2613 R2612 C2616 R2609 B2604 B2605 C2643_1 C2644_1 C2646_1 C2655 R2646 R2645 C2614 C2613 C2610 C2612 C2608_1 R2601 R2615 Q2601 R2618...
Страница 51: ...C751 R723 C740 W232 C731 R704 C722 W223 C721 W224 C720 C713 R703 C719 R712 C759 R719 C152 C753 C750 C728 C716 C712 C725 C756 C726 C727 C742 W229 W188 OS8001 J8007 J8006 J8008 SW8001 J8001 CP8001 C8062...
Страница 52: ...R113 C117 R124 C133 R3009 Q3007 Q3003 C129 R141 R143 R683 C3041 R136 R3035 R3055 R671 R126 R119 IC3003 IC8005 C3002 IC3099_1 R3021 C124 C137 C134 C120 C132 C146 C148 C151 R3038 I C 7 0 1 C762 R727 C7...
Страница 53: ...00 D D RE BLUE OR BL SW2 CD2301 M2602 M2601 SW1 CD2302 PRINTED CIRCUIT BOARDS F 7 F 8 LOADING MOTOR INSERTED PARTS SOLDER SIDE LOADING MOTOR CHIP MOUNTED PARTS SOLDER SIDE SW SOLDER SIDE...
Страница 54: ...3 HA15 DUPTD0 RFA_SCLK HA4 AAF_CE HA5 HA16 DUPRD0 AAF_FE HA6 HA14 AAF_TE HA7 HA13 VR_SEL AAF_PI HA8 HA12 TRAY_OPEN VR_SEL HA9 FNN HA10 HD15 TOUT_SW FNP HA11 HA11 TRAY_CLOSE VBIASS0 HA12 HD7 TIN_SW VBI...
Страница 55: ...HD12 HA20 RAMCS1 SD_D9 SD_D6 RAMRAS RAMCAS HD4 WR SD_BA0 RAMDQM SD_D8 SD_D7 RAMWE RESET RAMCLK HA0 HA1 HD11 RAMDQM HA2 HA3 RAMDQM RAMWE HA4 HD3 HA5 RAMCLK RAMCAS HA6 HA7 HD10 HA19 RAMRAS HA8 HA9 RAMCS...
Страница 56: ...2312 5 6K 1 B2605 FCM2012H 102T04 B2602 FCM2012H 102T04 B2601 FCM2012H 102T04 B2604 FCM2012H 102T04 B2603 FCM2012H 102T04 OF PRINTING AND SUBJECT TO CHANGE WITHOUT NOTICE NOTE THIS SCHEMATIC DIAGRAM I...
Страница 57: ...ING PLAYBACK MEASURED WITH THE DIGITAL TESTER NOTE THE DC VOLTAGE EACH PART WAS JG038 JG040 JG042 JG048 JG035 JG034 JG036 JG030 JG033 JG031 JG037 JG013 L8103 1uH 0305 L8102 1uH 0305 L8105 1uH 0305 L81...
Страница 58: ...NANCE SIGNAL PLAYBACK COLOR SIGNAL PLAYBACK LUMINANCE SIGNAL AUDIO SIGNAL PB AUDIO SIGNAL REC TUNER VIDEO SIGNAL COMP H SW ENV DET H AMP_SW C ROTARY Y C_CS Y C_DATA Y C_CLK P CON 5V P CON 5V AUDIO_MUT...
Страница 59: ...K TV VCR SEG_1 4FSC POWER_MUTE L Y C_DATA SYS_MUTE Y C_CLK DVD_POWER_CTL RF_CH_SW 5G CS BS_LED SW_V_OUT 4G VSC_LED AV_SW1 3G TV VCR_LED SCL AV_SW1 2G DUB REC_LED SDA Y C_CS 1G VCR T REC_LED AFT S CURV...
Страница 60: ...3 3K R8011 100 1 4W R8059 4 7K 1 4W R8056 150 R8032 150 R8017 2 2K R8016 2 2K R8014 100 R8045 100K R8046 100K R8036 56 1 4W R8041 10K R8028 10K R8029 10K R8040 47K R8003 1 5K R306 22 R301 33K R304 1K...
Страница 61: ...K R683 560 R651 1001 4W R653 330 1 4W R659 1 5K R658 1 8K R657 2 7K R674 180 R675 820 R662 180 R672 180 R673 180 R664 820 R669 820 R668 180 R663 180 R665 180 R666 180 R661 820 R670 180 R667 180 R671 8...
Страница 62: ...670BM L MPB E HI FI DEMODULATOR IC 1 10 11 12 13 14 15 16 17 18 19 2 20 21 22 23 24 25 26 27 28 29 3 30 31 32 33 34 35 36 37 38 39 4 40 41 42 43 44 45 46 47 48 49 5 50 51 52 53 54 55 56 57 58 59 6 60...
Страница 63: ...5V ECQUL C526_1 0 0022 250V KY C516_1 0 0022 250V KY C509 0 018 M C510 0 022 B C531 560P 500V B C534 1 F C520 1 F C524 0 022 B C508 0 022 B C515 0 01 500V B C513 220P 2KV R C525 680P 2KV R R549 100K 1...
Страница 64: ...LTL 1CHEE 002A DVD LED CD681 2H051202 DURING PLAYBACK MEASURED WITH THE DIGITAL TESTER NOTE THE DC VOLTAGE EACH PART WAS OF PRINTING AND SUBJECT TO CHANGE WITHOUT NOTICE NOTE THIS SCHEMATIC DIAGRAM IS...
Страница 65: ...LOADING MOTOR PCB LOADING MOTOR SW SCHEMATIC DIAGRAM G 24 G 23 SW PCB SSS 13 2 SW1 GND SW SW 2 CLOSE SW 1 OPEN LOADING MOTOR LOADING MOTOR DED003 PCB610 DED002 PCB640 BCZ3B52 M2603 CD2302 2H052601 M M...
Страница 66: ...6 5 4 3 2 1 24 23 22 21 20 19 18 17 16 15 14 13 12 11 10 9 8 7 6 5 4 3 2 1 3 2 1 4 2 1 3 4 AUDIO PB AUDIO REC FSC VEDA46 VMD335 PCB010 VCR PCB VMD343 PCB130 DVD PCB CD8001 FFC CVBS GND U B GND V R GND...
Страница 67: ...schematic diagram NOTE 1 2 3 6 7 10 9 MPEG MICON DSP AUDIO VIDEO 4 200ns 100mV 10ns 1 0V 200 s 500mV 200ns 200mV 500 s 1 0V 500 s 1 0V 10 s 100mV 10 s 100mV MEMORY RF_AMP DSP 5 10 s 200mV 8 10 s 200mV...
Страница 68: ...diagram NOTE PB 200 s 1 0V 22 POWER ON 50ns 1 0V 23 SYSCON PB 5ms 1 0V 21 PB 500 s 1 0V 24 PB 5ms 500mV 25 PB 5ms 2 0V 27 10 s 200mV 32 TUNER JACK 41 PB 500 s 100mV TUNER JACK 42 PB 500 s 100mV PB 5 s...
Страница 69: ...WAVEFORMS H 3 The following waveforms were measured at the point of the corresponding balloon number in the schematic diagram NOTE 45 PB 200ns 20mV PB 5 s 5 0V 44 TUNER JACK...
Страница 70: ...03 117 115 PCB130 DVD PCB ASS Y 113 207 113 207 201 210 201 210 120 109 204 204 204 111 205 205 105 102 103 106 108 110 110 202 204 204 112 PCB010 VCR PCB ASS Y 209 116 116 209 PCB270 OPERATION PCB AS...
Страница 71: ...7 300 317 336 346 345 319 320 AB 316 318 347 AB AB AB AA AA AA AA AB AB AE AE AC AC CD1501 M101 304 CD1502 510 348 Applying positions AA AB AC AD and AE for the grease are displayed for this section C...
Страница 72: ...A AA AA AA AA CD1501 CD1502 AA 339 AA AA I2 2 Applying positions AA AB AC AD and AE for the grease are displayed for this section Check if the correct grease is applied for each position NOTE PART NO...
Страница 73: ...T NAME Y315131000 610 608 M2603 704 612 614 615 613 602 609 611 AA AB AB AA AA AA AA AA AA AA AA Do not replace the parts Because minute adjustments are needed if this condition is disassembled furthe...
Страница 74: ...13 753WUA0065 SPRING EARTH 114 702WSA0212 CABINET TOP 115 712WPB0162 PLATE TRAY FRONT 116 8965TS1010 CUSHION 65TS10 10 10x20x25 117 7235630010 SHEET DVD 118 761WPA0262 HOLDER DECK TOP 119 723000A698 S...
Страница 75: ...2 1543Q02014 HEAD FULL ERASE VTR 1X2ERS11 154 314 85OA400235 TENSION ARM ASS Y 2 M101 1596S98001 MOTOR LOADING MDB2B66 315 85OA400231 INCLINED BASE S UNIT M2001 1510S98042 CAPSTAN DD UNIT F2QVB73 316...
Страница 76: ...4 92P100091A FRAME MAIN 615 92P100100A TRAY 616 92P100089A RACK FEED 1 617 92P100090A RACK FEED 2 618 92P300020A SPRING RACK FEED 701 811022680U SCREW TAP TITE P BIND 2 6x8 702 814011723U SCREW PAN M1...
Страница 77: ...E SILICON 1N4005 EIC Q663 TNYJC05001 COMPOUND TRANSISTOR DTC124EKAT146 D514 D97U01201B DIODE ZENER MTZJ12B T 77 Q664 TNYJC05001 COMPOUND TRANSISTOR DTC124EKAT146 D515 D28T21DQN4 DIODE SCHOTTKY 21DQ04N...
Страница 78: ...IC CAPACITOR SW690 0504R01T38 SWITCH TACT EVQ11L05R CMPP METAL POLYPROPYLENE CAPACITOR SW3001 0508S11001 SWITCH LEAF LSA 1144EAU SW8001 0510Y24001 SWITCH SLIDE SK42H01G9A P C BOARD ASSEMBLIES PCB010 A...
Страница 79: ...M2D8 11H SPEC NO O R NO K462001...