background image


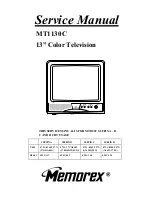
Service Manual


MT1130C


13” Color Television

THIS SERVICE MANUAL IS FOR MT1130C SUFFIX A , B ,

                        C AND D CRT USAGE

SUFFIX A

SUFFIX B

SUFFIX C

SUFFIX D

V451

5721-014ST37N
(37GDA86X)

5721-37CN030T
(370KSB22(SYB))

5721-026TT37N
(A34JFQ90X)

5721-030ZT37N
(A34JXV70X)

DY501

4993-117

4993-052

4993-110

4993-124

REMOTE SENSOR

VOLUME

CHANNEL

POWER

DOWN UP

DOWN UP

Содержание MT1130C

Страница 1: ...R MT1130C SUFFIX A B C AND D CRT USAGE SUFFIX A SUFFIX B SUFFIX C SUFFIX D V451 5721 014ST37N 37GDA86X 5721 37CN030T 370KSB22 SYB 5721 026TT37N A34JFQ90X 5721 030ZT37N A34JXV70X DY501 4993 117 4993 052 4993 110 4993 124 REMOTE SENSOR VOLUME CHANNEL POWER DOWN UP DOWN UP ...

Страница 2: ...ing up the adjustment mode menu screens shown below 2 From the menu screen press the or button on the Remote Control to select the item to be adjusted 3 Press the MENU button on the Remote Control to enter adjustment mode for the item selected and the display shown below appears Example 4 Use the or button on the Remote Control to adjust the data for the item selected 5 When adjustment has been co...

Страница 3: ...utton and press the Q REV button repeatedly four times 2 If use the User Remote Control at the Pass Number entry menu while holding down VOLUME DOWN button on the TV set and press number 3 button on the remote control repeatedly four times 3 The blinking will be replaced with after each press 4 Release the SHIFT button or VOLUME DOWN button and then press MENU button V BLOCK SET menu will be appea...

Страница 4: ...SUFFIX B V451 A34JXV70X CRT SUFFIX D CHASSIS REMOVAL 1 Remove 4 screws 183 from Cabinet Back AB and remove Cabinet Back from rear 2 Discharge anode lead at CRT chassis ground through a 10kohm resistor 3 Disconnect anode lead from CRT 4 Disconnect CRT Socket P C board PCB 2 from CRT V451 5 Disconnect 3 connectors CN501 DY501 CN601 L601 and LCN801 from Main P C board PCB 1 6 When replacing chassis r...

Страница 5: ... TV Channel Signal Generator 2 Connect wire of DC Digital Voltmeter to TP6 and wire to TP4 Figure 1 3 Adjust T202 so that the DC Digital Voltmeter reading is 2 0V 0 1V FIG 1 SUB COLOR AND SUB TINT ADJUSTMENT 1 Connect TV Test Pattern Generator NTSC signal Color Bar signal 70dB u channel 6 to EXT Antenna Terminal TE1 through TV Channel Signal Generator 2 Connect positive lead of Oscilloscope to TP1...

Страница 6: ...d in the static convergence procedure 3 Set the Contrast control to minimum position and Brightness control as far maximum as possible without causing the picture to bloom 4 Apply green raster signal from Dot Bar Generator to receiver 5 Loosen the deflection yoke clamp screw and pull the deflection yoke toward the rear of the CRT 6 Begin the following adjustment with the tabs on the round purity m...

Страница 7: ...tely converged at these points readjust the spacing between the two tabs to complete convergence of the magenta and green dots lines 10 If necessary repeat step 7 8 and 9 until proper convergence is obtained To prevent accidental mis adjustment of the magnets apply a stripe of paint across all six rings and onto the neck of the CRT FIG 4 DYNAMIC CONVERGENCE ADJUSTMENT Refer to Figure 5 Dynamic con...

Страница 8: ...sformer fully counterclockwise 6 Adjust the cutoff level of the color which appeared first by remote control refer to page 4 for remote control key combination and position so that voltage between TP16 and TP15 blue TP14 green or TP13 red is 20 1V 7 Turn the Screen control located under the flyback transformer clockwise so that the bright color line can just be seen 8 Adjust cutoff levels other th...

Страница 9: ...s 2 3 and 4 below refer to page 3 for Adjustment By Remote Control Method 2 Go to Adjustment Mode 2 by remote control 3 Select V AMP from Adjustment Mode 2 menu screen 4 Adjust V AMP level by using or button on remote control so that picture fills the picture opening from top to bottom and is proportionate to the width RF AGC ADJUSTMENT 1 Connect TV Channel Signal Generator to Antenna Terminal TE ...

Страница 10: ...TEST POINT 11 ...

Страница 11: ...4 8 4 8 4 8 3 3 2 6 2 5 TERMINAL No 21 22 23 24 25 26 27 28 29 30 Volt 2 3 0 8 5 1 5 2 5 6 8 3 3 0 2 0 2 1 1 0 TERMINAL No 31 32 33 34 35 36 37 38 39 40 Volt 0 7 1 2 6 9 5 4 0 0 2 8 3 2 3 1 3 0 6 3 TERMINAL No 41 42 43 44 45 46 47 48 49 50 Volt 3 1 4 9 4 7 2 4 2 0 9 0 4 0 9 0 8 4 8 2 TERMINAL No 51 52 53 54 55 56 Volt 0 0 0 0 2 8 5 2 5 8 0 0 IC311 TERMINAL No 1 2 3 Volt 12 1 0 0 9 0 IC501 TERMINAL...

Страница 12: ...CHASSIS WAVEFORM 13 ...

Страница 13: ...R561 3 3k 5W CEM IC601 STR30130 R607 4 7k C605 0 01 250V KH C604 0 01 250V KH Q601 2SC945 P C616 0 01 250V R610 1 8k 5W CEM C602 0 01 250V KH D603 1N4002E D602 1N4004E C611 1000 25V R611 680 1 2W D605 RD12ES2 R604 12k 1 4W R605 330k 1 4W C608 22 160V R606 47 1 4W C606 0 01 250V C607 470 200V R603 270 10W CEM R601 2 7 5W MTL D601 RS104 TH601 CN601 L601 DEGAUSSING RL601 RELAY FU601 4A 125V P1 AC120V...

Отзывы: