Rev 1.8
Mellanox Technologies
17
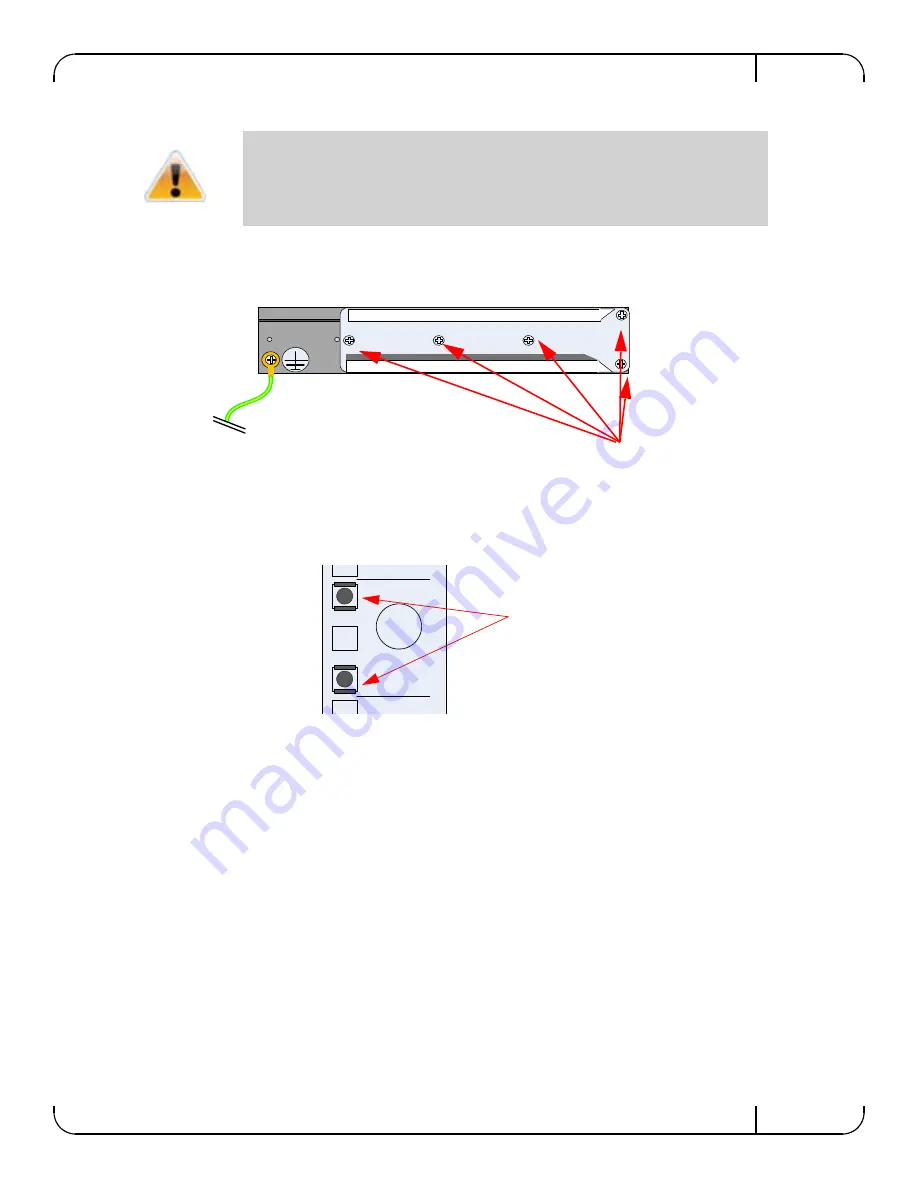
4. Screw the rails onto the switch. Use 5 flat head screws to connect each rail to the switch.
Figure 8: Screwing on the Rail
5. Clip the 4 caged nuts into the holes in the rack you will be using to connect the rail slides.
Check that both sides of the switch, left and right, are the same level in the rack.
Figure 9: Inserting the Caged Nuts
6. Clip 4 more caged nuts into the holes in the rack you will be using to connect the brackets.
Check that both sides of the switch, power side and connector side, are at the same level in the
rack.
7. Using two of the bolts for each rail slide, install the rail slides.
8. Tighten the bolts to 9.2 Nm or 81.5 pound inches. If the power cable is on this side of the
switch, feed the power cable into the slot in the rail slide before screwing it to the vertical sup-
port.
The side of the switch with these brackets will be the side that is even with or very
close to the vertical rack support.
5 screws
20
The caged nuts
are separated by
a single space


