background image

VPI Adapter Card Installation

Rev 1.0

Mellanox Technologies

30

To remove a cable, disengage the locks and slowly pull the connector away from the port recepta-
cle. Both LED indicators will turn off when the cable is unseated.

4.4.3.1 Inserting a Cable into the Adapter Card

1. Support the weight of the cable before connecting the cable to the adapter card. Do this by using 

a cable holder or tying the cable to the rack.

2. Determine the correct orientation of the connector to the card before inserting the connector. Do 

not try and insert the connector up side down. This may damage the adapter card.

3. Insert the connector into the adapter card. Be careful to insert the connector straight into the 

cage. Do not apply any torque, up or down, to the connector cage in the adapter card.

4. Make sure that the connector locks in place. 

4.4.3.2 Removing a Cable from the Adapter Card

1. Pull on the latch release mechanism thereby unlatching the connector and pull the connector out 

of the cage. 

2. Do not apply torque to the connector when removing it from the adapter card.

3. Remove any cable supports that were used to support the cable’s weight.

Cables, especially long copper cables, can weigh a substantial amount. Make sure that 
the weight of the cable is supported on its own and is not hanging from the adapter 
card. 

Содержание ConnectX-2 Series

Страница 1: ...www mellanox com ConnectX 2 LX VPI Single Port QSFP InfiniBand and Ethernet Adapter Card User Manual P N MHQA19 XSR MHQA19 XTR MHQA19 XNR Rev 1 0...

Страница 2: ...AULTS OF ANY KIND AND SOLELY FOR THE PURPOSE OF AIDING THE CUSTOMER IN TESTING APPLICATIONS THAT USE THE PRODUCTS IN DESIGNATED SOLUTIONS THE CUSTOMER S MANUFACTURING TEST ENVIRONMENT HAS NOT MET THE...

Страница 3: ...rmware 20 3 1 Driver Software 20 3 2 FlexBoot 20 3 3 Updating Adapter Card Firmware 20 Chapter 4 VPI Adapter Card Installation 22 4 1 Hardware and Software Requirements 22 4 2 Installation Instruction...

Страница 4: ...Rev 1 0 Mellanox Technologies 4 Appendix F Advertencias de seguridad para la instalaci n Warnings in Spanish 43...

Страница 5: ...Indications 16 Figure 4 I2C Connector 17 Figure 5 Flash Jumper 18 Figure 6 Support Download Assistant 21 Figure 7 Hardware Devices 23 Figure 8 PCI Device 24 Figure 9 MHQA 19 Mechanical Drawing 32 Fig...

Страница 6: ...Cards Part Numbering Key 12 Table 5 LEDs 16 Table 6 Jumper Configuration 18 Table 7 MHQA19X STN R 18 Table 8 Hardware and Software Requirements 22 Table 9 Specifications for MHQA19 X ST C 31 Table 10...

Страница 7: ...ConnectX 2 Card User Manual Rev 1 0 Mellanox Technologies 7 Revision History This document was printed on 11 17 10 Table 1 Revision History Table Date Rev Comments Changes Nov 2010 1 0 Initial draft...

Страница 8: ...ww mellanox com Downloads Firmware Document Conventions When discussing memory sizes MB and MBytes are used in this document to mean size in mega bytes The use of Mb or Mbits small b indicates size in...

Страница 9: ...rough a Mellanox approved reseller should first seek assistance through their reseller Firmware and Software Updates The Mellanox support downloader contains software firmware and knowledge database i...

Страница 10: ...v1 2 1 compliant Compliant with QSFP MSA spec Rev 1 0 Compatible with copper cables and optical cables with the use of QSFP connectors Support for SFP cables is available through QSA Quad to Serial ad...

Страница 11: ...rds List Ordering Part Number OPN PCI Express SERDES Speed Data Transmis sion Rate of ports Short Tall Bracket RoHS Adapter IC Part Number MHQA19 XTR PCIe Gen2 5 0 GT s 40 Gb s QDR 1 port Tall R 6 MT2...

Страница 12: ...0GT s field G blank to indicate first generation card field X X to indicate no on board memory field B T to indicate a tall bracket and field R R to indicate RoHS R6 with no exemptions compliance Tabl...

Страница 13: ...fety warnings in Spanish see Advertencias de seguridad para la instalaci n Warn ings in Spanish on page 43 1 Installation Instructions 2 Over temperature 3 During Lightning Electrical Hazard Read all...

Страница 14: ...ch they should be carefully attached to or detached from the connectors Refer to the cable manufacturer for spe cial warnings and instructions This equipment should be installed replaced or serviced o...

Страница 15: ...part of the Mellanox OFED for Linux package under sbin See the Mel lanox OFED for Linux User s Manual available at http www mellanox com Home Products Adapter IB VPI SW Running sbin connectx_port_conf...

Страница 16: ...D is blink ing it indicates a problem with the physical link The yellow LED when lit indicates a valid data activity link this is the logical link The yellow LED lights up when the network is discover...

Страница 17: ...F 8438i Specification for QSFP Quad Small Formfactor Pluggable Transceiver 2 4 Memory The adapter cards support multiple memory devices through the PCI Flash and I2C compatible interfaces 2 4 1 System...

Страница 18: ...Default Configuration Comments Flash present not present connection open Flash present connection shorted Flash not present Figure 5 Flash Jumper connection open Flash present Header 1x2 Table 7 MHQA1...

Страница 19: ...D W Tag 0x11 0x91 102 Length 7 0 LSB 0x97 103 Length 15 8 MSB 0x00 104 VPD Keyword V1 STR EFI Driver version 106 Length 0x6 107 Data N A STR_SPC 113 VPD Keyword YA STR Asset Tag 115 Length 0x20 116 Da...

Страница 20: ...www mellanox com Products Adapter IB VPI SW Flexboot 3 3 Updating Adapter Card Firmware Each card is shipped with the latest version of qualified firmware at the time of manufacturing Firmware is upd...

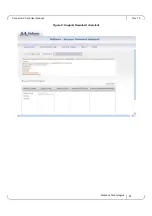
Страница 21: ...ConnectX 2 Card User Manual Rev 1 0 Mellanox Technologies 21 Figure 6 Support Download Assistant...

Страница 22: ...roper configuration is acceptable for connection If the card is installed in a PCI slot with less lanes than the card requires then the adapter card will not provide the optimum data transfer 4 3 Set...

Страница 23: ...ce Manager Click start Run and then enter devmgmt msc 2 Check the Device Manager under Other devices for PCI Device Windows 2003 or InfiniBand Controller Windows 2008 R2 Figure 7 Hardware Devices 3 Se...

Страница 24: ...es window 6 Click the Details tab and select Device Instance Id Windows 2003 or Hardware Ids Windows 2008 R2 from the Property pull down menu Figure 8 PCI Device 7 In the Value display box check the f...

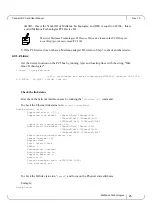
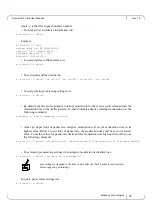
Страница 25: ...unning the ifconfig a command To check the Ethernet link status run ethtool interface Host ethtool eth1 Supported ports TP Supported link modes 10baseT Half 10baseT Full 100baseT Half 100baseT Full 10...

Страница 26: ...bleshooting driver installation please check Mellanox OFED driver user manual http www mellanox com Downloads InfiniBand VPI SW If you need to update your card firmware download the new firmware Unzip...

Страница 27: ...time to the traffic pattern To enable disable adaptive interrupt moderation use the following command ethtool C eth x adaptive rx on off Above an upper limit of packet rate adaptive moderation will se...

Страница 28: ...odinfo mlx4_en To set non default values to module parameters the following line should be added to the file etc modprobe conf options mlx4_en param_name value param_name value Ethernet Network Tuning...

Страница 29: ...e 4 4 3 Cable Installation All cables can be inserted or removed with the unit powered on To insert a cable press the con nector into the port receptacle until the connector is firmly seated The GREEN...

Страница 30: ...side down This may damage the adapter card 3 Insert the connector into the adapter card Be careful to insert the connector straight into the cage Do not apply any torque up or down to the connector c...

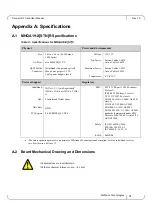
Страница 31: ...Support Regulatory InfiniBand QoS Data Rate PCI Express IBTA v1 2 1 Auto Negotiationa 20Gb s 5Gb s or 10Gb s 2 5Gb s 4 InfiniBand Virtual Lanes QDR 2 0 SERDES 5 0 GT s a The auto negotiation protocol...

Страница 32: ...llowing two conditions 1 This device may not cause harmful interference and 2 This device must accept any interference received including interference that may cause undesired operation Table 10 Adapt...

Страница 33: ...s equipment generates uses and can radiate radio frequency energy and if not installed and used in accordance with the instruction manual may cause harmful interference to radio communications Operati...

Страница 34: ...on This is a Class A product based on the standard of the Voluntary Control Council for Interference by Information Technology Equipment VCCI If this equipment is used in a domestic environment radio...

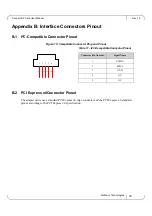
Страница 35: ...Compatible Connector Plug and Pinout B 2 PCI Express x8Connector Pinout The adapter cards use a standard PCI Express x8 edge connector and the PCI Express x8 standard pinout according to the PCI Expre...

Страница 36: ...ccRx 1 2 3 4 5 6 7 8 9 10 1 2 3 4 5 6 7 8 9 TX2p GND TX4n TX4p GND 1 1 1 1 1 1 1 1 1 1 20 GND GND GND RX3n RX1p RX1n 30 1 2 3 4 5 6 7 8 9 2 2 2 2 2 2 2 2 2 1 2 3 4 5 6 7 8 3 3 3 3 3 3 3 3 RX4p GND GND...

Страница 37: ..._2 Rx2n 22 RXP_2 Rx2p 23 GND GND 24 RXN_4 Rx4n 25 RXP_4 Rx4p 26 GND GND 27 ModPrsl_Port0 Mod PrsL 28 IntL IntL 29 VccTx 30 Vcc1 31 LPMode_Port0 LPMode 32 GND GND 33 TXP_3 Tx3p 34 TXN_3 Tx3n 35 GND GND...

Страница 38: ...holding the bracket in place 2 The bracket comes loose from the card Push the bracket off using equal pressure at the top and bottom of the bracket 3 Save the two screws and the two fiber washers C 2...

Страница 39: ...o the card until the screw holes line up 5 Screw on the bracket using the screws and washers saved from the procedure above step 1 Figure 14 Putting on the Bracket Do not force the bracket onto the ca...

Страница 40: ...Rev 1 0 Mellanox Technologies 40 6 Make sure that the LEDs are aligned onto the bracket holes 7 Use a torque driver to apply up to 2 lbs in torque on the screws...

Страница 41: ...ture ambiante maximale est n cessaire En outre pour garantir un bon coulement de l air laissez au moins 8 cm 3 pouces d espace libre autour des ouver tures de ventilation Pendant un orage il ne faut p...

Страница 42: ...gstemperatur erforderlich Au erdem sollten mindestens 8 cm 3 in Freiraum um die Bel ftungs ffnungen sein um einen einwandfreien Luftstrom zu gew hrleisten Arbeiten Sie w hrend eines Gewitters und Blit...

Страница 43: ...ada 55 C 131 F Adem s para garantizar una circu laci n de aire adecuada se debe dejar como m nimo un espacio de 8 cm 3 pul gadas alrededor de las aberturas de ventilaci n No utilizar el equipo ni cone...

Страница 44: ...Rev 1 0 Mellanox Technologies 44 C digos el ctricos locales y nacionales Este equipo se debe instalar conforme a los c digos el ctricos locales y nacio nales...

Отзывы: