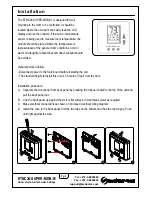


Installation
The ETNC24-SUPER-MDB-01 is designed for wall
mounting in the room to be controlled. It should be
located where the occupant can easily read the LCD
display and use the controls. If the built in temperature
sensor is being used to measure room temperature, the
module should be placed where the temperature is
representative of the general room conditions. Cold or
warm air draughts; radiant heat and direct sunlight should
be avoided.
General points to follow:
- Disconnect power to the main board before installing the unit.
- The standard height to install this unit is 1.6 meter (5 feet) from the floor.
Installation procedure:
A. Separate the front panel from back panel by pressing the tongue located in the top of the unit and
pull the back panel out.
B. Line the back panel up against the wall or flat surface. Install three screws as required.
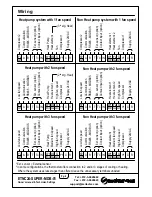
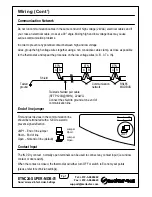
C. Make electrical connections as shown on enclosed electrical wiring diagram.
D. Install the cove to the back panel; first the two tabs on the bottom and then the top tongue. Push
until tight against the wall.
Tel: +972-3-9626462
Fax: +972-3-9626620
support@meitavtec.com
ETNC24-SUPER-MDB-01
Owner’s manual & Technician Settings
Pg. 5
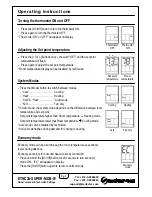
OFF
F
o
Aux
On/Off Mode Fan
Hi
Me
Lo
Fan