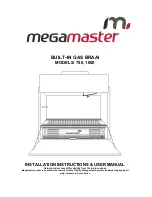
MEGAMASTER GAS BRAAI (970mm and 720mm)
Remove all components from the packaging and assemble.
Connect the regulator to the gas cylinder (anti-clockwise).
Do not adjust any setting on the regulator under any circumstances.
Place the stones on the mesh to cover the burner completely.
How to light the braai:
1. Make sure that the gas valve on the braai is in a horizontal position.
2. Open the gas cylinder and listen for any leakages. Repair if necessary.
3. Press the piezo igniter. A constant clicking sound will be heard. Press the button continuously
and then open the gas valve (anti-clockwise) until the burner ignites.
4. Only one burner is now lit. To light the second burner on the 970mm unit, open the second gas
valve (anti-clockwise).
5. This gas valve is also used to adjust the flame size on the burner.
6. Replace top grills after they have been washed and brushed with cooking oil.
7. Wait approximately 10 minutes and your braai will be ready for use.
PLEASE NOTE:
The two bigger holes (approx. 50 mm in diameter) are the air intake pipes of the burner.
If the air pipes catch fire with a roaring sound, turn off the gas immediately. Wait 5 seconds and repeat
the lighting process.
DO'S AND DONT'S
1. Never desert your braai when the gas valves are open.
2. Make sure the regulator tip has a rubber seal in the front before connecting it to the gas
cylinder.
3. The regulator is adjusted for your specific braai. Should the need occur to replace it, please
contact the manufacturer for information.
4. Close the gas cylinder after use.
MAINTENANCE
1. Steel wool and scouring powder (Vim) or fine sandpaper are used to clean the stainless steel
braai.
2. Oven cleaner is recommended to clean the top grill after a braai.
3. To clean the stones (after approx. 20 braais) they need to be removed from the braai and
brushed with a steel brush. New stones can be added from time to time. Chips of hard brick
can be used for this purpose.
Burner maintenance:
The burners need to be cleaned after approximately 100 braais:
• Remove burners
• Brush them with a steel brush
• Tap them lightly with hammer and shake to remove any oxidation.
After 300 braais, follow the steps described above and then drill open the holes very slowly with a 2,8
mm metal drill after the burner has been soaked in water.
Please contact the manufacturer if you have any problems or need any information.
The braai can also be delivered to the factory for a full service.
PROBLEMS THAT MAY OCCUR
1. If your braai does not function as expected:
2. Are there too many stones in the braai? Should be covered by a single layer.
3. Is there enough gas?
4. Is there an obstruction in the gas supply?
5. If the flame burns yellow instead of blue, your burner needs a service.
6. After a prolonged period of not using your braai a spider web may be the result of a weak
flame.


