background image

LED Display 

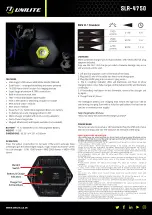
This function allows you to set the display to automatically turn off after it has not been used for 1 minute. Press 

Enter


use the 

up/down 

keys to select desired setting 

ON 

for the display to stay on at all time or 

OFF

 for the display to automati-

cally turn off. Press 

Enter

 to confirm the settings. 

Fade Time 

This function allows you to set the fade time.  Press

 Enter u

se the 

up/down 

keys to select desired fade time 

0

 will be the 

fastest fade time and 

will be the slowest fade time . Press 

Enter

 to confirm the settings. 

Software Ver-

This function allows you to confirm the software version you are using. 

Menu 

Up  Down  Enter 

CONTROL BOARD 

DMX Indicator 

When DMX Signal is being received the last point on the control board display  will turn on.  If 

there is no DMX signal present is will be off. 

Содержание Baby Color H84

Страница 1: ...R MANUAL Table of Contents Safety Information 3 Specifications 4 Main Power Connection 5 DMX 512 Connection 5 Main Control Menu 6 DMX Profile 9 Rigging the Fixture 10 Cleaning Maintenance 10 Parts List 10 ...

Страница 2: ......

Страница 3: ...able are properly secured 6 Maximum surface operating temperature 80º Protection Against Fire 1 Disconnect power before servicing 2 For connection to main power supply proceed to page 5 3 This unit must be earthed electronically grounded 4 Do not expose unit to rain or moisture Protection Against Mechanical Hazards 1 Use safety chain when hanging unit 2 Use quality clamps or bolts when positioning...

Страница 4: ...s Audio Trigger Master Slave Control Programming DMX Connectors 3 pin XLR connectors in and out Thermal Maximum ambient temperature 104 Maximum surface temperature 140 Fastening System Double Mounting Yoke Display Digital Power connection Power Con in out LED Quantity 7 LED Angle 20 Diffusion Beam Angel 25 Red 7 Power Input Voltage 110V 240 50 60 Hz Green 7 Blue 7 Ballast Electronic auto switching...

Страница 5: ...ockets for DMX input and output The sockets are wired in parallel Only use a shielded twisted pair cable designed for RS 485 and 3 pin XLR plugs and connectors in order to connect the controller with the fixture or the fixture with another Caution At the last fixture the DMX signal needs to be terminated with a terminator Solder a 120 Ohm resistor between the and the signal into a 3 pin XLR plug a...

Страница 6: ...ss and control all the functions on the unit Its digital display gives you a code view of the options and functions The following will explain each func tion and its options Slave Speed Pro 0 15 Pre Pro 0 30 Sound Display On Off Fade Time Mode 0 Mode 1 Mode 2 Mode 3 Software Ver VE 2 0 Speed Program This function allows you to select the speed of the pre programs Press Enter use the up down keys t...

Страница 7: ...ter use the up down keys to select desired fade speed settings from 0 to 15 Press Enter to confirm the settings Flash This function allows you to strobe all the LED s Press Enter use the up down keys to select desired strobe speed set tings from 0 to 15 Press Enter to confirm the settings White Dim This function allows you to dim up or down the white LED s Press Enter use the up down keys to selec...

Страница 8: ...settings Fade Time This function allows you to set the fade time Press Enter use the up down keys to select desired fade time 0 will be the fastest fade time and 4 will be the slowest fade time Press Enter to confirm the settings Software Ver This function allows you to confirm the software version you are using Menu Up Down Enter CONTROL BOARD DMX Indicator When DMX Signal is being received the l...

Страница 9: ...olor Q70 7 Channel Mode DMX Chanel Function Description Value 1 LED Color Red LED intensity 0 255 2 LED Color Green LED Intensity 0 255 3 LED Color Blue LED Intensity 0 255 4 LED Color White LED Intensity 0 255 5 Strobe Strobe slow to fast 0 196 Random Strobe slow to fast 197 255 No Function 0 1 Color fade slow to fast 2 19 Color Snap slow to fast 20 39 Random slow to fast 40 59 Yellow 60 79 Purpl...

Страница 10: ...e If the power cable of this device becomes damaged it has to be replaced by author ized dealers or trained professional only Should you have further questions please contact your dealer Parts List 4035 MPCB Main PCB card 4035 PS Power Supply 4035 DIS Display 4035 DF Removable Diffusion Filter 4035 FAN Replacement fan Rigging the fix Caution 1 The installations must be carried out by an authorized...

Страница 11: ...repaid by MSI via the most economical means of shipment Repair or replacement as provided for under this warranty is the exclusive remedy of the consumer MEGA SYSTEMS INC makes no warranties express or implied with respect to any product and Mega Systems specifically disclaims any warranty of merchantability or fitness for a particular purpose Mega Systems shall not be liable for any indirect inci...

Отзывы: