


EN
62
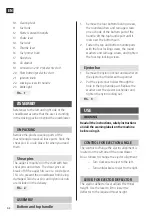
1. Remove the four bottom locking screws,
the round washers and carriage screws
on each side of the bottom part of the
handle. Lift the top handle part until it
locks over the bottom part.
2. Fasten the top and bottom handle parts
with the four locking screws, the round
washers and carriage screws, and tighten
the four top locking screws.
Ejector bar
1. Remove the nylon lock nut and washer on
the ejector bar holder with a spanner.
2. Put the ejector bar holder through the
hole in the top handle part. Replace the
washer over the ejector bar holder and
tighten the nylon locking nut.
FIG. 3
USE
WARNING!
Read all the instructions, safety instructions
and all the warning labels on the machine
before using it.
CONTROL FOR EJECTION ANGLE
The control to change the ejector alignment is
located on the left side of the snowblower.
Do as follows to change the ejector alignment:
– Turn clockwise to eject to the left.
– Turn anticlockwise to eject to the right.
LEVER FOR EJECTOR DEFLECTOR
The ejector deflector lever adjusts the throw
height. Use the lever to lift or lower the
deflector to the required throw height.
10. Clearing tool
11. Fuel tank
12. Starter cord with handle
13. Choke lever
14. Fuel cock
15. Throttle lever
16. Fuel primer bulb
17. Skid shoe
18. Oil dipstick
19. Connection 230 V for electric start
20. Start button for electric start
21. Ignition knob
22. Locking screws for handle
23. Work light
FIG. 1
ASSEMBLY
References to the left and right side of the
snowblower assume that the user is standing
in the driving position behind the snowblower.
UNPACKING
Remove the plastic covering parts of the
machine and unpack all loose parts. Store the
shear pins in a safe place, for when you need
them.
Shear pins
The auger is mounted on the shaft with two
shear pins and cotters. The shear pins can
break off if the auger hits ice or a solid object.
This is to prevent the snowblower from being
damaged. Two shear pins and nylon lock nuts
are included in the delivery.
FIG. 2
ASSEMBLY
Bottom and top handle
Содержание 006295
Страница 4: ...1 13 12 16 11 14 15 1 2 3 4 5 7 8 17 22 20 18 23 6 19 21 9 10 ...
Страница 5: ...2 3 4 5 ...
Страница 6: ...7 8 6 MAX MIN ...
Страница 7: ...9 0 6 0 8 mm ...


