background image

English   

- 46 -

 Safety Precautions 

 Please read the following recommended safety 
precautions carefully for your safety. 

Power

• Always use the provided AC adaptor.

• Operate only from the power source specifi ed  on 

the AC adaptor.

• The power adaptor may become hot during normal 

operation. This is not a malfunction. 

• Please make sure that the adaptor is not covered 

while in operation. Leave a space of 15 cm  
(minimum) around the AC adaptor.

• The rating information and safety caution of the AC 

adaptor are provided on the adaptor.

WARNING: When the set is not in use for a long time, 
disconnect from the power.

 Power Cord 

 Do not place the set, a piece of furniture, etc. on the 
power cord (mains lead) or pinch the cord. Handle the 
power cord by the plug. Do not unplug the appliance 
by pulling from the power cord and never touch the 
power cord with wet hands as this could cause a short 
circuit or electric shock. Never make a knot in the cord 
or tie it with other cords. The power cords should be 
placed in such a way that they are not likely to be 
stepped on. A damaged power cord can cause fi re or 
give you an electric shock. When it is damaged and 
needs to be replaced, it should be done by qualifi ed 
personnel. 

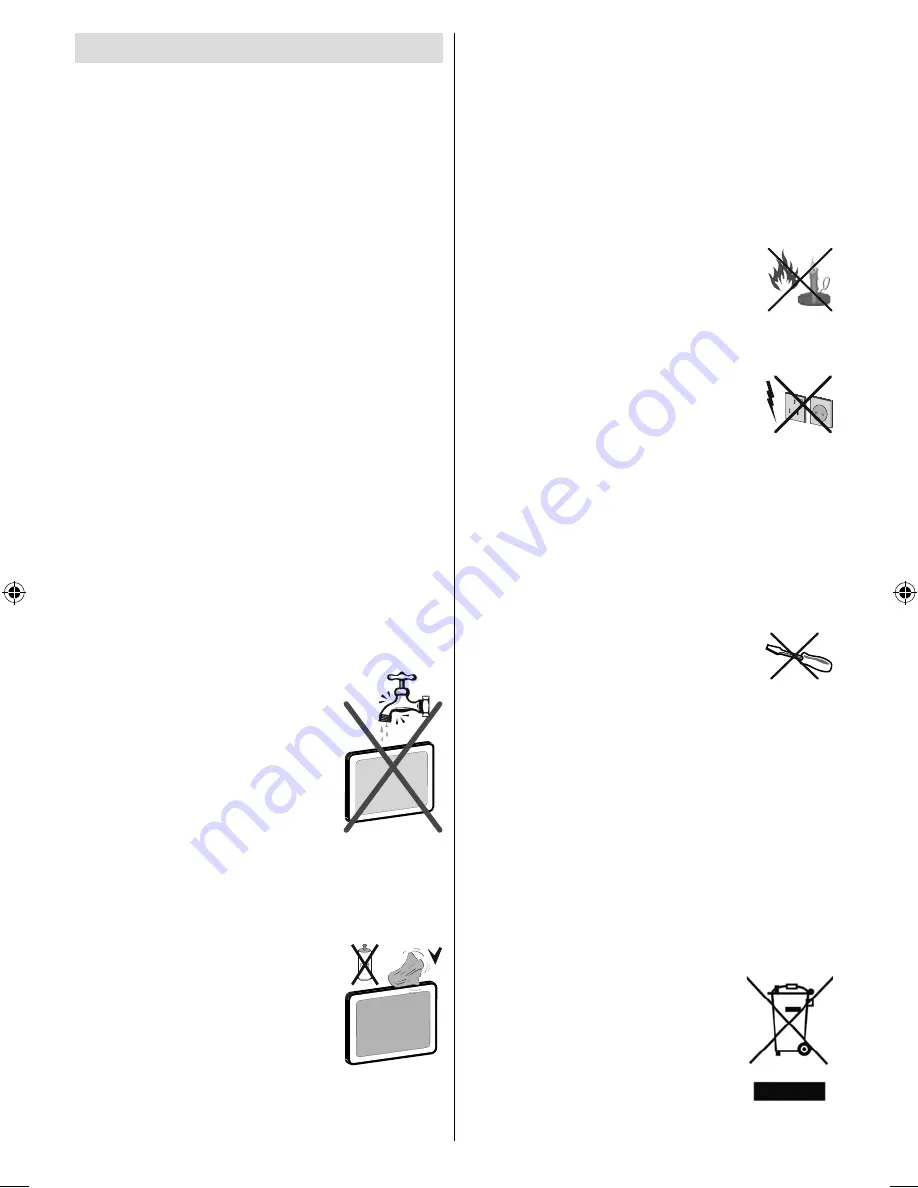
 Moisture and Water 

 Do not use this device in a humid 
and damp place (avoid the bathroom, 
the sink in the kitchen, and near the 
washing machine). Do not expose this 
device to rain or water, as this may be 
dangerous and do not place objects 
filled with liquids, such as flower 
vases, on top. Avoid from dripping 
or splashing.

If any solid object or liquid falls into the cabinet, unplug 
the TV and have it checked by qualifi ed  personnel 
before operating it any further.  

 Cleaning

Before cleaning, unplug the adaptor 
from the wall outlet.Do not use liquid 
or aerosol cleaners Use soft and 
dry cloth

 
 Ventilation 

 The slots and openings on the TV set are intended for 
ventilation and to ensure reliable operation. To prevent 
overheating, these openings must not be blocked or 
covered in anyway. 

 Heat and Flames 

 The set should not be placed near to open fl ames and 
sources of intense heat such as an electric heater. 
Ensure that no open fl ame sources, such 
as lighted candles, are placed on top of 
the TV. Batteries should not be exposed 
to excessive heat such as sunshine, fi re 
or the like. 

 Lightning 

 In case of storm and lightning or when 
going on holiday, disconnect the power 
cord from the wall outlet.  

 Replacement Parts 

 When replacement parts are required, make sure that 
the service technician has used replacement parts, 
which are specifi ed by the manufacturer or have the 
same specifi cations as the original one. Unauthorized 
substitutions may result in fi re, electrical shock or 
other hazards.  

  Servicing 

 Please refer all servicing to qualifi ed personnel. Do 
not remove the cover yourself as this may 
result in an electric shock. 

 Waste Disposal 

 Instructions for waste disposal:

• Packaging and packaging aids are recyclable and 

should principally be recycled. Packaging materials, 
such as foil bag, must be kept away from children.

• Batteries, including those which are heavy metal-

free, should not be disposed of with household 
waste. Please dispose of used battery in an 
environment friendly manner. Find out about the 
legal regulations which apply in your area.

• Cold cathode fluorescent lamp in LCD PANEL 

contains a small amount of mercury; please follow 
the local laws or regulations for disposal. 

 Information for Users  in European 
Union Countries 

 This symbol on the product or on its 
packaging means that your electrical 
and electronic device should be 
disposed at the end of its service 
life separately from your household 
wastes. There are separate collection 
systems for recycling in EU.

B02_MB37_[GB]_(01-TV)_1900UK_IDTV_BRONZE13_16820W_10070077_50176575.indd   46

B02_MB37_[GB]_(01-TV)_1900UK_IDTV_BRONZE13_16820W_10070077_50176575.indd   46

12.10.2010   15:53:04

12.10.2010   15:53:04

Содержание P13077

Страница 1: ...ual Medion Service Center Visonic S A c Miguel Faraday 6 Parque Empresarial La Carpetania N IV Km 13 E 28906 Getafe Madrid Espanha Hotline 808 202 789 Fax 34 91 460 4772 service portugal medion com www medion com portugal PT Medion Service Center Visonic S A c Miguel Faraday 6 Parque Empresarial La Carpetania N IV Km 13 E 28906 Getafe Madrid España Hotline 902196437 Fax 914604772 service spain med...

Страница 2: ... Operations 53 Operation with the Buttons on the TV 53 Operation with the Remote Control 53 Initial Settings 54 Electronic Programme Guide EPG 55 Programme Options 55 Analogue Teletext 56 Widescreen 56 Dijital TV Menu System 56 Channel List 56 Navigating the Entire Channel List 56 Moving the channels in the channel list 56 Deleting the Channels in the Channel List 56 Renaming channels 57 Adding Lo...

Страница 3: ...NTSC playback AVL Automatic Volume Limiting When no valid signal is detected after 5 minutes the TV switches itself automatically to standby mode PLL Frequency Search PC input Plug Play for Windows 98 ME 2000 XP Vista Audio line out Game Mode optional Accessories MENU INFO EPG FAV PRESETS SUBTITLE RETURN SOURCE SLEEP SCREEN LANG Remote Controller Batteries 2 X AAA Instruction Book Introduction Tha...

Страница 4: ...iquid or aerosol cleaners Use soft and dry cloth Ventilation The slots and openings on the TV set are intended for ventilation and to ensure reliable operation To prevent overheating these openings must not be blocked or covered in anyway Heat and Flames The set should not be placed near to open flames and sources of intense heat such as an electric heater Ensure that no open flame sources such as...

Страница 5: ... product Warning Do not leave your TV in standby or operating mode when you leave your house Connection to a Television Distribution System Cable TV etc fromTuner Device connected to the protective earthing of the building installation through the mains connection or through other apparatus with a connection to protective earthing and to a television distribution system using coaxial cable may in ...

Страница 6: ...in 16 DTV mode Green Picture Subtitle on off in DTV mode 17 Yellow Feature Current language in DTV 18 mode Menu on off 19 Blue Install menu Selects DVB T channels 20 in DTV mode OK Channel list in DTV mode Hold in TXT 21 mode Cursor right Subpage in TXT mode 22 Cursor down Page down in TXT mode 23 Volume up 24 Volume down 25 Mute 26 Teletext Mix 27 Subtitle on off in DTV mode TXT Subtitle 28 FAV F...

Страница 7: ...io sockets with a device that has component output Connect the component video cables between the COMPONENT VIDEO INPUTS on on the TV and the component video outputs of your device While connecting be sure that the letters on your TV Y Pb Pr correspond with your device s connectors PC YPbPr Audio Inputs 3 are used for connecting audio signals of a PC or a device that connects to the TV via YPbPr C...

Страница 8: ...HDMI connection Viewing the Connections Side Connectors CI Slot is used for inserting a CI card A CI card allows you to view all the channels that you subscribe 1 to For more information see Conditional Access section USB Input 2 functional in DTV mode only Headphone jack is used for connecting an external headphone to the system 3 Connect to the HEADPHONE jack to listen to the TV from headphones ...

Страница 9: ...king any connections Use 15 pin D sub display cable to connect a PC to the LCD TV When the connection is made switch to PC source See Input selection section Settheresolutionthatsuitsyourviewingrequirements Resolution information can be found in the appendix parts PC audio cable not supplied to AUDIO INPUTS on the TV PC RGB cable not supplied to PC input Audio Inputs PC Input Connecting to a DVD P...

Страница 10: ...d also set SPDIF Out option in the Sound menu as On External Speakers A device that supports SPDIF signal Connecting Other Equipment via Scart Most devices support SCART connection You can connect a DVD recorder a VCR or a decoder to your LCD TV by using the SCART socket Note that cables shown in the illustration are not supplied Power off both the TV and the devices before making any connections ...

Страница 11: ...ume Setting Press button to decrease volume or button to increase volume so a volume level scale slider will be displayed on the screen Programme Selection Press P CH button to select the next programme or P CH button to select the previous programme Viewing Main Menu Press buttons at the same time to view main menu In the Main menu select sub menu using P CH or P CH buttons and enter the sub menu...

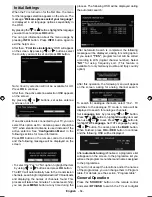
Страница 12: ... broadcasts and displaying the names of channels found This process will take a few minutes To cancel searching you can press MENU button at any time during the process The following OSD will be displayed during the automatic search After Automatic Search is completed the following message will be displayed asking for sorting option If you select YES programme list will be sorted according to LCN ...

Страница 13: ...ys the programmes in detail OK View Timer shows the highlighted channel sets the reminder for future programmes Numeric buttons Jump go to preferred channel directly via numeric buttons SWAP Jump to current broadcast 0 SEARCH activates Guide Search window Press 0 button to view Guide Search menu Using this feature you can search the programme guide database in accordance with the genre selected or...

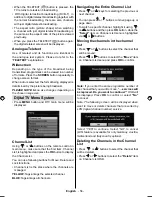
Страница 14: ...el List is highlighted and press the OK button to display the Channel List You can use following buttons for Move Delete and Lock functions Channel List is the place where the channels are managed YELLOW Tags untags the selected channel BLUE Tags untags all channels Navigating the Entire Channel List Press or keys for selecting the previous or next channel You can press or buttons to move page up ...

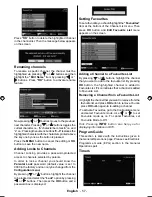
Страница 15: ...ons highlight the channel to be locked and select the Lock option by pressing or buttons Then press the OK button and a password box is displayed Setting Favourites To set a favourite you should highlight the Favourites item at the bottom of the Channel List menu Then press OK button and Edit Favourite List menu appears on the screen Adding a Channel to a Favourites List By pressing or buttons hig...

Страница 16: ...ard is activated Some CAMs may require the following set up Please set the CAM by entering the DIGITAL TV menu Common Interface then pressing OK button CAM set up menu is not displayed when it is not required To see the viewing contract information Enter DIGITALTV press MENU button then highlight Common Interface and press OK button When no module is inserted No Common Interface module detected me...

Страница 17: ...ed to input your new pin a second time for verification purposes The factory default pin number is 0000 if you change the pin number make sure you write it down and keep it safe Time Settings Time setting will not be available for UK In the configuration menu highlight the Time Settings item by pressing or buttons Press OK and Time Settings sub menu will be displayed on the screen Use or buttons t...

Страница 18: ...button to change the delay Audio Description Optional Audio description refers to an additional narration track for blind and visually impaired viewers of visual media You can use this feature only if the broadcaster supports that additional narration track Use or buttons to select an item Then use or buttons to set Audio Description Optional This function enables or disables the audio description...

Страница 19: ...arch starts Selecting No cancels automatic search After search is completed for digital channels a message asking whether to search for analogue channels appears on the screen Highlight Yes and press OK button to search for analogue channels The following menu appears on the screen for analogue channel search Set Language item by pressing or button Press or button to highlight Country item and the...

Страница 20: ...rs on the screen Highlight Yes item by pressing or buttons and press OK button to start installation After search is completed for digital channels a message asking whether to search for analogue channels appears on the screen This process is same as described in Automatic Search section Media Browser in DTV mode Whenever you plug a USB flash disk to your TV the following message will be displayed...

Страница 21: ...hows the files randomly and continuous in current folder and icon turns the highlighted icon If during a slideshow the shuffle mode is enabled the next pictures will be chosen randomly If the loop function is not enabled the slideshow will stop at the end If the loop function is enabled after the slideshow ends it will start again and again Loop BLUE Slideshow goes on continuously and icon turns t...

Страница 22: ... different number of frames per second to normal television programmes Press or button to select Film Mode Press or button to set this feature On or Off Turn this feature on when you are watching films to see the fast motion scenes clearly Game Mode optional Select Game Mode by pressing or button Use or button to set Game Mode as On or Off When Game Mode is set to On specific game mode settings wh...

Страница 23: ... button to select Sound Mode Using or button you can select Mono Stereo Dual I or Dual II mode only if the selected channel supports that mode AVL Automatic Volume Limiting AVL function adjusts the sound to obtain fixed output level between programmes For instance volume level of advertisements tend to be louder than programmes Press or button to select AVL Press or button to set the AVL as On or ...

Страница 24: ...nu timeout to 15 sec 30 sec or 60 sec Teletext Language Press or button to select Teletext Language Use or button to change Teletext Language to West East Turk Gre Cyrillic Arabic or Persian Ext Out Press or button to select Ext Out Use or button to set the Ext Out as On or Off Note For copying from a DVD or VCR device you should choose desired source from source menu and turn On to EXT Out from f...

Страница 25: ... screen Program Table Select Program Table by pressing or button Press to display Program Table By moving the cursor in four directions you can reach 20 programmes in the same page You can scroll the pages up or down by pressing the navigation buttons to see all the programmes in TV mode except for the AV modes By cursor action programme selection is done automatically Name To change the name of a...

Страница 26: ...nly while the TV is in PC source PC Position Menu Select the first icon by pressing or button PC Position menu appears on the screen Autoposition If you shift the picture horizontally or vertically to an unwanted position use this item to put the picture into correct place automatically This setting therefore automatically optimizes the display Select Autoposition item by using or buttons Press OK...

Страница 27: ...freeze mode Note Not available in ATV mode Zoom Modes You can change the aspect ratio image size of the TV for viewing the picture in different zoom modes Press SCREEN button to directly change the zoom mode Available zoom modes are listed below Note In YPbPr and HDMI modes while in 720p 1080i resolutions only 16 9 mode is available Zoom mode cannot be changed while in PC mode Auto When a WSS Wide...

Страница 28: ...ge Press again to revert back to normal size INFO Reveal Shows hidden information e g solutions of games OK Hold Holds a text page when convenient Press again to resume P P and numbers 0 9 Press to select a page Note Most TV stations use code 100 for their index pages Coloured Buttons RED GREEN YELLOW BLUE Your TV supports both FASTEXT and TOP text systems When these systems are available the page...

Страница 29: ...icture or teletext unrecognisable Check if you have entered the correct frequency Please retune the channels The picture quality may degrade when two peripherals are connected to the TV at the same time In such a case disconnect one of the peripherals No Picture Is the aerial connected properly Are the plugs connected tightly to the aerial socket Is the aerial cable damaged Are suitable plugs used...

Страница 30: ...864 75 67 5 VESA 16 1152 870 75 68 9 MAC 17 1280 768 60 47 7 VESA 18 1360 768 60 47 7 19 1280 960 60 60 0 VESA 20 1280 1024 60 64 0 VESA 21 1280 1024 75 80 0 VESA 22 1600 1200 60 75 0 VESA Appendix B AV and HDMI Signal Compatibility Input Signal Types Source Supported Signals Available EXT 1 SCART PAL 50 60 O NTSC 60 O RGB 50 O RGB 60 O FAV PAL 50 60 O NTSC 60 O YPbPr 480I 60Hz O 480P 60Hz O 576I ...

Страница 31: ...upport format 444 440 422 420 Grayscale External Subtitles optional srt Support Text File Format but do not support Picture File Format smi Note Necessary bitrates for some video types are higher than USB limits For this reason some video types cannot be played Products Battery Information for Users on Disposal of Old Equipment and Batteries European Union only These symbols indicate that equipmen...

Страница 32: ...ONSUMPTION W 50 W max 1 W Standby PANEL 15 6 wide display DIMENSIONS mm DxLxH With foot 120 x 384 x 300 Weight Kg 3 9 DxLxH Without foot 65 x 384x 270 Weight Kg 3 7 Transmission Standards DVB T MPEG2 DVB T MPEG4 HD i DEMODULATION Symbol rate COFDM with 2K 8K FFT mode Modulation 16 QAM 64 QAM FEC for all DVB modes automatically found ii VIDEO H 264 MPEG 4 part 10 main and high profile level 4 1 MPE...

Страница 33: ...P3 JPG MPEG playback NTSC PAL playback according to disc content LPCM audio via coaxial and optical digital audio outputs optional Multi Audio up to 8 support According to disc content Multi Subtitle up to 32 support According to disc content Multi Angle up to 9 support According to disc content 8 level parental control Fast forward and rewind in 5 different speeds 2x 4x 8x 16x 32x Slow motion pla...

Страница 34: ...any substance like glue remove before using it Do not expose the disc to direct sunlight or heat sources such as hot air ducts or leave it in a car parked in direct sunlight as the temperature can rise quickly and damage the disc After playing store the disc in its case On cleaning Before playing clean the disc with a cleaning cloth Wipe the disc from the center out Do not use solvents such as ben...

Страница 35: ...ia the remote control While playing a file you should press STOP button three times to eject Overview of the Remote Control Standby 1 Numeric buttons 2 Return back 3 Language selection Set language 4 Display time DVD menu 5 Clear 6 Stop 7 No function 8 Rapid Reverse 9 Rapid advance 10 Info 11 Zoom 12 Repeat 13 Root 14 Menu 15 Title 16 OK Select 17 Navigation Buttons 18 Subtitle 19 Angle 20 Search ...

Страница 36: ...r mode selection during playback Press repeatedly to switch between modes LANG Audio language X X MENU Displays TV menu OK SELECT Enter View Play REPEAT Displays repeat options RETURN Returns back to the previous menu if available ROOT Goes back to the root folder if available SEARCH MODE Direct selection of scenes or time Selects the desired file Selects the desired file SUBTITLE Subtitle on off ...

Страница 37: ...back to the initial settings If a language is selected not supported by the 7 disc the subtitle language will automatically be set to the disc s priority language Usually a circulation will happen while switching 8 to another language that is you can cancel the subtitle by pressing this button a number of times until Subtitle Off appears on the screen When the power is turned on or the disc is 9 r...

Страница 38: ...ing The picture quality is poor DVD Make sure the DVD disc surface is not damaged Scratch fingerprint etc Clean the DVD disc and try again See instructions described in Notes on Discs to clean your disc properly Ensure that the DVD disc is in the drawer with the label uppermost A damp DVD disc or condensation may effect the equipment Wait for 1 to 2 hours in Stand by to dry the equipment Disc does...

Страница 39: ...city than a single 1 2 mm thick disc Since the two thin discs are adhered to each other there is the potential to achieve double sided play sometime in the future for even longer duration play Subtitles These are printed lines appearing at the bottom of the screen which translate or transcribe the dialogue They are recorded on the DVD discs Time Number This indicates the playtime which has elapsed...

Страница 40: ... s R ec o r d in g Ty p e s D is c S ize M a x P lay in g Tim e 74 m in 20 m in S i n g le s id e d 24 0 m in D o u b l e s id e d 48 0 m in S i n g le s id e d 8 0 m in D o u b l e s id e d 16 0 m in C h ar ac t e r is tic s D V D c o n ta in s e x c e lle n t s o u n d a n d v id e o d u e to D o lb y D ig i tal a n d M P E G 2 S y s tem Va r io u s s c r ee n a n d a u d io fu n c t io n s c a ...

Страница 41: ...22 420 Grayscale External Subtitles optional srt Support Text File Format but do not support Picture File Format smi sub ssa ass Specifications Types of Discs Supported DVD SS SL 4 7 DVD 5 SS DL 4 7 DVD 9 DS SL 4 7 DVD 10 DS DL 4 7 DVD 18 CD DA CD R CD RW MP 3 JPG Video Type MPEG 2 Video Standard Decoding MPEG 1 supported Full Screen Video Display of 720 x 576 PAL 720 x 480 NTSC pixels 50 and 60 H...

Отзывы: