21
This mode contains two parts: the drum pad trigger settings and drum
module settings.
The Drum Pad Trigger Settings
As a professional drummer, you may be very pleased to set your drum
triggers carefully corresponding to your playing habits and feelings,
making your performance more interesting and professional. At the
meantime, your digital drum will be more operable.
1.
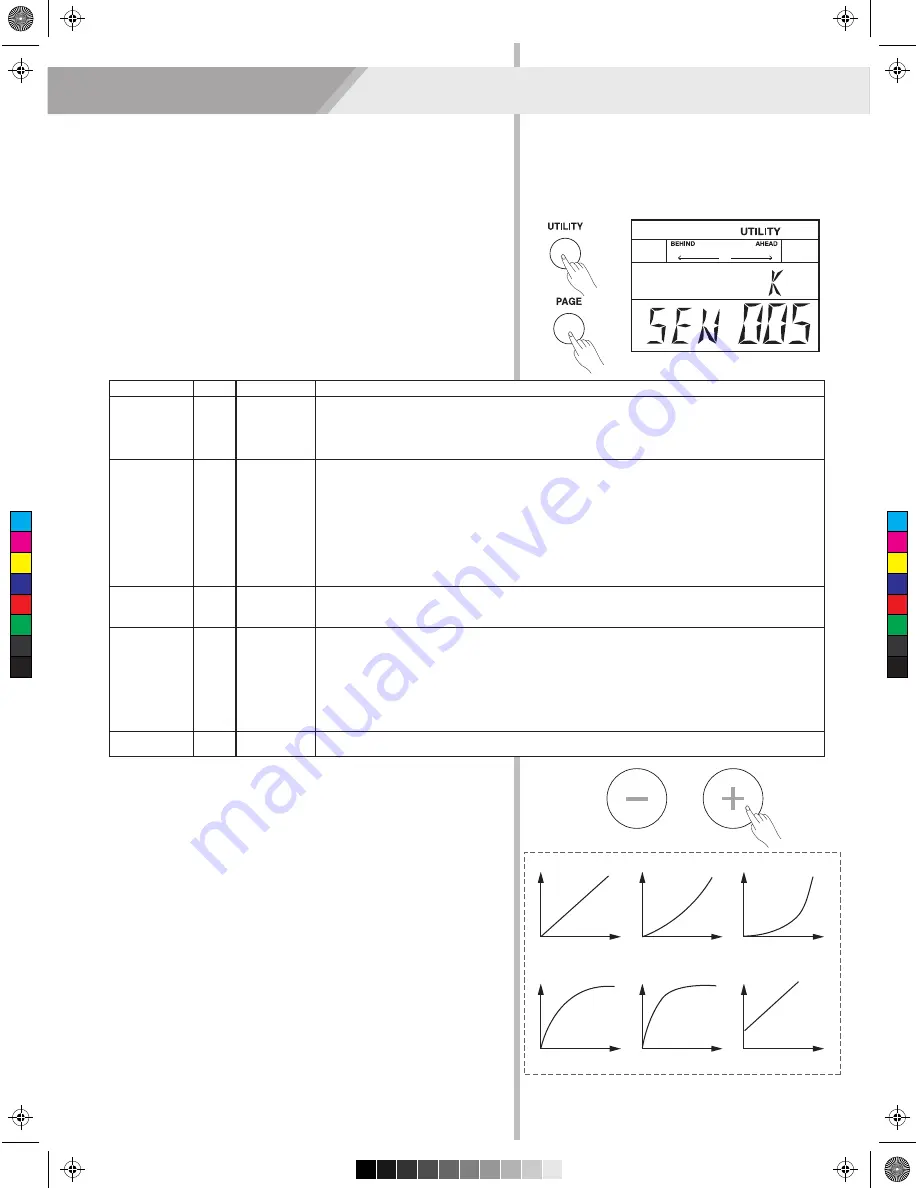
Press the [UTILITY] button, the LCD will display the UTILITY menu.
2.
Repeatedly press the [PAGE] button to select the trigger parameters
that you want to edit.
The drum pad trigger settings are shown below:
3.
Striking the specified pad, select the pad that you want to edit.
4.
Use the [+] / [-] button to adjust the parameter value.
Note:
The Curve descriptions are shown below:
Curve 1:
The most natural setting. There is a linear change between
playing dynamics and volume response.
Curve 2, 3:
Compared to Curve 1, heavily strikings make greater
change.
Curve 4, 5:
Compared to Curve 1, gentle strikings make greater
change
Curve 6:
Even a soft strike can make strong volume, and the range of
dynamic response is small. Especially when a drum trigger is used as
an external pad, reliable triggering can be made.
Utility Mode (UTILITY)
Parameter
SENSITIVITY
XTALK
CURVE
RETRIG
CANCEL
MIDI NOTE
Value
1~16
1~8
1~6
1~16
0~127
LCD Display
SEN XXX
XTK XXX
CUR XXX
RTG XXX
MID XXX
Description
Adjust the sensitivity of the pad to regulate the pad response. Higher settings result in
higher sensitivity, so that the pad will produce a loud volume even when struck softly.
Lower sensitivity will keep the pad to producing a low volume even when played forcefully.
You can also adjust the sensitivity of the splash in Splash Sensitivity.
When two pads are mounted on the same stand, the vibration produced by hitting one
pad may trigger the sound from another pad unintentionally (This is called crosstalk.) You
can avoid this problem by adjusting Crosstalk on the pad that is sounding inadvertently. If
the value is set too high, then when two pads are played simultaneously, the one that is
struck less forcefully will not sound. So be careful and set this parameter to the minimum
value required to prevent such crosstalk. With a setting of "0”, crosstalk prevention does
not function.
You can control the relation betweeen striking force and response volume by this setting.
Adjust the curve to satisfy your playing requirement.Refer to the CURVE description.
This setting avoids “re-triggering”, which means that when you strike a pad once, maybe
you can hear two hits coming from one strike. This may happen when pad vibrating.Adjust
the “Retrigger Cancel” value and strike the pad to see if there is any re-triggering. Be
careful to set it to a suitable value. If too high, some sounds may be omitted when played
fast; if too low, retrigger can’t be prevented effectively. It is best to set it to a value just
prevented retriggering.
MIDI output key mapping.
VOL
Striking
Curve1
VOL
Striking
Curve2
VOL
Striking
Curve3
VOL
Striking
Curve4
VOL
Striking
Curve5
VOL
Striking
Curve6
C
M
Y
CM
MY
CY
CMY
K
AW_DD620_manual_G04_150508.pdf 21 2015/5/13 16:09:48
Содержание DD 620 BX
Страница 1: ...C M Y CM MY CY CMY K AW_DD620_manual_G04_150508 pdf 1 2015 5 13 16 09 46...
Страница 30: ...30 GM Backing Instrument List C M Y CM MY CY CMY K AW_DD620_manual_G04_150508 pdf 30 2015 5 13 16 09 49...
Страница 31: ...31 MIDI Implementation Chart YES NO C M Y CM MY CY CMY K AW_DD620_manual_G04_150508 pdf 31 2015 5 13 16 09 50...
Страница 32: ...DD620 _G04 C M Y CM MY CY CMY K AW_DD620_manual_G04_150508 pdf 32 2015 5 13 16 09 50...


