background image

b.

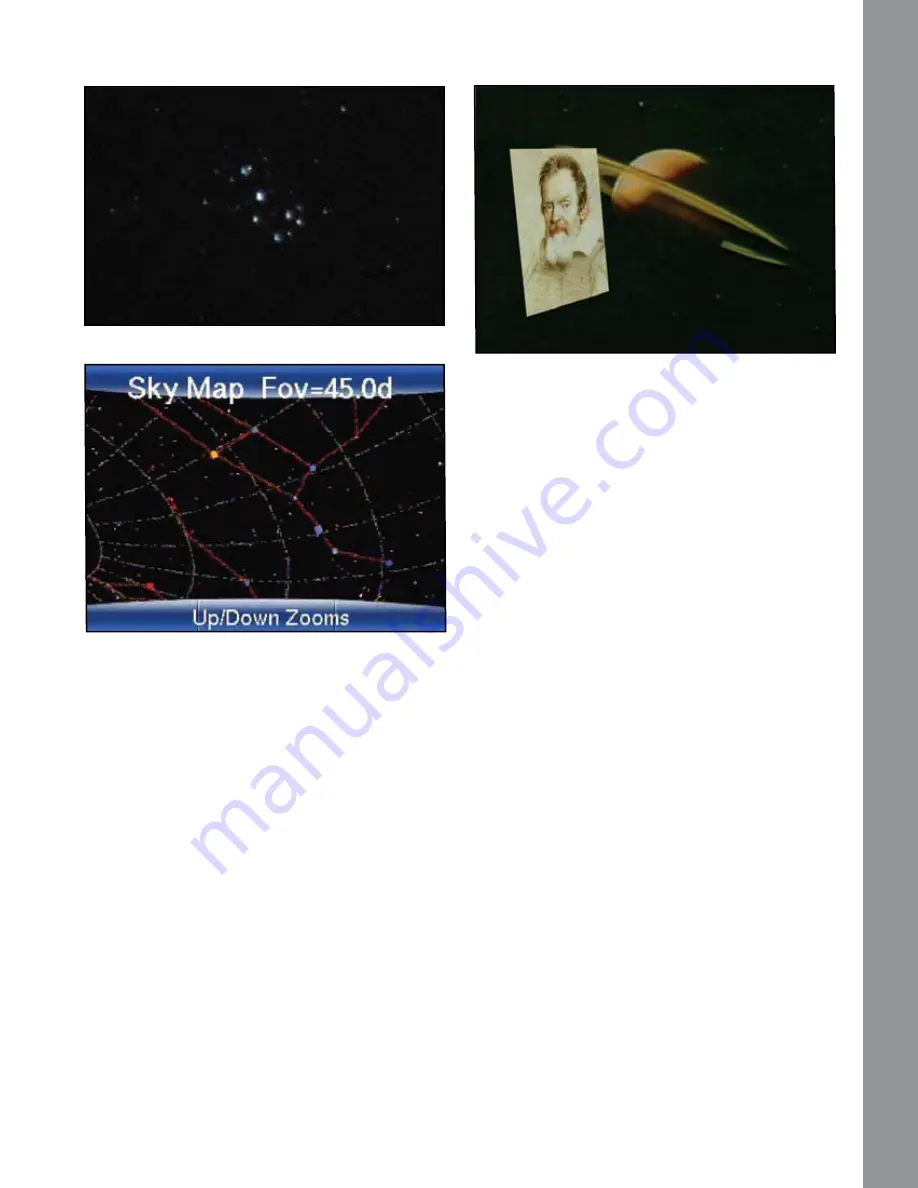
  Images from the ECLIPS camera.

d.

  Sky maps of the region where your telescope is 

pointed

e.

  Astronomer  Inside  videos  and  images  of  the 

moon, planets, and deep sky objects

2#


Audio  Output:

  This  connection  will  allow 

you  to  pass  the  telescope’s  stereo  sound  to 
external  speakers,  headphones  or  and  external  
television monitor. 

2$


Electronic  Focuser  Jack:

  Plug  in  the  optional 

Meade  Zero  Image  Shift  Micro-Focuser  (P/N 
07080) for precision focusing control.

2%


Handbox  (HNDBX)  Port:

  Plug  the  AutoStar  III 

coil cord (

Page 12, Fig. 4, 23

) into this port. 

2^


12v  Power Connector:

 Provides  connection  so 

that the telescope system may be powered from 
either a 12v DC auto cigarette light plug or from a 
standard 115v AC home outlet using the optional 
Meade  Universal  Power Adaptor.  It  is  important 
that only the Meade Universal Power Adaptor be 
used to power the telescope.

2&


AutoStar  Suite  Software:

  Contains  the  LS-

6  Instruction  Manual  and  a  collection  of  useful 
software  including  a  planetarium  program,  the 
AutoStar Updater for downloading and upgrading 

the  firmware  in  the  telescope,  software  to 

control the telescope from a computer and other 
programs all designed to enhance your use of the 
LS-6 system. 

LS-

 KEY FEA

TURES

14

Содержание 6" ETX-LS ACF

Страница 1: ...Instruction Manual 6 LS 6 ACF and 6 LS 6 SC Telescopes with AutoStar III Hand Controller ...

Страница 2: ...ersible damage to your eye Eye damage is often painless so there is no warning to the observer that damage has occurred until it is too late Do not point the telescope at or near the Sun Do not look through the telescope or Red Dot Finder as it is moving Children should always have adult supervision while observing ...

Страница 3: ...o get in contact 36 Appendix A Training the Drive 37 Appendix B Creating User Objects 38 Appendix C Basic Astronomy 39 Specifications LS 6 ACF 6 41 LS 6 SC 6 42 Meade Warranty One Year Limited Warranty Back Cover The name Meade AutoStar LightSwitch and the Meade logo are trademarks registered with the U S Patent and Trademark Office and in principal countries throughout the world SmartFinder Deep ...

Страница 4: ...es of our SC models and then ups the ante ACF gives a flatter coma free field of view with pinpoint images all the way to the edge of the field equaling Ritchey Crétien performance ACF is the perfect solution for the serious astroimager or visual astronomer looking for observatory class optics Mechanics Strong and stable aluminum castings with large precision worm gear drives in both axes for smoo...

Страница 5: ...ights will spoil your night vision and impede your ability to see the sky Additionally it will take the telescope longer to align itself if there are too many bright lights around Assembling the Tripod 2 Remove the field tripod from the shipping carton Stand the tripod vertically with the tripod feet down and with the tripod still fully collapsed Grasp two of the tripod legs and with the full weig...

Страница 6: ...w battery manufacturer s precautions Do not install batteries backwards or mix new and used batteries Do not mix battery types If these precautions are not followed batteries may explode catch fire or leak Improperly installed batteries void your Meade warranty Always remove the batteries if they will not be used for a long period of time Using an AC Adapter or DC Power Cord 7 Use only the optiona...

Страница 7: ... turning the thumbscrew to a firm feel Place the Super Plössl 26mm eyepiece into the diagonal prism and tighten the diagonal prism thumbscrew to a firm feel only Your Telescope is now Fully Assembled Now remove the dust cover from the front of the telescope tube Be careful not to touch the glass lens Next remove the dust cap from the ECLIPS CCD Module and put it in a safe place Powering Up The Tel...

Страница 8: ...roll Down arrow key at the bottom of theAutoStar Press ENTER to start the tour of the best objects visible in your sky right now You will hear a brief introduction to the tour and then the first object will be shown on the second line of the AutoStar display If you press ENTER to select this object you will hear a description of the object If you press the GoTo key the telescope will move slew to ...

Страница 9: ...stest speed While this is great for getting close to the area you want to see it is really too fast to get anything positioned into the eyepiece For that reason the LS 6 has 9 distinct speeds To change the telescope s speed press the 1 SPEED key You can now select a speed with the scroll up and down small arrow keys on the bottom of the hand control When you have the desired speed selected press t...

Страница 10: ...ope Sky Map Mode Press MODE again The hand control display will show Sky Map FOV 45 In sky map mode an attached video monitor shows a planetarium like map of the sky in the area where your telescope is pointed Use the motion keys to move the scope and notice how the sky display changes as you move the scope You can zoom the display in or out by pressing the scroll up and scroll down buttons Shortc...

Страница 11: ...2 1 5 Telescope Input Output Panel ON OFF LightSwitch ECLIPS CCD Module Red Dot Finder Alignment Screws Handbox Storage Cradle 1 Diagonal Eyepiece Holder 2 Diagonal Prism 3 1 25 Eyepiece Holder 4 Eyepiece Holder Thumb Screw 5 Eyepiece 8 Single Fork Arm Mount 11 2 ...

Страница 12: ...6 6 Diagonal Thumbscrew 7 Optical Tube Assembly OTA 9 Focus Knob Integrated Sensor Module Dust Cover Battery Compartment Red Dot Finder Mini SD Card Slot USB A for Future Expansion 2 USB B connector to PC 2 Video Output 2 Audio Output 2 Electronic Focuser Jack 2 Handbox HNDBX Port 2 12v Power Input 12 ...

Страница 13: ... dew that might have collected during the observing session has evaporated prior to replacing the dust cover ON OFF LightSwitch Turns the LS 6 system ON or OFF The red LED power indicator light illuminates when power is on Battery Compartment Insert eight ANSI 14A IEC LR14 Alkaline C Cell user supplied batteries in compartment Be sure batteries are aligned correctly as shown in the battery compart...

Страница 14: ...Page 12 Fig 4 23 into this port 2 12v Power Connector Provides connection so that the telescope system may be powered from either a 12v DC auto cigarette light plug or from a standard 115v AC home outlet using the optional Meade Universal Power Adaptor It is important that only the Meade Universal Power Adaptor be used to power the telescope 2 AutoStar Suite Software Contains the LS 6 Instruction ...

Страница 15: ...g the direction keys on the handbox move the telescope until the red dot is on the target you want to view in the eyepiece As you get close to your target select a moderately low speed like speed 5 and move the scope to center your target as you look through the eyepiece This a great way to get used to finding the movement keys without removing your eye from the eyepiece On Off Brightness Adjustme...

Страница 16: ...ngth When the object is located and centered in the eyepiece you may wish to switch to a higher power eyepiece to enlarge the image as much as practical for prevailing seeing conditions or for many objects the view is best with a high quality low power wide field eyepiece NOTE Seeing conditions vary widely from night to night and site to site Turbulence in the air even on an apparently clear night...

Страница 17: ...the large 2 inch eyepieces NOTE 2 inch eyepieces require the optional Series 5000 2 Enhanced Diagonal with 99 Reflectivity product number 07677 and the SC Thread to 2 Accessory Adapter product number 07085 Series 5000 Eyepieces 40 0mm 5 EP 2 60º 38x 1º 34 32 0mm 5 EP 2 60º 48x 1º 16 26 0mm 5 EP 60º 59x 1º 1 20 0mm 5 EP 60º 76x 47 14 0mm 5 EP 60º 109x 33 9 0mm 5 EP 60º 169x 21 5 5mm 5 EP 60º 277x 1...

Страница 18: ... that might work better for your situation and save you money Deep Sky Imagers DSI Accessories at Meade com Now you can order all these and more accessories or any Meade products right from the Meade Web Site www meade com and it will be shipped right to your door 607 DC Power Cord w Cigarette Lighter Adapter 07043 This adapter allows you to plug into a standard automobile 12v DC power socket It c...

Страница 19: ...oftware with other LS 6 enthusiasts The AutoStar Computer handbox provides control of virtually every telescope function AutoStar III has soft touch keys designed to have a positive feel The LCD Liquid Crystal Display is backlit with a red LED Light Emitting Diode for easy viewing in the dark The backlit display key arrangement and sequential database make AutoStar extremely user friendly 2 Line L...

Страница 20: ...pe into Scope Information Mode Information about the telescope s status displays on the handbox and any attached video monitor When the status displays press one of the Scroll keys Pg 19 Fig 5 7 to display the following information Right Ascension and Declination astronomical coordinates Altitude vertical and Azimuth horizontal coordinates Local Time and Local Sidereal Time LST Timer and Alarm Sta...

Страница 21: ...ar to drift across the sky and have been calculated to accomplish specific functions Pressing a Number key changes the slew speed which is shown for about two seconds on AutoStar s display To change the speed press the 1 Speed Nine available speeds are Number Key 1 1x Number Key 2 2x Number Key 3 8x Number Key 4 16x Number Key 5 0 25 sec Number Key 6 0 50 sec Number Key 7 1 0 sec Number Key 8 2 0 ...

Страница 22: ...ord into this port Pg 19 Fig 5 9 located at the bottom of the AutoStar handbox Coil Cord Plug one end of the AutoStar coil cord into the HNDBX port Pg 12 Fig 4 23 of the input output panel of the telescope and the other end into the coil cord port Fig 5 9 AUTOSTAR III HANDBOX LS 6 TIPS Observing Considerations Try to pick an observing site away from street and house lights and car headlights While...

Страница 23: ...Phases Meteor Showers Solar Eclipses Lunar Eclipses Min of Algol Autumn Equinox Vernal Equinox Winter Solstice Summer Solstice ET 1 000 Up Dn ET Up Dn Preview Exposure Set Contrast Shoot Store Dark Calibration Select Item Take Picture Select Item Sky Map FOV xx up down zooms FOV 22 FOV 31 FOV 45 FOV 63 FOV 90 Select Item Scope Info RA DEC AZ EL Date Local Time LST Battery Near LaT Lon Free Mem Ser...

Страница 24: ...cluded in ascending orbits from the Sun followed by the Moon asteroids and comets Constellation is a database of all 88 Northern and Southern Hemisphere constellations When this menu option is chosen and a constellation name appears on the first line of the screen the multimedia description of the constellation is played When the media presentation completes or you press the MEDIA key to halt the ...

Страница 25: ...ate and type total partial penumbral of eclipse Use the Scroll Up and Down keys to display the available data Min Minimum of Algol is the minimum brightness of the dramatic eclipsing binary star system Algol It is relatively close at a distance of 100 light years Every 2 8 days during a 10 hour period Algol undergoes a major change in apparent magnitude as one of the two starspassesbehindtheother ...

Страница 26: ... The DSI series are USB compatible to easily interface with most Windows based laptop computers It includes AutoStar Suite which automatically sorts aligns and combines the best images resulting in a highly detailed color image The following Deep Sky Imagers models and accessories are available Deep Sky Imager III DSI III Deep Sky Imager Pro III DSI PRO III Deep Sky Imager II DSI II Deep Sky Image...

Страница 27: ... to use on land objects Preferences allows you to configure the telescope s behaviors to suit your own viewing tastes Configurable options include Restore Defaults sets all the settings back to the factory original values Hi Precision Slews allows you to turn high precision slews on and off When this feature is enabled and you command the telescope to GoTo and object it will first slew to a nearby...

Страница 28: ... park position This is convenient for permanently mounted scopes that will be restarted and parked after every use Custom Rate allows you to make minor adjustments to the telescopes tracking rate Tip If you are having difficulties with the telescope the first step to getting back on track is to use the Preferences Restore Factory Defaults command rate Calibrate allows you to precisely tune several...

Страница 29: ...procedure for the first time with your telescope and therefore the Telescope Mount option does not need to be selected Two Star Alt Az Alignment 1 Select Alt Az 2 Star alignment from the Align menu to begin two star alignment 2 Automatic Alignment displays The system now performs the following routines press any ETX LS key to abort Automatic Alignment Caution As the telescope performs the followin...

Страница 30: ...vides a library of bright stars One StarAlignment is identical to Two StarAlt Az Alignment see TWO STAR ALT AZ ALIGNMENT above except only one star from the database is chosen by the observer for alignment Finding Objects Not in the Database Although LS 6 contains an extensive database of celestial objects stars nebulae planets etc that you can observe you may eventually want to view objects that ...

Страница 31: ...perapidly Bestviewing is near sunrise or sunset when the sky is dark Viewing in the middle of the night can be problematic because the satellite may pass overhead in the Earth s shadow 8 Center Landmark Press ENTER displays Using only the Arrow keys do not manually move the telescope move the telescope to the desired landmark and center the object in the eyepiece Press ENTER The object is now stor...

Страница 32: ...on the Handbox screen Use the SCROLL keys to move through the menu to Align Press the ENTER key again to set up the Align menu Use the SCROLL keys to move to Terrestrial and hit ENTER 3 Move your telescope using the direction arrows on the handbox while looking through the Red Dot Finder to put your target in the eyepiece 4 Focus on the target with the focus knob pg 12 Fig 2 9 ADVANCED LS 6 FEATUR...

Страница 33: ...time of rewarding viewing Given the care and respect due any precision instrument the LS 6 will rarely if ever require factory servicing Maintenance guidelines include 1 Avoid cleaning the telescope s optics a little dust on the front surface of the telescope s correcting lens causes virtually no degradation of image quality and should not be considered reason to clean the lens 2 When absolutely n...

Страница 34: ... give a final precision collimation make extremely slight adjustments of the three set screws if necessary to center the Airy disc in the diffraction ring You now have the best alignment of the optics possible with this telescope dark central spot is in fact the shadow of the secondary mirror Turn the focus knob until the ring of light fills about 10 of the eyepiece field diameter If the dark cent...

Страница 35: ...t controls our computerized telescopes and we even add new features and capabilities from time to time Your new LS 6 shipped with the most current firmware at the time of manufacture but there may well be a new version available through the AutoStar Updated program supplied on the AutoStar Suite DVD MAINTENANCE supplied with your telescope The Updater goes online to the Meade web site and checks t...

Страница 36: ... with a Mini SD Card slot located in the front edge of the fork arm With a user supplied Mini SD Card or a Micro SD Card in a Mini Card Adapter you can update your telescope firmware or save images made with the ECLIPS CCD Only use SD Cards bearing the official SD logo Each card must be properly formatted using a PC utility or AutoStar Suite before use in the LS 6 The card must be formatted with t...

Страница 37: ...y once 12 16 13 Calibrate Elevation Drive Calibrate Elevation Drive 14 15 BACK Slo Mo Setup Media exits A V Center reference object Audio Instructions automatically play Center Target using Arrow Keys Press ENTER APPENDIX A TRAINING THE DRIVE Figure 9 Training the Drive TRAINING THE DRIVE Perform this procedure if you are experiencing any pointing accuracy problems Fig 9 depicts the complete Drive...

Страница 38: ...your own objects and create your own titles Tours similar to the three preloaded guided tours Tonight s Best A Star s Life and How Far Is Far can also created You can chose your own theme and objects For complete instructions on how to use the authoring tools to create tours user objects and load your own files please refer to the reference manual included on the AutoStar Suite DVD 38 ...

Страница 39: ...rely a machine made of glass and metal but something far more a window through which the beating heart of the universe might be observed Objects in Space Listed below are some of the many astronomical objects that can be seen with the LS 6 BASIC ASTRONOMY APPENDIX C The Moon is on average a distance of 239 000 miles 380 000km from Earth and is best observed during its crescent or half phase when S...

Страница 40: ...magnification These moons orbit Jupiter so that the number of moons visible on any given night changes as they circle around the giant planet Saturn is nine times the diameter of Earth and appears as a small round disk with rings extending out from either side In 1610 Galileo the first person to observe Saturn through a telescope did not understand that what he was seeing were rings Instead he bel...

Страница 41: ...h Drives 4 875 inch Precision Worm Drive Power 8 C Cell Batteries or AC Adapter Battery Life 3 to 5 Hours Tripod New Adjustable height Steel Leg Tripod Electronics Controller Hand Box AutoStar III Processor 400 megahertz Blackfin Memory 256 Megabytes of NAND Flash Storage Mini SD Card user supplied Input Output USB 2 0 Speaker Built in Mount Connections USB AutoStar Hand Box Multimedia Content Des...

Страница 42: ... Drives 4 875 inch Precision Worm Drive Power 8 C Cell Batteries or AC Adapter Battery Life 3 to 5 Hours Tripod New Adjustable height Steel Leg Tripod Electronics Controller Hand Box AutoStar III Processor 400 megahertz Blackfin Memory 256 Megabytes of NAND Flash Storage Mini SD Card user supplied Input Output USB 2 0 Speaker Built in Mount Connections USB AutoStar Hand Box Multimedia Content Desc...

Страница 43: ......

Страница 44: ......

Страница 45: ...A number must be obtained from Meade by writing or calling 800 626 3233 Each returned part or product must include a written statement detailing the nature of the claimed defect as well as the owner s name address and phone number This warranty is not valid in cases where the product has been abused or mishandled where unauthorized repairs have been attempted or performed or where depreciation of ...

Отзывы: