background image

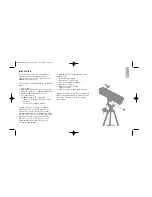
to make it easier to line up more
precisely with a target.
1. Note the two thumbscrews (16,
Fig. 4) thread onto two bolts on the

optical tube. Remove the thumbscrews
from the tube.

2. Line up the two holes on the red dot

viewfinder bracket over the two bolts.
Slide the bracket over the bolts.

3. Replace the thumbscrews onto the bolts

and tighten to a firm feel.

INSERT THE EYEPIECE

1. Slide the MA25mm eyepiece (17) into

eyepiece holder on the focuser (15).

2. Tighten the eyepiece holder thumbscrew

(16) to hold the eyepiece securely.

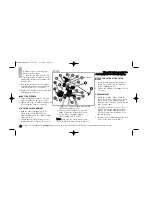
ATTACH THE COUNTERWEIGHT

1. Hold the counterweight (5, Fig. 5) 

firmly in one hand, and slide the
counterweights onto the counterweight
shaft (6, Fig. 5).

2. Thread the shaft into the base of the

declination axis (19,Fig. 5). Be sure to

the shaft. T

Th

hiis

s  s

sa

affe

ettyy  ffe

ea

attu

urre

e  p

prre

evve

en

ntts

s  tth

he

e

c

co

ou

un

ntte

errw

we

eiig

gh

htt  ffrro

om

m  a

ac

cc

ciid

de

en

nttllyy  s

slliip

pp

piin

ng

g..

ATTACH THE OPTICAL TUBE TO THE
MOUNT

1. Insert the two bolts on the bottom of

the optical tube (4) into the bolt holes
on the saddle plate (13)

2. Tighten the attachment wingnuts (42) to

a firm feel.

PREPARE MOUNT

1. Attach the flexible cables (3) and (4)

(See Fig. 6). These cables are secured
in place with a firm tightening of the
thumbscrews located at the attachment
ends of each cable.

2. Tilt the polar axis of the telescope to

roughly a 45

°

angle with the horizon:

Loosen the latitude adjustment lock 
(9) so you can move the mount to the
desired position.

3. Re-tighten the latitude adjustment lock

(9) to secure the mount in place.

4

Fig. 5

support the counterweight with one hand
while performing this step.

3. Slide the counterweight to a position

about 2" from the bottom of the shaft.

4. Secure in place by tightening the

counterweight lock (7, Fig. 5). 

N

No

otte

e:: Make sure the safety washer and

screw (8, Fig. 5) always remain in place on

(not shown)

Looking at or near the 

Sun

will cause 

irreversible

damage to your eye. Do not point this telescope at or near the Sun. Do not look through the telescope as it is moving.

Meade114EQASTR  3/28/07  9:33 AM  Page 6

Содержание 114EQ-ASTR

Страница 1: ...MEADE INSTRUCTION MANUAL 114mm 4 5 Equatorial Reflecting Telescope 114EQ ASTR www meade com Meade114EQASTR 3 28 07 9 33 AM Page 1 ...

Страница 2: ...ur eye Eye damage is often painless so there is no warning to the observer that damage has occurred until it is too late Do not point the telescope at or near the Sun Do not look through the telescope or SmartFinder as it is moving Children should always have adult supervision while observing Meade114EQASTR 3 28 07 9 33 AM Page 2 ...

Страница 3: ...ive lens has a diameter of 114mm The lens diameter is one of the most important pieces of information about the telescope The size of the objective lens determines how much detail you will be able to see in your telescope The focal length information will help later on to calculate magnification Setting up your telescope involves these simple steps Assemble your tripod Attach the accessory tray At...

Страница 4: ...mbscrew 17 Eyepiece 18 Red dot viewfinder bracket see Inset B 19 Declination axis see Fig 5 20 Right Ascension lock see Fig 5 21 Declination lock see Fig 5 22 Red dot viewfinder 23 Telescope front dust cover not shown 24 Leg brace see Inset A 25 Right Ascension setting circle 26 Declination setting circle see Fig 5 27 Latitude dial see Fig 5 28 Sliding leg extension see Inset C 29 Focus knobs 30 A...

Страница 5: ...r mounting bolt to a firm feel ATTACH THE RED DOT VIEWFINDER An eyepiece 17 has a narrow field of view A viewfinder 22 makes it easier to locate objects The red dot viewfinder has a red dot 3 b Slide the inner portion of the leg 39 in or out to the desired length Repeat for the other two legs c Rotate and tighten the leg lock thumbscrew to relock the leg lock d Repeat for the other two legs ATTACH...

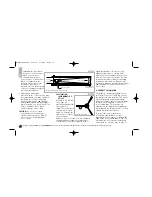
Страница 6: ... in ng g ATTACH THE OPTICAL TUBE TO THE MOUNT 1 Insert the two bolts on the bottom of the optical tube 4 into the bolt holes on the saddle plate 13 2 Tighten the attachment wingnuts 42 to a firm feel PREPARE MOUNT 1 Attach the flexible cables 3 and 4 See Fig 6 These cables are secured in place with a firm tightening of the thumbscrews located at the attachment ends of each cable 2 Tilt the polar a...

Страница 7: ...d turn the focuser knob 29 until the image is sharply focused Center the object precisely in the eyepiece s field of view 2 Look through the red dot viewfinder Turn one or more of the viewfinder s alignment screws 32 Inset B until the red dot is precisely over the same object as you centered in the eyepiece 3 Check this alignment at night on a celestial object such as the Moon or a bright star and...

Страница 8: ...n be located by its latitude and longitude celestial objects may also be located using Right Ascension and Declination For example You can locate 6 Fig 6 14 15 16 17 18 19 20 21 22 23 0 1 12 11 10 9 8 7 5 6 4 3 2 13 Rotation of the Earth 0 Dec South Celestial Pole Right Ascension Star Celestial Equator 90 Dec 90 Déc D e c l i n a t i o n North Celestial Pole Vicinity of Polaris Jupiter s four brig...

Страница 9: ... aligned with the pole very little use of the telescope s Declination flexible cable control is necessary Virtually all of the required telescope tracking will be in Right Ascension For the purposes of casual visual telescopic observations lining up the telescope s polar axis to within a degree or two of the pole is more than sufficient with this level of pointing accuracy the telescope can track ...

Страница 10: ...everything that there is to know about a telescope or what all the 8 Saturn s rings of ice dust and gas are huge and small at the same time The main rings are so large they could almost reach from the earth to the moon But they are only about a half of a mile just a few city blocks wide sights in the universe are but that s OK Just point and observe at first You will enjoy your telescope even more...

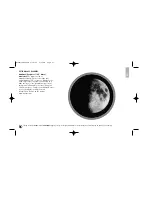
Страница 11: ...ent No shadows are seen during a full Moon making it appear flat and uninteresting Look for different features on the Moon The most obvious features are craters In fact you can see craters within craters Some craters have bright lines about them These are called rays and are the result of material thrown out of the crater when it was struck by a colliding object The dark areas on the Moon are call...

Страница 12: ...e dawn or after sunset because it is close to the Sun You can observe Venus going through crescent phases But you cannot see any surface detail on Venus because it has a very thick atmosphere of gas 10 STAR CHARTS Star charts and planispheres are useful for a variety of reasons In particular they are a great aid in planning a night of celestial viewing A wide variety of star charts are available i...

Страница 13: ...only with the sunlight shining through them can the rings be seen Uranus and Neptune also have faint rings Optional color filters help bring out detail and contrast of the planets Meade offers a line of inexpensive color filters What s Next Beyond the Solar System Once you have observed our own system of planets it s time to really travel far from home and look at stars and other objects You can o...

Страница 14: ...ts are formed red shift the big bang what are the different kinds of nebula what are comets asteroids and meteors and what is a black hole The more you learn about astronomy the more Fig 9 eyepiece barlow You will also be able to see some nebulas with your scope Nebula means cloud Most nebulas are clouds of gas The two easiest to see in the Northern Hemisphere are the Orion nebula during the winte...

Страница 15: ...copes coarse and fine adjustment controls At higher powers astronomical objects will seem to move through the field of view of the eyepiece more rapidly Place the object to be viewed at the edge of the field and without touching the telescope watch it drift through the field to the other side before repositioning the telescope so that the object to be viewed is again placed at the edge of the fiel...

Страница 16: ...iewing obstructions such as tall trees street lights headlights and so forth The best locations are dark locations the darker the better Deep space objects are easiest to see under dark skies But it is still possible to observe even in a city Surf the Web and visit your local library The internet contains a huge amount of astronomical information both for children and adults Check out astronomy bo...

Страница 17: ...er increase the power of an eyepiece To find out how much your magnification is when you use a Barlow multiply your eyepiece s magnification by two Your 25mm low power eyepiece magnifies an object 28 times Multiply 28 by 2 and you get 56 times magnification with a Barlow Eyepiece s magnification x 2 Magnification with a 2X Barlow lens It s worth repeating Keep in mind that a bright clear but small...

Страница 18: ...lignment procedure is simple and requires only a few minutes the very first time the telescope is used Take the time to familiarize yourself with the following collimation procedure so That you will recognize a properly collimated instrument and can adjust the collimation yourself if necessary A CORRECT COLLIMATION The properly collimated aligned mirror system in the Polaris 114 EQ AR assures the ...

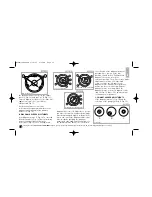
Страница 19: ...e entire primary mirror can be seen centered within the diagonal mirror reflecting When the diagonal mirror is correctly aligned it will look like Fig 13 Note The primary mirror is shown out of alignment C PRIMARY MIRROR ADJUSTMENTS If the diagonal mirror 1 Fig 15 and the reflection of the primary mirror 2 Fig 15 Fig 12 3 2 Primary Mirror Cell 4 5 3 2 2 1 3 1 2 2 1 3 4 A B C Collimation Primary Mi...

Страница 20: ...enter within the out of focus star disk this is the shadow of the secondary mirror as shown in Fig 16C An improperly aligned telescope will reveal elongated circles Fig 16A with an off center dark shadow If the out of focus star disk appears elongated Fig 16A you will need to adjust the primary mirror Phillips head tilt screws of the primary mirror cell 3 Fig 12 To adjust the primary mirror tilt s...

Страница 21: ...iety of sizes provide a high level of image resolution and color correction at an economical price Contact your Meade Dealer or see the Meade catalog for more information Visit us on the web at www meade com 19 Looking at or near the Sun will cause irreversible damage to your eye Do not point this telescope at or near the Sun Do not look through the telescope as it is moving Meade114EQASTR 3 28 07...

Страница 22: ...purchased outside North America are not included in this warranty but are covered under separate warranties issued by Meade international distributors RGA Number Required Prior to the return of any product or part a Return Goods Authorization RGA number m mu us st t be obtained from Meade by writing or by calling 800 626 3233 Each returned part or product must include a written statement detailing...

Страница 23: ...OBSERVER OBJECT NAME DATE TIME OBSERVED CONSTELLATION EYEPIECE SIZE SEEING CONDITIONS EXCELLENT GOOD POOR NOTES DRAWING OF IMAGE OBSERVATION LOG Meade114EQASTR 3 28 07 9 33 AM Page 23 ...

Страница 24: ...OBSERVER OBJECT NAME DATE TIME OBSERVED CONSTELLATION EYEPIECE SIZE SEEING CONDITIONS EXCELLENT GOOD POOR NOTES DRAWING OF IMAGE OBSERVATION LOG Meade114EQASTR 3 28 07 9 33 AM Page 24 ...

Страница 25: ...OBSERVER OBJECT NAME DATE TIME OBSERVED CONSTELLATION EYEPIECE SIZE SEEING CONDITIONS EXCELLENT GOOD POOR NOTES DRAWING OF IMAGE OBSERVATION LOG Meade114EQASTR 3 28 07 9 33 AM Page 25 ...

Страница 26: ...OBSERVER OBJECT NAME DATE TIME OBSERVED CONSTELLATION EYEPIECE SIZE SEEING CONDITIONS EXCELLENT GOOD POOR NOTES DRAWING OF IMAGE OBSERVATION LOG Meade114EQASTR 3 28 07 9 33 AM Page 26 ...

Страница 27: ...Meade114EQASTR 3 28 07 9 33 AM Page 27 ...

Страница 28: ...www meade com Meade Instruments Corporation 6001 Oak Canyon Irvine California 92618 1 800 626 3233 Meade114EQASTR 3 28 07 9 33 AM Page 28 ...

Отзывы: