Page 8 of 12 / OM 897
At this point all selections have been made and
nothing on the display should be blinking. You are now
ready to install a node.
Note:
There are several types of remote control nodes
that can be linked to the T9000 thermostat. Refer to
a specific node documentation for details about the
nodes you are using. In every case, a node is linked to
a thermostat using the same procedure as described,
and involves either pressing the Link Service Request
button on the node, or powering the node up from the
“Off” state.
Step 5
Press the
SW9-LINK
button on the back of the
thermostat printed circuit board. Within 5-seconds,
activate the link service request on the control node you
are installing by the following method:
Model 122 - 24VAC Node – Apply power or press
PB3
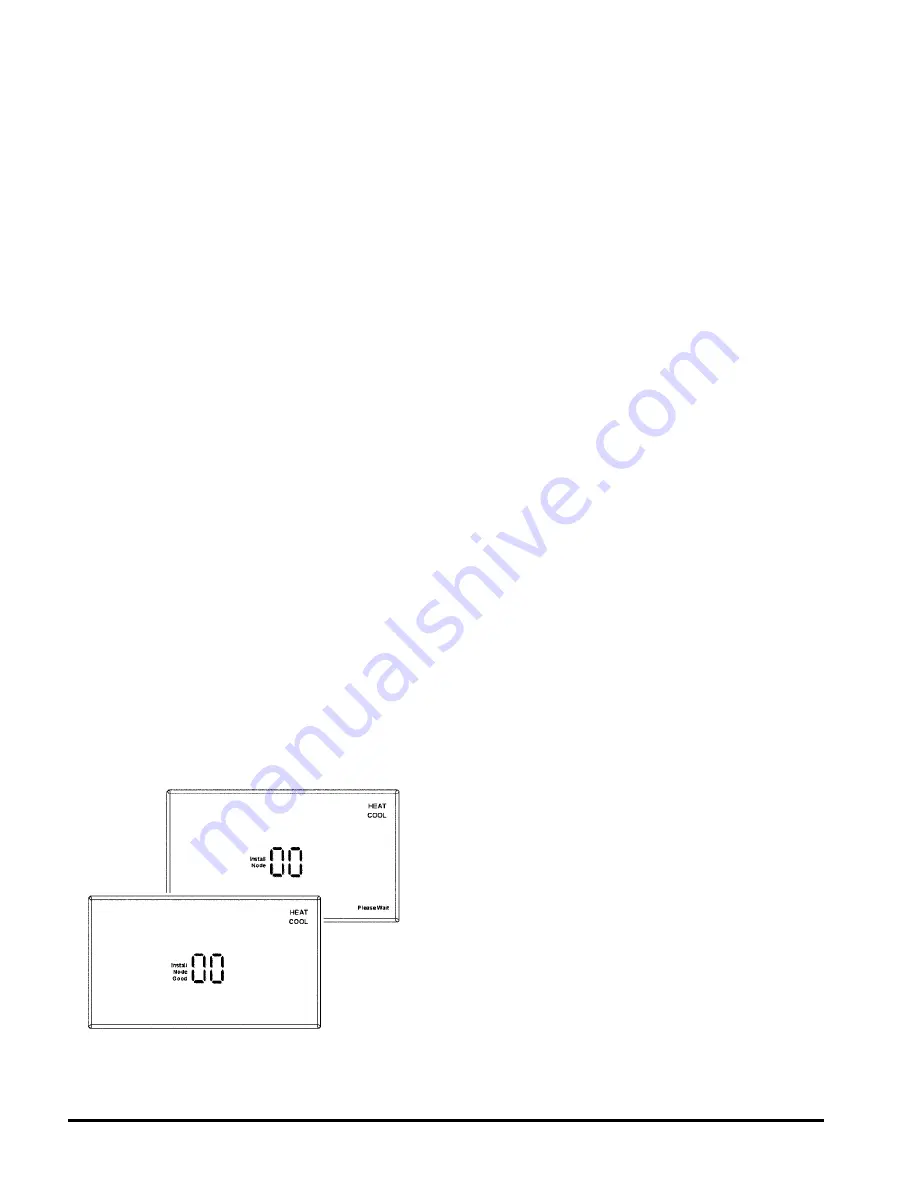
When the SW9-LINK button is pressed, the
thermostat will display a “Please Wait” message (see
Figure 10) in the bottom right corner of the LCD while it
searches for a node. You have several seconds to initiate a
Link Service Request at the control node. Often it is easiest
to have the thermostat in your hand while you are near the
node. The thermostat will link with the first node it hears
that indicates a Link Service Request. It is for this reason
that multiple installations must be coordinated. (see note
in Installing Nodes section.) Once the thermostat finds
a node, linking information is exchanged, the “Please
Wait” message is extinguished, and a “Good” message
will appear as shown in Figure 10.
Figure 10. Install – Link Display
If another node is to be installed to this thermostat,
press the HEAT/COOL button again. The “Install” icon
will flash. As was done previously, press the HEAT/
COOL button (Step Two). The node number will begin
blinking, select the node number by one using the UP
button and continue with the remaining steps. When all
nodes are installed, press the SW4-INSTALL button
to close the installation session and return to normal
thermostat operation.
If for any reason there was a problem encountered
during the final installation and linking step, a “Bad”
message will be displayed. If this happens, repeat the
“Installing Nodes” process from the beginning. If the
problem persists, perform a “Thermostat Installation
Reset” (see below) and repeat the “Installing Nodes”
process.
Installing Multiple Nodes to a Thermostat
Multiple nodes are typically installed to a thermostat
by linking each as a different number (0-7). If a node
is not sending a signal to the thermostat for any reason,
such as loss of power, it will turn off the antenna symbol
indicating a break in communication and attempt to find
the missing node, increasing battery power drain. If, in
your application, a node may be removed or powered
down at times, consider linking all nodes as the same node
number, node 00 for instance. As long as the thermostat
hears back from at least one node, it will consider the
communication to be good. (See Frequently Asked
Questions, page 10)


