McCulloch Cabrio 115306026 Скачать руководство пользователя страница 15

15

SNOW THROWER SAFETY

WARNING:

Keep hands and feet

away from the rotor when starting or running

the engine. Never attempt to clear the rotor

with the engine/motor running. Stop engine

and disconnect spark plug before unclogging

snow or debris from discharge chute or when

adjusting vanes.

WARNING:

Never lean over dis-

charge chute. Rocks or debris could be

thrown into the eyes and face and cause seri-

ous injury or blindness.

WARNING:

Inspect the area where

the unit is to be used. Remove objects that

could be thrown or damage the unit. Some

objects may be hidden by fallen snow -- be

alert for the possibility.

S

Direct material discharge away from glass

enclosures, automobiles, etc.

S

Do not run engine at high speed while not

removing snow.

S

Be attentive when using the snowthrower,

and stay alert for holes in the terrain and other

hidden hazards.

S

Make sure the rotor will spin freely before

attaching the snowthrower to the powerhead.

S

If the rotor will not rotate freely due to frozen

ice, thaw the unit before thoroughly before

attempting to operate under power.

S

Keep the rotor clear of debris.

S

Do not throw snow near other people. The

snow thrower could propel small objects at

high speed causing injury.

S

After striking a foreign object, stop the engine,

disconnect spark plug and inspect the

snowthrower for damage and repair if

necessary before restarting unit.

S

Never operate the snowthrower near glass

enclosures, automobiles and trucks.

S

Never attempt to use the snowthrower on a

roof.

S

Never operate the snowthrower near window

wells, dropoffs, etc.

S

Never discharge snow onto public roads or

near moving traffic.

S

Clear snow from slopes by going up and

down; never across. Use caution when

changing directions. Never clear snow from

steep slopes.

S

Let snowthrower run for a few minutes after

clearing snow so moving parts do not freeze.

S

Look behind and use care when backing up.

Exercise caution to avoid slipping or falling,

especially when operating in reverse.

S

Know how to stop quickly.

MAINTENANCE

The life span of the machine can be reduced

and the risk of accidents can increase if ma-

chine maintenance is not carried out correctly

and if service and/or repairs are not carried

out professionally. If you need further infor-

mation, please contact your nearest autho-

rised service dealer.

WARNING:

Disconnect the spark

plug before performing maintenance except

for carburetor adjustments.

CHECK FOR LOOSE

FASTENERS AND PARTS

S

Spark Plug Boot

S

Air Filter

S

Housing Screws

S

Handlebar Screws

S

Combination Shield

CHECK FOR DAMAGED OR

WORN PARTS

Contact an authorized service dealer for re-

placement of damaged or worn parts.

S

Fuel Tank -- Discontinue use of unit if fuel

tank shows signs of damage or leaks.

S

Debris Shield -- Discontinue use of unit if

debris shield is damaged.

INSPECT AND CLEAN UNIT AND

LABELS

S

After each use, inspect complete unit for

loose or damaged parts. Clean the unit and

labels using a damp cloth with a mild deter-

gent.

S

Wipe off unit with a clean dry cloth.

CLEAN AIR FILTER

A dirty air filter decreases engine perform-

ance and increases fuel consumption and

harmful emissions. Always clean after every

5 hours of operation.

1. Clean the cover and the area around it to

keep dirt from falling into the carburetor

chamber when the cover is removed.

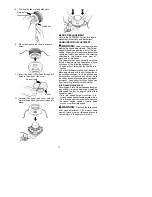
2. Remove parts as illustrated.

NOTE:

Do not clean filter in petrol or other

flammable solvent to avoid creating a fire haz-

ard or producing harmful evaporative emis-

sions.

3. Wash the filter in soap and water.

4. Allow filter to dry.

5. Replace parts.

Содержание Cabrio 115306026

Страница 1: ...nstructions et assurez vous de les avoir comprises Conservez les instructions pour référence ultérieure BETRIEBSANWEISUNG WICHTIGE INFORMATION Lesen Sie diese Hinweise zur Handhabung des Geräts aufmerksam durch Verwenden Sie es erst wenn Sie sicher sind daß Sie alle Anweisungen verstanden haben und gut aufbewahren MANUAL DE INSTRUCCIONES INFORMACIÓN IMPORTANTE Lea atentamente las instrucciones y a...

Страница 2: ...1 IDENTIFICATION WHAT IS WHAT 3 10 1 4 16 14 20 19 7 2 17 8 6 9 18 21 5 13 15 11 12 22 8 23 1 Fuel tank 2 Loop handle 3 ON STOP switch 4 Shoulder strap clamp 5 Shoulder strap 6 Trimmer head 7 Line limiter blade 8 Shield 9 Shaft 10 J handle 11 Blade 12 Coupler 13 Throttle trigger 14 Throttle lock out 15 Starter handle 16 Fuel cap 17 Primer bulb 18 Start lever 19 Muffler 20 Wrench 21 Hex wrench 22 I...

Страница 3: ... C Always use Ear protection eye protection head protection boots and gloves SAFETY RULES WARNING When using gardening appliances basic safety precautions should al ways be followed to reduce the risk of fire and serious injury Read and follow all instructions DANGER This power tool can be dan gerous This unit can cause serious injury in cluding amputation or blindness to the operator and others T...

Страница 4: ...othing with loosely hanging ties straps tassels etc They can be caught in moving parts S Being fully covered also helps protect you from debris and pieces of toxic plants thrown by spinning line S Stay alert Do not operate this unit when you are tired ill upset or under the influence of al cohol drugs or medication Watch what you are doing use common sense S Wear hearing protection Long or continu...

Страница 5: ... fuel va pors cannot reach sparks or open flames from water heaters electric motors or switches furnaces etc S Store unit so line limiter cannot accidentally cause injury Unit can be hung by the shaft S Always install transport guard on blade be fore transporting or strorage S Store the unit out of the reach of children S Secure the machine during transport SPECIAL NOTICE Exposure to vibra tions t...

Страница 6: ...injury or damage to the unit Locking Release Button in Primary Hole For optional attachments see the ASSEMBLY section of the applicable attachment instruction manual ATTACHING THE HANDLE DANGER To avoid serious injury the barrier portion of the handle must be installed as shown to provide a barrier between operator and the spinning blade 1 Position the loop handle on the shaft Note that the handle...

Страница 7: ...pped with a line limiter blade which cuts excess line to the proper length The line limiter blade on un derside of shield is sharp and can cut you 1 Insert bracket into slot on shield 2 Pivot shield to align holes in shield and bracket Slot Shield Bracket 3 Secure shield to bracket with bolt Bolt CONFIGURING YOUR UNIT You can configure your unit using a cuttinghead for grass and light weeds or a w...

Страница 8: ...r protective gloves when handling or performing maintenance on the blade to avoid injury The blade is sharpand can cut you even when it is not moving WARNING Do not use any blades or fastening hardware other than the washers and nuts shown in the following illustrations These parts must be provided by McCulloch and installed as shown below Failure to use proper parts can cause the blade to fly off...

Страница 9: ...er Once oil is added topetrol shakecontainer momentarily toassure that the fuel is thoroughly mixed Always read and follow the safety rules relating to fuel before fueling your unit CAUTION Never use straight petrol in your unit This will cause permanent engine damage FUEL REQUIREMENTS Use good quality unleaded petrol The lowest recommended octane grade is 90 RON IMPORTANT Use of alcohol blendedfu...

Страница 10: ... TRIMMER ATTACH MENT OR OTHER OPTIONAL AT TACHMENTS CAUTION When removing or installing at tachments place the unit on a flat surface for stability 1 Loosen the coupler by turning the knob counterclockwise Attachment Coupler Knob LOOSEN TIGHTEN 2 Press and hold the locking release button Locking Release Button Coupler Upper Shaft Attachment 3 While securely holding theengine andup per shaft pull t...

Страница 11: ...se serious injury Do not use other materials such as wire string rope etc Wire can break off during cutting and become a dangerous missile that can cause serious injury CUTTING METHODS WARNING Use minimum speed and do not crowd the line when cutting around hard objects rock gravel fence posts etc whichcandamage thetrimmer head become entangled in the line or be thrown causing a serious hazard S Th...

Страница 12: ...er and is less likely to bind or stall S Feed the blade deliberately and not too rapidly The blade can thrust away if it is fed too rapidly S Cut only from your left to your right Cuttingon right side of the shield will throw debris away from the operator S Use the shoulder strap and keep a firm grip on the unit with both hands A properly adjusted shoulder strap will support the weight of the unit...

Страница 13: ... that can rico chet be thrown or otherwise cause injury or damage during operation S Do not set unit on any surface except aclean hard area while engine is running Debris such as gravel sand dust grass etc could be picked up by the air intake and thrown out through discharge opening damaging unit property or causing serious injury to bystanders or operator S Never place objects inside the blower t...

Страница 14: ...before use Do not operate unit with a bent cracked ordull bladeor dullchain Keep away from the blade chain WARNING The reciprocating blade rotating chain is sharp Do not touch To pre vent serious injury always stop engine and ensure blade chain has stopped moving dis connect spark plug and wear gloves when changing or handling the blade or chain WARNING A coasting blade rotating chain can cause in...

Страница 15: ...and down never across Use caution when changing directions Never clear snow from steep slopes S Let snowthrower run for a few minutes after clearing snow so moving parts do not freeze S Look behind and use care when backing up Exercise caution to avoid slipping or falling especially when operating in reverse S Know how to stop quickly MAINTENANCE The life span of the machine can be reduced and the...

Страница 16: ...rimmer head and remove cover and spool Tab Tab Cover Spool 2 Remove any remaining line 3 Clean dirt and debris from all parts Re place spool if it is worn or damaged 4 Replace with a pre wound spool or re place line using a 4 5 meters length of 2 4 mm diameter McCulloch brand line WARNING Never use wire rope string etc which canbreak offand becomea dangerous missile 5 When installing new line on a...

Страница 17: ...justments may benecessary ifyou notice any of the following conditions S Engine will not idle when the throttle is re leased S The trimmer head moves spins at idle speed Make adjustments with the unit supported so the cutting attachment is off the ground and will not make contact with any object Hold the unit by hand while runningand makingad justments Keep all parts of your body away from the cut...

Страница 18: ...y cause injury SEASONAL STORAGE Prepare unit for storage at end of season or if it will not be used for 30 days or more If your unit is to be stored for a period of time S Clean the entire unit before lengthy storage S Store in a clean dry area S Lightly oil external metal surfaces ENGINE S Remove spark plug and pour 1 teaspoon of 40 1 2 cycle engine oil air cooled through the spark plug opening S...

Страница 19: ...reen 5 Compression low Engine will not accelerate lacks power or dies under a load 1 Clean or replace air filter 2 Clean or replace plug and regap 3 Contact an authorized service dealer 4 Contact an authorized service dealer 5 Contact an authorized service dealer Engine smokes excessively 1 Fuel mixture incorrect 2 Air filter dirty 3 Carburetor requires adjustment 1 Empty fuel tank and refill with...

Страница 20: ...ng to electromagnetic compatibility 2004 108 EC andapplicable supplements and of 8 May 2000 relating to the noise emissions in the environment in accordance with Annex V of 2000 14 EC For information relating to noise emissions see Technical data section The following standards have beenapplied EN ISO 12100 1 A1 2009 EN ISO 12100 2 A1 2009 CISPR 12 2007 EN 11806 2008 SMP The Swedish Machinery Test...

Страница 21: ...to EN ISO 11806 and ISO 22867 m s2 Equipped with grass blade original left right 8 3 8 4 Equipped with trimmer head original left right 6 4 8 1 Note 1 Noise emissions in the environment measured as sound power LWA in conformity with EC directive 2000 14 EC Reported sound power level for the machine has been measured with the original cutting attachment that gives the highest level The difference b...

Отзывы: