background image

12

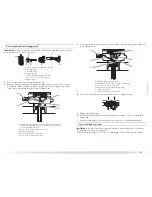
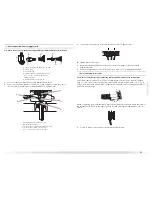
Strip 5" (12.7 cm) of outer covering from end of cable, leaving bare ground wire at 5" 
(12.7 cm). Cut 1

1

/

2

" (3.8 cm) from 3 remaining wires. Strip insulation back 1" (2.5 cm). Shape 

ends of wires into a hook shape.

When connecting to the terminal block, place the hooked end of the wire under the screw of 
the terminal block (hook facing right), squeeze hooked end together and tighten screw, as 
shown.  

1.

Remove center silver-colored terminal block screw.

2.

Remove neutral ground wire from external ground conductor screw. Connect neutral 
ground wire and place the hooked end (hook facing right) of the neutral wire (white or 
center wire) of direct wire cable under the center screw of the terminal block. Squeeze 
hooked ends together. Tighten screw.

3.

Connect ground wire (green or bare) of direct wire cable to external ground conductor 
screw. Tighten screw.

4.

Place the hooked ends of the other direct wire cable wires under the outer terminal block 
screws (hooks facing right). Squeeze hooked ends together. Tighten screws.

5.

Tighten strain relief screw.

6.

Insert tab of terminal block cover into slot of dryer rear panel. Secure cover with 
hold-down screw.

7.

You have completed your electrical connection. Now go to “Venting Requirements.”

A. External ground conductor screw - Dotted line shows 

position of NEUTRAL ground wire before being moved to 

center silver-colored terminal block screw.

B. Center silver-colored terminal block screw

C. Neutral ground wire

D. Neutral wire (white or center wire) 

E. ¾" (1.9 cm) UL listed strain relief

     1"

(2.5 cm)

       5"

(12.7 cm)

A

C

B

D

E

A. External ground conductor screw 

B. Ground wire (green or bare) of power supply cable

C. ¾" (1.9 cm) UL listed strain relief

D. Center silver-colored terminal block screw

E. Neutral ground wire 
F. Neutral wire (white or center wire)

A

B

C

D

E

F

Содержание Performance MEDE500

Страница 1: ... PREGUNTAS RESPECTO A LAS CARACTERÍSTICAS FUNCIONAMIENTO RENDIMIENTO PARTES ACCESORIOS O SERVICIO TÉCNICO LLAME AL 1 800 688 9900 EN CANADÁ LLAME AL 1 800 807 6777 AU CANADA POUR ASSISTANCE INSTALLATION OU SERVICE COMPOSEZ LE 1 800 807 6777 VISIT OUR WEBSITE AT WWW MAYTAG COM IN CANADA WWW MAYTAG CA VISITE NUESTRO SITIO WEB EN WWW MAYTAG COM EN CANADÁ WWW MAYTAG CA OU VISITEZ NOTRE SITE INTERNET À...

Страница 2: ... pièces 37 Piédestal facultatif 37 Exigences d emplacement 38 Spécifications électriques 40 Exigences concernant l évacuation 41 Planification du système d évacuation 43 Installation du système d évacuation 44 Installation des pieds de nivellement 45 Raccordement du conduit d évacuation 45 Mise à niveau de la sécheuse 45 Raccordement du tuyau d alimentation 45 Mise à niveau de la sécheuse 46 Achev...

Страница 3: ... have been previously cleaned in washed in soaked in or spotted with gasoline dry cleaning solvents or other flammable or explosive substances as they give off vapors that could ignite or explode Do not allow children to play on or in the dryer Close supervision of children is necessary when the dryer is used near children Before the dryer is removed from service or discarded remove the door to th...

Страница 4: ...t Are you planning to stack your washer and dryer To do so you will need to purchase a Stack Kit To order call the dealer from whom you purchased your dryer or refer to the Assistance or Service section Ask for Part Number 8212640 Door Reversal Kit Are you planing to reverse the door swing direction on your PERFORMANCE SERIES dryer To do so you will need to purchase a Door Reversal Kit To order ca...

Страница 5: ...requirements Some codes limit or do not permit installation of the dryer in garages closets mobile homes or sleeping quarters Contact your local building inspector Installation clearances The location must be large enough to allow the dryer door to open fully Dryer Dimensions Most installations require a minimum 5 12 7 cm clearance behind the dryer for the exhaust vent with elbow See Venting Requi...

Страница 6: ...g is allowed Recommended installation spacing for recessed or closet installation with stacked washer and dryer The dimensions shown are for the recommended spacing Required spacing A Side view closet or confined area B Closet door with vents A Recessed area B Side view closet or confined area A B 14 max 35 6 cm 18 min 45 72 cm 1 5 12 7 cm 31 80 cm 48 in 2 310 cm2 24 in 2 155 cm2 3 7 6 cm 3 7 6 cm...

Страница 7: ... determine the type of electrical connection you will be using and follow the instructions provided for it here This dryer is manufactured ready to install with a 3 wire electrical supply connection The neutral ground conductor is permanently connected to the neutral conductor white wire within the dryer If the dryer is installed with a 4 wire electrical supply connection the neutral ground conduc...

Страница 8: ...in length Be sure wall receptacle is within reach of dryer s final location 4 wire receptacle 14 30R Do not use an extension cord If you are using a replacement power supply cord it is recommended that you use Power Supply Cord Replacement Part Number 9831317 For further information please reference the service numbers located in the Assistance or Service section GROUNDING INSTRUCTIONS SAVE THESE ...

Страница 9: ...re green or bare wire must be connected to green ground connector Connect remaining 2 supply wires to remaining 2 terminals gold Securely tighten all electrical connections Failure to do so can result in death fire or electrical shock WARNING Fire Hazard Use 10 gauge solid copper wire Use a UL listed strain relief Disconnect power before making electrical connections Connect neutral wire white or ...

Страница 10: ...l position Tighten strain relief screw against the direct wire cable 4 Now complete installation following instructions for your type of electrical connection 4 wire recommended 3 wire if 4 wire is not available Electrical Connection Options If local codes do not permit the connection of a cabinet ground conductor to the neutral wire go to Optional 3 wire connection section A Removable conduit con...

Страница 11: ...ction Now go to Venting Requirements 4 wire connection Direct wire IMPORTANT A 4 wire connection is required for mobile homes and where local codes do not permit the use of 3 wire connections Direct wire cable must have 5 ft 1 52 m of extra length so dryer can be moved if needed A 4 wire receptacle NEMA type 14 30R B 4 prong plug C Ground prong D Neutral prong E Spade terminals with upturned ends ...

Страница 12: ... cable to external ground conductor screw Tighten screw 4 Place the hooked ends of the other direct wire cable wires under the outer terminal block screws hooks facing right Squeeze hooked ends together Tighten screws 5 Tighten strain relief screw 6 Insert tab of terminal block cover into slot of dryer rear panel Secure cover with hold down screw 7 You have completed your electrical connection Now...

Страница 13: ...ct wire cable must have 5 ft 1 52 m of extra length so dryer can be moved if needed Strip 31 2 8 9 cm of outer covering from end of cable Strip insulation back 1 2 5 cm If using 3 wire cable with ground wire cut bare wire even with outer covering Shape ends of wires into a hook shape When connecting to the terminal block place the hooked end of the wire under the screw of the terminal block hook f...

Страница 14: ...ck screw 2 Remove neutral ground wire from external ground conductor screw Connect neutral ground wire and the neutral wire white or center wire of power supply cord cable under center silver colored terminal block screw Tighten screw 3 Connect the other wires to outer terminal block screws Tighten screws 4 Tighten strain relief screws 5 Connect a separate copper ground wire from the external grou...

Страница 15: ...information see the Assistance or Service section Rigid metal vent For best drying performance rigid metal vents are recommended Rigid metal vent is recommended to avoid crushing and kinking Flexible metal vent Flexible metal vents are acceptable only if accessible for cleaning Flexible metal vent must be fully extended and supported when the dryer is in its final location Remove excess flexible m...

Страница 16: ...nt the dryer from the rear of the dryer Other installations are possible Optional exhaust installations This dryer can be converted to exhaust out the right side left side or through the bottom If you prefer you may contact your local dealer to have the dryer converted A Louvered hood style B Box hood style 4 10 2 cm 4 10 2 cm B A 4 10 2 cm 2 6 4 cm Improper venting can cause moisture and lint to ...

Страница 17: ...st vent outside Determine vent path Select the route that will provide the straightest and most direct path outdoors Plan the installation to use the fewest number of elbows and turns When using elbows or making turns allow as much room as possible Bend vent gradually to avoid kinking Use the fewest 90 turns possible Determine vent length and elbows needed for best drying performance Use the follo...

Страница 18: ...utlet in dryer If connecting to existing vent make sure the vent is clean The dryer vent must fit over the dryer exhaust outlet and inside the exhaust hood Check that the vent is secured to exhaust hood with a 4 10 2 cm clamp 2 Move dryer into its final location Do not crush or kink vent 3 Once the exhaust vent connection is made remove the corner posts and cardboard Connect Inlet Hose The dryer m...

Страница 19: ...NOTE Do not overtighten Damage to the coupling can result 9 Attach angled end of long hose to fill valve at bottom of dryer back panel Screw on coupling by hand until it is seated on fill valve connector 10 Using pliers tighten the coupling with an additional two thirds turn NOTE Do not overtighten Damage to the coupling can result 11 Check that the water faucets are on 12 Check for leaks around Y...

Страница 20: ...p of scale through the water system in the dryer Over time the buildup of lime scale may clog different parts of the water system which will reduce product performance Excessive scale buildup may lead to the need for certain part replacement or repair 13 Select a Timed Dry heated cycle and start the dryer Do not select the Air Only Temperature setting If the dryer will not start check the followin...

Страница 21: ...ayed To use a Sensor Cycle Press the POWER CANCEL button Rotate the dial to select a Sensor Cycle The default dryness setting is Normal in all Sensor Cycles This dryness level will dry most loads adequately using the least amount of energy You can select a different dryness level by pressing SENSOR CYCLES DRYNESS and choosing More Dry WARNING Explosion Hazard Keep flammable materials and vapors su...

Страница 22: ...the clothes as they tumble An electronic control determines the load type to help save time avoid overdrying and increase the accuracy of the end dryness level After the first 5 minutes of a Sensor cycle the estimated time display will adjust based on the approximate load size cycle dryness level selected and amount of moisture left in the clothes When the clothes have reached approximately 80 of ...

Страница 23: ...locked when a single beep is heard and the Control Lock light is on When the dryer is off it is not necessary to press the POWER CANCEL button before activating the Control Lock feature To unlock Press and hold the CONTROL LOCK button for 3 seconds to turn this feature off NOTE When the dryer is running and Control Lock is on the dryer can be stopped by pressing the POWER CANCEL or START PAUSE but...

Страница 24: ...ows during the cool down part of the cycle Laundry is cooling down for ease in handling Dry The Dry light illuminates when the drying cycle is finished This indicator stays on during the WRINKLE PREVENT feature Wrinkle Prevent Feature The Wrinkle Prevent indicator light blinks when the Wrinkle Prevent option is selected and that part of the cycle is occurring This cycle lasts for 120 minutes Cycle...

Страница 25: ...inish may yield better results than those without Use of a fabric softener sheet is not recommended with steam cycles as it may cause temporary staining on the clothes Rapid Refresh This cycle is best for smoothing out wrinkles and reducing odors from loads consisting of one to four dry items of wrinkle free cotton cotton polyester blend common knits and synthetic garments Custom Refresh This cycl...

Страница 26: ...inkling Press SIGNAL ON OFF The light on the control will glow yellow when the Cycle Signal is on NOTE When the WRINKLE PREVENT feature is selected and the End of Cycle Signal is on an audible sound will be emitted every 5 minutes until the clothes are removed or the WRINKLE PREVENT feature is finished Changing Cycles Options and Modifiers You can change Sensor Cycles Timed Cycles Modifiers and Op...

Страница 27: ...ture see following chart Items containing foam rubber or plastic must be dried on a clothesline or by using the Air Dry temperature setting 6 You must select a time by pressing the TIME ADJUST up or down buttons Reset time as needed to complete drying Refer to the following table 7 Press and hold START PAUSE button about 1 second NOTE Check the lint screen and remove any lint accumulated from item...

Страница 28: ...a residue buildup To wash 1 Roll lint off the screen with your fingers 2 Wet both sides of lint screen with hot water 3 Wet a nylon brush with hot water and liquid detergent Scrub lint screen with the brush to remove residue buildup 4 Rinse screen with hot water 5 Thoroughly dry lint screen with a clean towel Replace screen in dryer Cleaning the Dryer Interior To clean dryer drum 1 Make a paste wi...

Страница 29: ...t and drain To use dryer again 1 Flush water pipes Reconnect water inlet hose to faucet Turn on water faucet 2 Plug in dryer or reconnect power Moving care For power supply cord connected dryers 1 Unplug the power supply cord 2 Shut off water faucet 3 Disconnect the water inlet hose from faucet then drain the hose Transport hose separately 4 Make sure leveling legs are secure in dryer base 5 Use m...

Страница 30: ...p When balled up the load will bounce causing the dryer to vibrate Separate the load items and restart the dryer Dryer displaying code message PF power failure check the following Was the drying cycle interrupted by a power failure Depending on the length of the power outage you may be able to resume the cycle by simply pressing and holding START PAUSE otherwise press POWER CANCEL and then start a...

Страница 31: ...e Use 4 10 2 cm diameter vent material Is the dryer located in a room with temperature below 45ºF 7ºC Proper operation of dryer cycles requires temperatures above 45ºF 7ºC Is the dryer located in a closet Closet doors must have ventilation openings at the top and bottom of the door The front of the dryer requires a minimum of 1 2 5 cm of airspace and for most installations the rear of the dryer re...

Страница 32: ...ally blue jeans This will not transfer to other clothing Loads are wrinkled Was the load removed from dryer at the end of the cycle Select the Custom Refresh Cycle to tumble the load with water and heat to help smooth out wrinkles from a load left in the dryer Was the dryer overloaded Dry smaller loads that can tumble freely Odors Have you recently been painting staining or varnishing in the area ...

Страница 33: ...rals to local dealers repair parts distributors and service companies Maytag appliances designated service technicians are trained to fulfill the product warranty and provide after warranty service anywhere in the United States To locate the Maytag appliances designated service company in your area you can also look in your telephone directory Yellow Pages For further assistance If you need furthe...

Страница 34: ...allation of your major appliance if it is installed in an inaccessible location or is not installed in accordance with published installation instructions 11 Major appliances with original model serial numbers that have been removed altered or cannot be easily determined This warranty is void if the factory applied serial number has been altered or removed from your major appliance The cost of rep...

Страница 35: ...non respect des instructions Votre sécurité et celle des autres est très importante Nous donnons de nombreux messages de sécurité importants dans ce manuel et sur votre appareil ménager Assurez vous de toujours lire tous les messages de sécurité et de vous y conformer AVERTISSEMENT DANGER Voici le symbole d alerte de sécurité Ce symbole d alerte de sécurité vous signale les dangers potentiels de d...

Страница 36: ...ompartiment de séchage Ne pas mettre la main dans la sécheuse si le tambour est en mouvement Ne pas réparer ni remplacer une pièce de la sécheuse ou essayer d en faire l entretien à moins d une recommandation spécifique dans le guide d utilisation et d entretien ou publiée dans les instructions de réparation par l utilisateur que vous comprenez et pouvez exécuter avec compétence CONSERVEZ CES INST...

Страница 37: ...s devrez placer le piédestal de 10 25 4 cm à au moins 9 22 9 cm au dessus du sol Vous aurez besoin de placer le piédestal de 15 5 39 4 cm à au moins 3 5 8 9 cm au dessus du sol Les piédestaux sont disponibles en plusieurs couleurs Pour commander téléphonez au marchand chez qui vous avez acheté votre sécheuse ou consulter la section Assistance ou service Ensemble de superposition Prévoyez vous de s...

Страница 38: ...nt Pour l installation dans un garage vous devez placer la sécheuse à au moins 18 46 cm au dessus du sol En cas d utilisation d un piédestal il faudra 18 46 cm jusqu au fond de la sécheuse Ne pas faire fonctionner la sécheuse là où la température est inférieure à 45ºF 7ºC À des températures inférieures la sécheuse risque de ne plus s arrêter à la fin d un programme automatique Les temps de séchage...

Страница 39: ...on par le côté ou par le fond un espacement de 0 0 cm est permis Espacement recommandé pour l installation dans un placard Pour installation dans un placard avec porte on doit prévoir des ouvertures minimums d entrée d air au sommet du placard Espacement requis Pour une évacuation par le côté ou par le fond un espacement de 0 0 cm est permis A Vue latérale placard ou endroit exigu B Porte de placa...

Страница 40: ... conformes au Code canadien de l électricité C22 1 dernière édition et à tous les codes locaux Pour obtenir un exemplaire de la norme des codes ci dessus contacter Association canadienne de normalisation 178 Rexdale Blvd Toronto ON M9W 1R3 CANADA Alimenter l appareil uniquement par un circuit monophasé de 120 240 volts CA seulement 60 Hz à 4 fils sur un circuit séparé de 30 ampères fusionné aux de...

Страница 41: ... feuille métallique Pour une sécheuse reliée à la terre et connectée par un cordon Cette sécheuse doit être reliée à la terre En cas de mauvais fonctionnement ou de panne la liaison à la terre réduira le risque de choc électrique en offrant au courant électrique un acheminement d évacuation de moindre résistance Cette sécheuse est alimentée par un cordon électrique comportant un conducteur relié à...

Страница 42: ...e les coudes à 90 Brides de serrage Utiliser des brides pour sceller tous les joints Le conduit d évacuation ne doit pas être connecté ou fixé avec des vis ou avec tout autre dispositif de serrage qui se prolonge à l intérieur du conduit Ne pas utiliser de ruban adhésif pour conduit Évacuation Les styles de clapets recommandés sont illustrés ci dessous Le clapet incliné de type boîte ci dessous es...

Страница 43: ...r les installations où le dégagement est réduit Veuillez consulter la section Assistance ou service pour passer une commande Installation au dessus de la sécheuse Pièce numéro 4396028 Installation de périscope Pour utilisation en cas de non concordance de la bouche de décharge de la sécheuse avec le clapet Pièce numéro 4396037 Non concordance de 0 0 cm à 18 45 72 cm Pièce numéro 4396011 Non concor...

Страница 44: ...dre la meilleure performance de séchage Tableau des systèmes d évacuation REMARQUE Les installations d évacuation du conduit par le côté ou par le bas comportent un changement de direction à 90º à l intérieur de la sécheuse Pour établir la longueur maximale du conduit ajouter un changement de direction à 90º au tableau Installationdusystèmed évacuation 1 Installer le clapet d évacuation Utiliser d...

Страница 45: ...iveau de la sécheuse Contrôler l aplomb de la sécheuse Contrôler l aplomb tout d abord transversalement puis dans le sens avant arrière Si la sécheuse n est pas de niveau la déposer sur un bloc de bois Utiliser une clé à molette pour ajuster les pieds vers le haut ou vers le bas et vérifier à nouveau si elle est de niveau Raccordement du tuyau d alimentation La sécheuse doit être connectée au robi...

Страница 46: ... reliée à la terre Mettre le courant 9 Retirer tout film de protection ou ruban adhésif resté sur la sécheuse 10 Lire Utilisation de la sécheuse 11 Essuyer soigneusement le tambour de la sécheuse avec un chiffon humide pour éliminer toute trace de poussière 12 Si vous vivez dans une zone où l eau est dure l utilisation d un adoucisseur d eau est recommandée pour contrôler l accumulation de tartre ...

Страница 47: ...e choisi s affichent REMARQUE Chaque fois qu une caractéristique est sélectionnée une lumière jaune s allume à côté de cette caractéristique Le témoin ne s allume pas lorsque la sélection n est pas disponible avec le programme ou les options sélectionnés Utilisation d un programme de détection Appuyer sur le bouton POWER CANCEL mise sous tension annulation Faire tourner le cadran pour sélectionner...

Страница 48: ...n peut être modifié uniquement pour les programmes de détection Cette caractéristique ne peut pas être sélectionnée pour les programmes Timed minutés Steam vapeur ou Sanitize assainissement Comment fonctionnent les programmes de détection Le système de séchage Sensi CareTM améliore la performance avec Auto Moisture Sensing Plus détection automatique avancée de l humidité qui fait avancer le progra...

Страница 49: ...e en jaune REMARQUE Lors du programme Custom Refresh rafraîchissement personnalisé vous pouvez modifier les réglages de durée de température la caractéristique Wrinkle Prevent anti froissement et Signal On Off mise en marche arrêt du signal Lors du programme Rapid Refresh rafraîchissement rapide vous pouvez modifier les caractéristiques Wrinkle Prevent et Signal On Off Pour modifier d autres régla...

Страница 50: ...e des programmes de détection avec les programmes minutés Steam à la vapeur ou Sanitize assainissement Témoins lumineux Vous pouvez suivre la progression de la sécheuse grâce aux témoins lumineux de degré de séchage Témoin lumineux de détection Lors de la mise en marche initiale d un programme le témoin lumineux Sensing en cours de détection s allume jusqu à la détection d un article mouillé Dans ...

Страница 51: ...e réglage de degré de séchage des programmes de détection Normal La durée variera en fonction du type et du volume de la charge Programmes minutés Utiliser les programmes minutés pour sélectionner une durée de séchage précise et une température de séchage Lorsqu un programme minuté est sélectionné l afficheur de la durée résiduelle estimée indique la durée réelle restante pour le programme en cour...

Страница 52: ...te pendant 20 minutes Lorsque la sécheuse ne fonctionne pas la lampe du tambour s allume lorsqu on appuie sur la touche DRUM LIGHT lampe du tambour ou lorsque la porte est ouverte Elle restera allumée à moins que la porte de la sécheuse ne soit laissée ouverte pendant 20 minutes qu on ferme la porte ou qu on appuie à nouveau sur la touche DRUM LIGHT Appuyer sur DRUM LIGHT à tout moment pour allume...

Страница 53: ...s arrête automatiquement Changement des modificateurs et options après avoir appuyé sur Start Il est possible de changer un modificateur ou une option à tout moment avant que le modificateur ou l option choisi e ne commence 1 Appuyer une fois sur START PAUSE mise en marche pause 2 Choisir le nouveau modificateur et ou la nouvelle option 3 Appuyer sans relâcher sur START PAUSE pour poursuivre le pr...

Страница 54: ...ques avec la grille de séchage Ce tableau montre des exemples d articles qui peuvent être séchés sur une grille et indique le programme le réglage de température et la durée de séchage suggérés La durée de séchage réelle dépendra du degré d humidité retenu dans les articles Minutes Régler de nouveau la durée pour compléter le séchage si nécessaire REMARQUE Il faut enlever la grille de séchage pour...

Страница 55: ...ttoyant liquide domestique ininflammable sur la surface tachée et frotter avec un linge doux jusqu à ce que toute la teinture et les taches soient enlevées 3 Essuyer complètement le tambour avec un linge humide 4 Faire culbuter une charge de linge ou de serviettes propres pour sécher le tambour REMARQUE Les vêtements contenant des teintures instables tels que jeans en denim ou articles en coton de...

Страница 56: ... Veiller à ce que les pieds de nivellement soient fixés solidement à la base de la sécheuse 5 Utiliser du ruban adhésif de masquage pour fixer la porte de la sécheuse Changement de l ampoule d éclairage du tambour La lumière de la sécheuse s allume automatiquement à l intérieur du tambour lorsqu on ouvre la porte Changement de l ampoule du tambour 1 Débrancher la sécheuse ou déconnecter la source ...

Страница 57: ... ce qui fait vibrer la sécheuse Séparer les articles de la charge et remettre la sécheuse en marche La sécheuse affiche un message codé PF panne de courant vérifier ce qui suit Le programme de séchage a t il été interrompu par une panne de courant Appuyer sans relâcher sur START pour remettre la sécheuse en marche Code de diagnostic L2 tension faible ou pas de tension de la ligne Le tambour tourne...

Страница 58: ...acard doivent comporter des ouvertures d aération au sommet et en bas de la porte Un espace minimum de 1 2 5 cm est nécessaire à l avant de la sécheuse et pour la plupart des installations un espace de 5 12 7 cm est nécessaire à l arrière de la sécheuse Voir les Instructions d installation Le réglage de température Air Only air seulement a t il été sélectionné Choisir la température correcte pour ...

Страница 59: ...rechange spécifiées par l usine dans votre région composer le numéro de téléphone du Centre d assistance à la clientèle de Maytag Services LLC ou appeler le centre de service désigné par Maytag le plus proche Aux États Unis Téléphoner sans frais au Centre d assistance à la clientèle de Maytage Services LLC au 1 800 688 9900 Nos consultants fournissent de l assistance pour Caractéristiques et spéci...

Страница 60: ...10 La dépose et la réinstallation de votre gros appareil si celui ci est installé dans un endroit inaccessible ou n est pas installé conformément aux instructions d installation fournies 11 Les gros appareils ménagers dont les numéros de série et de modèle originaux ont été enlevés modifiés ou qui ne peuvent pas être facilement identifiés La présente garantie est nulle si le numéro de série d usin...

Страница 61: ... Trademark of Maytag Corporation or its related companies Used under license by Maytag Limited in Canada Marque déposée Marque de commerce of Maytag Corporation ou de ses compagnies affiliées Emploi sous licence par Maytag Limited au Canada 5 08 Printed in U S A Imprimé aux É U ...

Отзывы: