background image

INSTALLATION INSTRUCTIONS,

INFORMATION AND OPERATING GUIDE

for

 MAXXFAN

® 

Mini

 MODELS 4301M 

and

 4401M

for

 MAXXFAN

®


and

 MAXXFAN

® 

Plus

 MODELS

4000K, 4001K, 4002K, 4050K, 4201KW, 4251KW, 

4301K, 4401K, 4500K, 4501K, 4541K, 4700K, 4751KS, 

4761KS, 4800K, 4801K, 4900K, 4951KS

WARNING!  

To reduce risk of fire, injury to persons or damage to property, use only 

in the manner intended by AIRXCEL, INC.   Should you have questions, please contact 

AIRXCEL/MAXXAIR VENTILATION SOLUTIONS Customer Service at 316.832.4357.


P/N: 11F90000K

01-2018

READ AND SAVE THESE INSTRUCTIONS

NOTE:

 Refer to Installation Instructions, Information and Operation Guides regarding the 

model you have purchased.
The 

MAXXFAN

 installs into a standard RV roof opening of 14 by 14 inches.

To determine if your roof opening is correctly sized, simply remove the interior ceiling garnish 

trim ring of your existing roof vent and measure the ceiling opening or verify the opening is 

large enough by sliding the 

MAXXFAN

 interior Garnish trim ring into the opening.

The 

MAXXFAN 

Mini

 is designed for a minimum roof thickness of 1 inch to a maximum 

of 6 1/2 inches.
The 

MAXXFAN/MAXXFAN

 Plus

 is designed for a minimum roof thickness of 2 inches 

to a maximum of 6 1/2 inches.   If your roof thickness is less than 2 inches, build additional 

thickness at the ceiling opening using wood or other suitable material.
The 

MAXXFAN

 requires a minimum 12 Volt DC, 5 amp service.   Confirm that the circuit 

you intend to use will accommodate the additional load.   Use the proper gauge stranded 

wire for electrical connections.

MAXXFAN

®

Содержание 4000K

Страница 1: ...into a standard RV roof opening of 14 by 14 inches To determine if your roof opening is correctly sized simply remove the interior ceiling garnish trim ring of your existing roof vent and measure the...

Страница 2: ...ower wires slide to the interior and do not become entangled Using the sixteen 16 screws provided screw the flange to the roof at each raised ring dimple location along the flange Screw into the dimpl...

Страница 3: ...ng all 4 markers on the outside of the Garnish ring and trim accordingly refer to 6B to the right STEP 7 Complete the installation by placing any excess wiring to the inside of the roof opening and sl...

Страница 4: ...rs The Serial Number for your MAXXFAN is located on the back page of this booklet and on the fan control plate under the round insect screen frame Your serial number may or may not be located in the s...

Страница 5: ...lock lid rotate the knob clockwise It may be necessary to slightly rotate the knob to properly align it to lock The locking knob is for use during transporting and high wind situations Do not use exc...

Страница 6: ...turn to remove screen CAUTION Never operate fan with screen removed When removing screen for cleaning turn the MAXXFAN OFF and remove the vehicle 12 volt power to the MAXXFAN When cleaning your MAXXF...

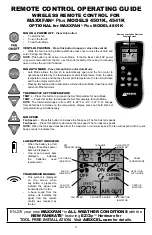
Страница 7: ...per press The fan will emit a beeping sound to confirm this setting If a previous thermostat temperature was entered the fan will remember this temperature setting and the next time you enter Auto Mod...

Страница 8: ...URE TEMP Press this button to increase the Set Temperature for Auto Mode TEMP Press this button to decrease the Set Temperature for Auto Mode NOTE The thermostat ranges is from 29 F to 99 F or 2 C to...

Страница 9: ...emperature for Auto Mode NOTE The thermostat ranges is from 29 F to 99 F or 2 C to 37 C To change from Fahrenheit to Celsius on the temperature display press and hold both set temperature keys simulta...

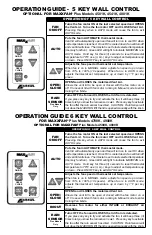
Страница 10: ...ON at the last selected speed When Fan is running select LOW MEDIUM or HIGH Speed Once HIGH Speed is reached the fan motor cycles back to LOW Speed FAN OFF Turns the Fan Motor OFF OPERATION GUIDE 1 SW...

Страница 11: ...N CLOSE AUTO HOLD TO SET 78 F OPERATION OF 5 KEY WALL CONTROL FAN ON OFF Turns the fan motor ON at the last selected speed and OPENS the Vent Lid Turns the fan motor OFF and CLOSES Vent Lid Pressing t...

Страница 12: ...or additional product information please visit www AIRXCEL com AIRXCEL INC RV Products Division MAXXAIR 3050 N St Francis St Wichita KS 67219 316 832 3400 reinventing comfort PLACE CONSUMER LABEL HERE...

Отзывы: