


19
Display Connections
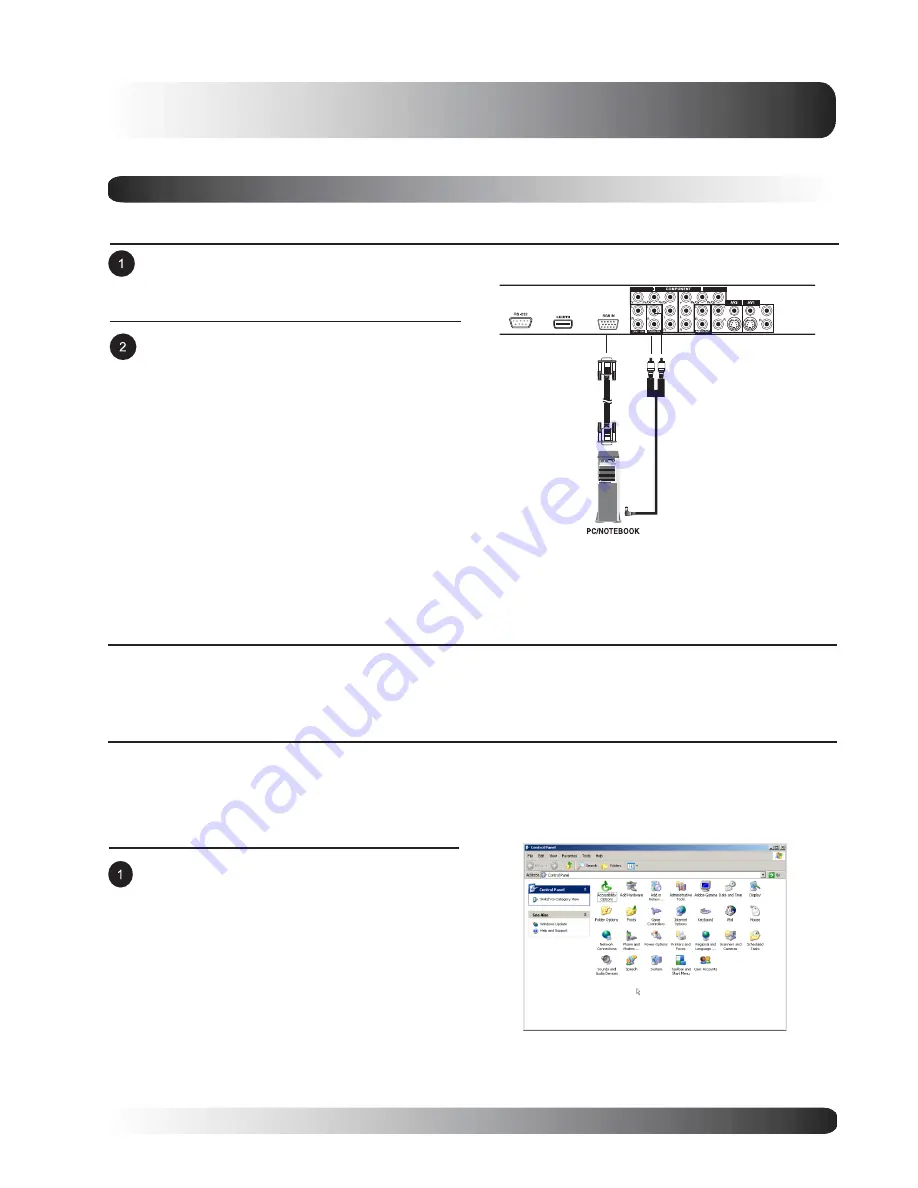
Connecting a PC
Using RGB Video Input
Connect the red (R) and white (L) audio jacks
from the PC to the R and L jacks located next
to the RGB connector.
For most PCs, connect the 15-pin D-Sub RGB
connector from the back of the PC to the RGB-
IN Connector located on the back of the
monitor.
Note:
!
A RGB loop-out labeled RGB Out will allow
another RGB monitor to be connected. The RGB
loop-out will display the same signal as the RGB
In signal source.
Audio
(3.5 mm Mini-Stereo to RCA cable)
VGA Cable
(15 Pin D-Sub)
Setting Up Your Monitor Using Plug and Play
This monitor adheres to VESA Plug and Play standard to eliminate complicated and time consuming setup of
monitors. This monitor identifies itself to the computer and automatically sends the PC its Extended Display
Identification Data (EDID) using Display Data Channel (DDC) protocols.
How to Set up Your PC for Use with Monitor (Windows)
The display settings for a typical Windows-based computer are shown below; however, actual screens on your
computer will differ depending on the version of Windows and video card equipped with the computer. Even
though the actual screen may look different from example displayed below, basic set-up routine will apply in
most cases.
Go to Window’s CONTROL PANEL by clicking:
START, SETTINGS, CONTROL PANEL. The
CONTROL PANEL Window is displayed.
Select the DISPLAY icon from this window.
Содержание ML-42HLM20
Страница 1: ...Owners Manual LCD Flat Panel 42 LCD Monitor...
Страница 6: ...6 Table of Contents...
Страница 7: ...7 Getting to Know Your Display Flat Panel Monitor...
Страница 13: ...13 Display Connections Flat Panel Monitor...


