11
ENGLISH
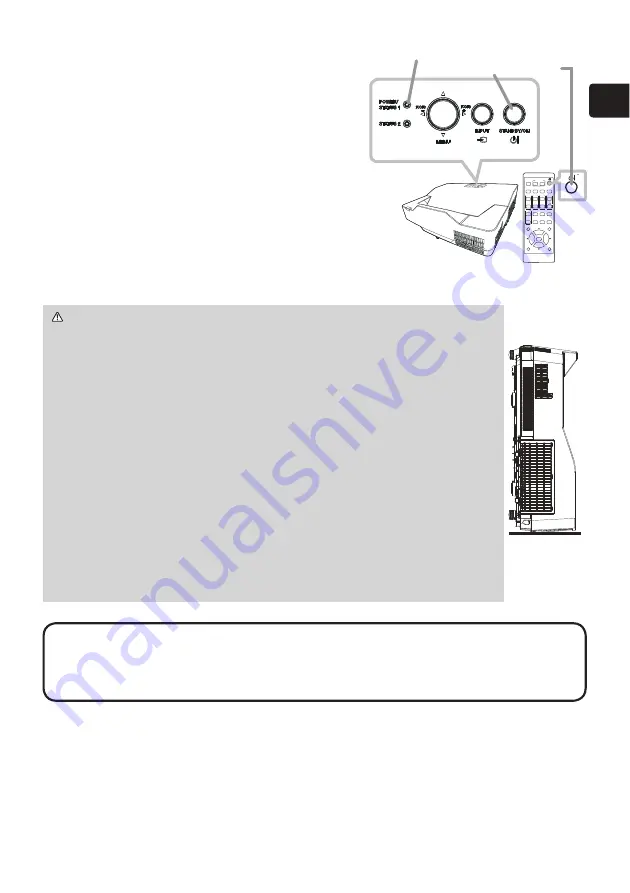
Turning on the power
1.
0DNHVXUHWKDWWKHSRZHUFRUGLV¿UPO\
and correctly connected to the projector
and the outlet.
2.
Make sure that the
POWER/STATUS1
indicator is steady orange.
3.
Press the
STANDBY/ON
button on the
projector or the remote control.
The projection light source will light up,
and the
POWER/STATUS1
indicator will begin
blinking in green.
When the power is completely on, the
indicator will stop blinking and light in steady green.
WARNING
Ź
Never look into the projection window while the
projection light source is on, since the projection ray may cause a
trouble on your eyes.
Ź'RQRWSODFHWKHSURMHFWRUYHUWLFDOO\DVVKRZQLQWKH¿JXUHRQWKH
right. It could cause malfunction or injury. If you install the projector
vertically on a table or desk, be sure to use the designated optional
accessories.
Ź7KHSURMHFWLRQZLQGRZRIWKLVPDFKLQHLVPDGHRIJODVV,WFDQ
be damaged by excessive force or an impact. Read the following
important warnings carefully, and follow them for your own safety.
• Do not apply excessive force on or allow impact to the projection
window.
• Keep the projector out of the reach of children.
• If the projection window is broken, the projected image will be
distorted. Never touch a broken projection window, and contact your
dealer.
NOTE
• Please power on the projector prior to the connected devices.
• The projector has the DIRECT POWER ON
function, which can make the
SURMHFWRUDXWRPDWLFDOO\WXUQRQ)RUPRUHLQIRUPDWLRQVHHWKH³2SHUDWLQJ
Guide”. (
1
)
ASPECT
BLANK
ESC
MENU
RESET
AUTO
PAGE
DOWN
ON
OFF
FREEZE
UP
ENTER
FOCUS
ZOOM
INPUT
INTERACTIVE
MYBUTTON
PbyP
MAGNIFY
VOLUME
GEOMETRY
PICTURE
MUTE
NETWORK
OSD MSG
POWER/STATUS1
indicator
STANDBY/ON
button


