Max BC-LGW-O-TW Скачать руководство пользователя страница 11

11

Setting up the MAX! system

• 

Plug the USB power supply unit provided into an easily ac-

cessible power socket outlet.

In order to completely disconnect the mains voltage 

please plug out the power supply unit from the sock-

et.

• 

Before you reset the MAX! Connect the MAX! Cube and the 

main adapter with the USB cable. Use the USB port on the 

side of the device (2) for this purpose (see diagram on page 8).

• 

The power LED starts to flash as soon as the MAX! Cube 

initiates a self-test. 

• 

The power LED lights up continuously once the self-test 

has been successfully completed and the power supply 

is present.

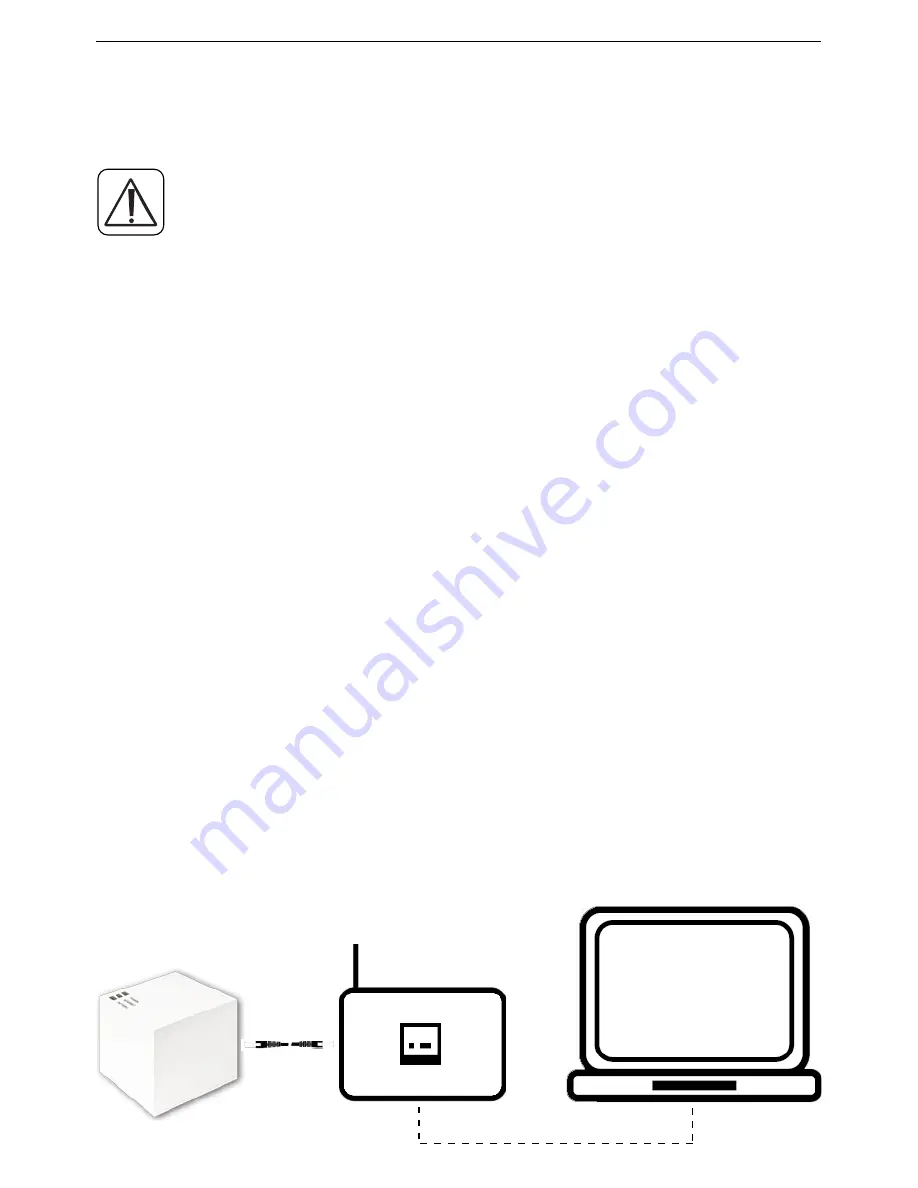
6.1.2  Connect the MAX! Cube to the router/PC

• 

Connect the MAX! cube to a router. To do this, plug the 

network cable supplied with the device into the designat-

ed port (1) on the side of the MAX! Cube (see diagram on 

page 4). Connect the other end of the cable to a free Eth-

ernet port on your router.

• 

Connect the router to your PC.

• 

The Internet LED starts to flash as soon as the connection 

to the router is active.

Содержание BC-LGW-O-TW

Страница 1: ...Cube LAN Gateway BC LGW O TW Operating manual...

Страница 2: ...1x MAX Cube LAN Gateway 1x Plug in USB power supply 1x USB cable 1x Network cable 1x Mounting accessories 1x Assembly bracket for wall mounting 3x Brief instruction in German English French Dutch and...

Страница 3: ...g up the MAX system 10 7 Restore factory settings 15 8 LED flashing sequences and transmission behaviour 17 9 Maintenance and cleaning 18 10 Information about radio operation 18 1st English edition 07...

Страница 4: ...Note This section contains important additional informa tion 2 Safety instructions The device is not a toy do not allow children to play with it Do not leave packaging material lying around as it can...

Страница 5: ...y 3 Function With the MAX Heating Control system the room temperature in apartments houses and other small buildings can comfortably be controlled and regulated MAX Heating Control offers three expand...

Страница 6: ...es The MAX Cube links the MAX devices in your house and your computer network Further more the device stores any settings and configurations that you have made Different settings and configurations fo...

Страница 7: ...restore the factory settings of your MAX components and teach in the devices to the MAX Cube You will find further information in the operating manual of the single devices available for download at...

Страница 8: ...D indicates whether a connection to the LAN Internet exists Battery The LED indicates whether a battery needs to be replaced on a MAX component Bottom side Reset button For restoring the factory setti...

Страница 9: ...mount the MAX Cube on a wall Use a pen to mark the bore hole positions a on the wall Use a drill to make the holes as illustrated a Use the screws and plugs supplied to fasten the bracket to the wall...

Страница 10: ...e installing and teaching in the MAX devices setting up Internet control 6 1 Connecting the MAX Cube 6 1 1 Connect the MAX cube to the power supply The MAX Cube draws its power supply from the plug in...

Страница 11: ...er LED starts to flash as soon as the MAX Cube initiates a self test The power LED lights up continuously once the self test has been successfully completed and the power supply is present 6 1 2 Conne...

Страница 12: ...ata store 6 2 Installing the MAX software system requirements You need the MAX software to teach in MAX components via the MAX Cube for configuration purposes and to call up device status messages The...

Страница 13: ...fari version 6 or 5 1 9 Mac Google Chrome version 31 and other browsers Previous and later versions may also be applied 6 3 Installing the devices InordertoenablecommunicationbetweenMAX components the...

Страница 14: ...om Follow the same procedure for all the other devices that you want to teach in on the MAX system 6 4 Setting up Internet control If you want to be able to control your system using the Inter net con...

Страница 15: ...from home as well as on the move via Internet access 7 Restore factory settings The factory settings of the MAX Cube can be restored anytime When the factory settings are restored all informa tion ab...

Страница 16: ...16 Restore factory settings IP Adr 192 168 0 222 Reset The Power LED lights up and then starts to flash The Power LED lights up permanently again The factory settings of the device are now restored...

Страница 17: ...perma nently lit Self test completed successfully and power supply present Internet LED LED off No network connection check cabling LED flashing Network connection to router estab lished no connectio...

Страница 18: ...s performed on a non exclusive trans mission path which means that there is a possibility of in terference occurring Interference can also be caused by switching operations electrical motors or defect...

Страница 19: ...ain adapter Output 5 V 550 mA Standby power consumption 1 1 W Radio frequency 868 3 MHz Receiver category SRD category 2 Typ open area RF range 100 m Duty cycle 1 per h Interface RJ 45 Ethernet Degree...

Страница 20: ...isposed of at local collection points for waste electronic equipment in compliance with the Waste Electrical and Electronic Equipment Directive The CE sign is a free trading sign addressed exclu sivel...

Страница 21: ...21 Information about radio operation Bevollm chtigter des Herstellers Manufacturer s authorised representative eQ 3 AG Maiburger Stra e 29 26789 Leer GERMANY www eQ 3 de...

Отзывы: