


39
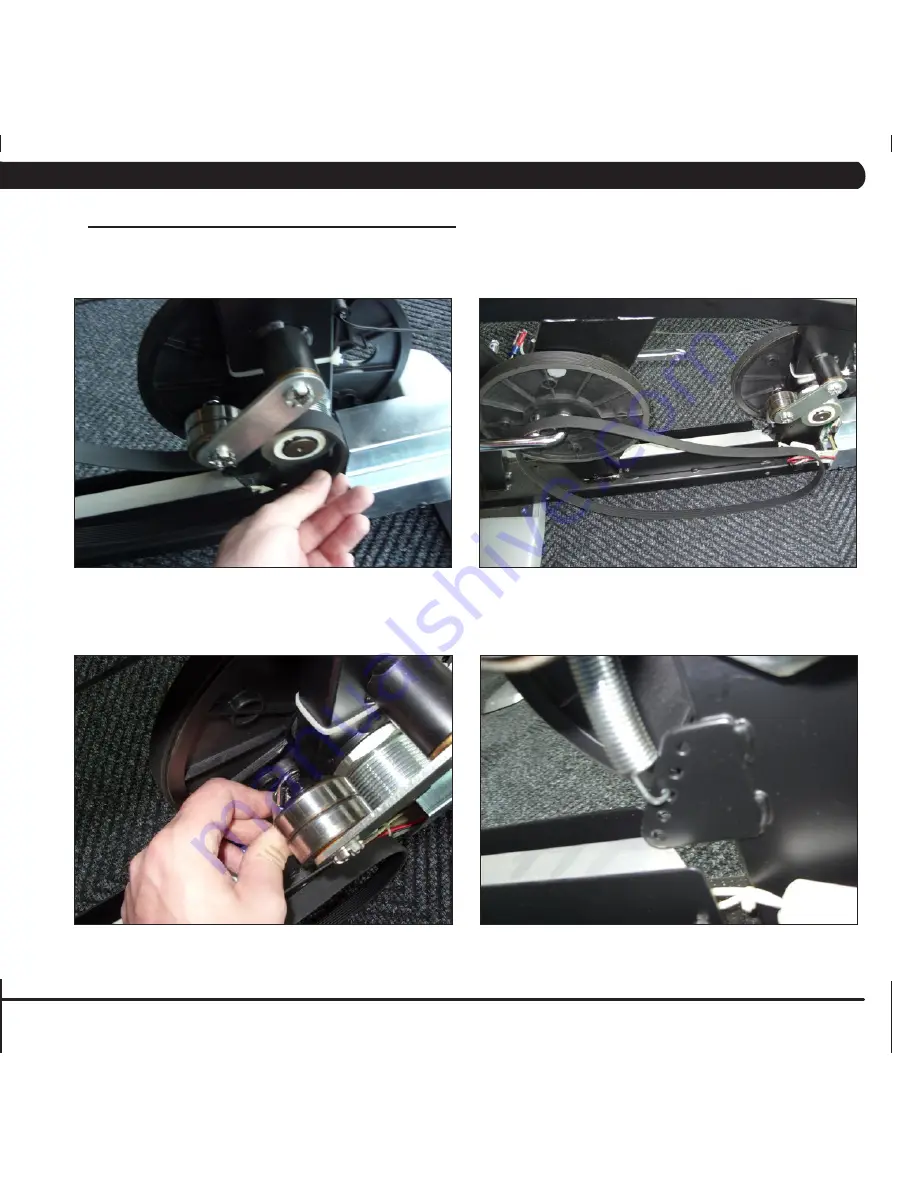
8.13 DRiVe BelT RePlACeMeNT
CHAPTeR 8: PART RePlACeMeNT gUiDe
1) Remove the right side shroud as outlined in Section 8.11.
2) Pull up on the tension assembly and walk the belt off of the pulley (Figure A).
3) Remove the belt (Figure B).
4) Reverse Steps 1-3 to install a new drive belt.
note:
Be sure to reattach the tension spring (Figure C). If more tension is needed on the
drive belt, multiple holes are available for the lower spring attachment (Figure D).
5) Test the bike for function as outlined in Section 8.20.
figURe A
figURe B
figURe C
figURe D
Содержание U5X-02
Страница 1: ...U 5 x 0 2 B i k e S E R V I C E M A N U A l...
Страница 2: ......
Страница 6: ...2 1 1 Serial Number Location Chapter 1 Serial number location console serial number location...
Страница 18: ...14 Chapter 7 TROUBLESHOOTING 7 1 Electrical Diagrams...
Страница 19: ...15 7 1 Electrical Diagrams Chapter 7 Troubleshooting...
Страница 20: ...16 Chapter 7 TROUBLESHOOTING 7 1 Electrical Diagrams...
Страница 55: ...51 9 3 Assembly Instructions Continued Chapter 9 bike SPECIFICATIONS AND ASSEMBLY GUIDE step 3 step 4...
Страница 56: ...52 9 3 ASSEMBLY INSTRUCTIONS CONTINUED Chapter 9 bike specifications and assembly guide Step 5...
Страница 57: ...53 final assembly 9 3 assembly instructions continued Chapter 9 bike SPECIFICATIONS AND ASSEMBLY GUIDE...
Страница 61: ...57 NOTES...


