

Thank you for choosing DSS532!
Please read this guide for correct installation and retain it for future reference.
The information in this guide was current at the time of publication. All
specifications are subject to change without notice.
This Guide is meant to help you install and connect the DSS532 as the Key
Expansion Module for EON510 or SPARSH VP510 phone .
Copyright
All rights reserved. No part of this document may be copied or reproduced in any form or by
any means without the prior written consent of Matrix Comsec Pvt. Ltd.
Warranty
Limited Warranty. Valid only if primary protection is provided, mains supply is within limit and
protected, and environment conditions maintained within product specifications. Complete
warranty statement is available on our website: www.MatrixTeleSol.com
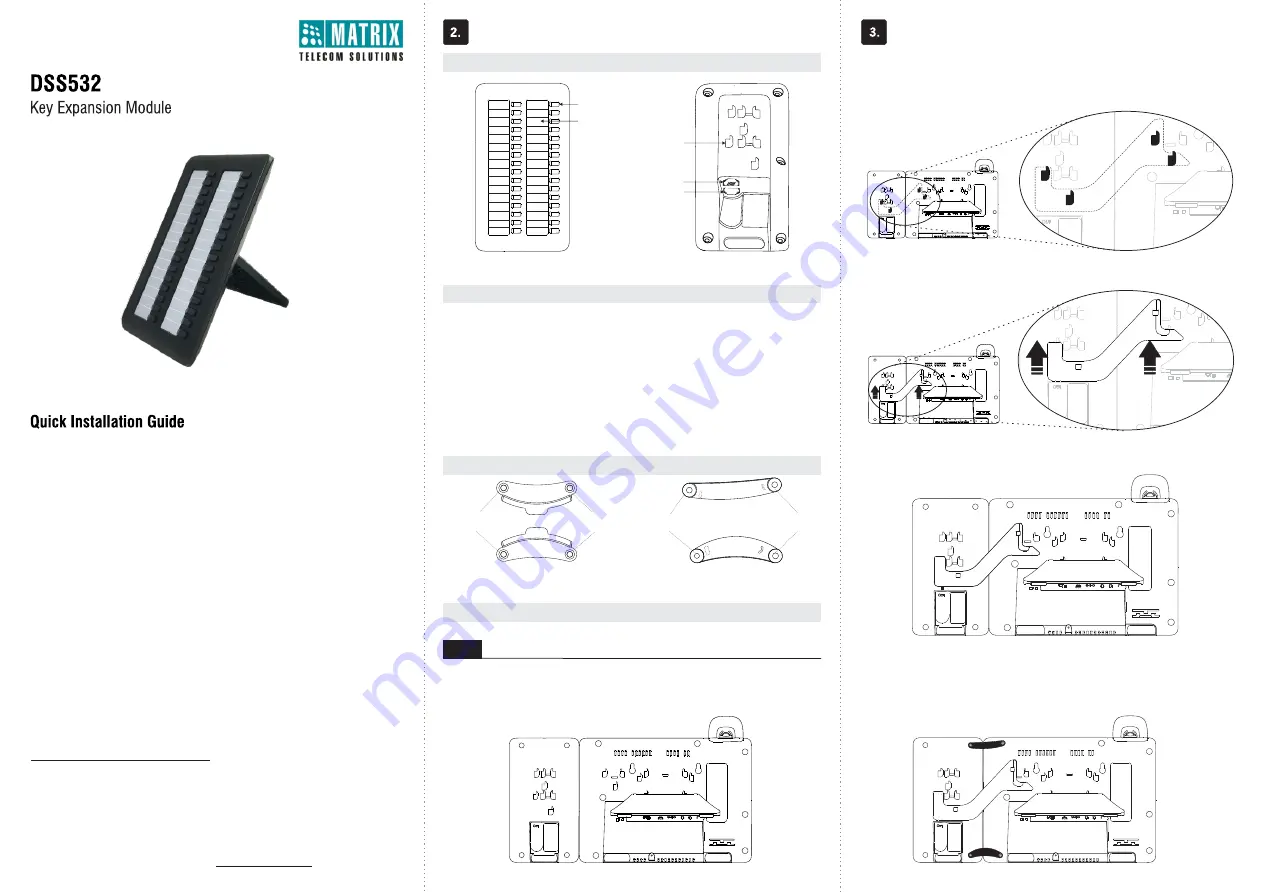
Know Your DSS532
IN
OUT
1
Front View
Back View
What Your Package Contains
DSS532
RJ11 Cable
Foot Stand
DSS Extender
4 Clamps (2 DSS-Phone Clamps and 2 DSS-DSS Clamps)
Warranty Card Set
Quick Installation Guide (printed copy)
Installing DSS532
Attach the DSS Extender
To attach the DSS532 with the phone use the DSS Extender.
Place the DSS Extender as illustrated below.
Attach the DSS532 with Phone
Step 1
Turn the phone upside down on a table.
Now, place the inverted DSS532 adjacent to the phone.
AUX
Insert the hooks on the Extender into the slots provided on the phone and the
DSS532.
Firmly slide the DSS Extender upward to lock them in place.
AUX
AUX
DSS Key
DSS Key Label
Slot
IN Port
OUT Port
AUX
AUX
AUX
DSS532 Clamps
DSS-Phone Clamps
Attach this side
to the First DSS
Attach this side
to the Phone
DSS-DSS Clamps
Attach this side
to the Second DSS
Attach this side
to the First DSS
Attach the Clamps
Remove the screws to attach the clamps.
Place the DSS-Phone Clamps between the DSS532 and the phone.
Insert the screws back to fix the clamps.
AUX
Upper DSS-Phone Clamp
Lower DSS-Phone Clamp