background image

lll. OPERATION GUIDE:

lV. MAINTENANCE:

1. The nut riveting adapter is 
    lubricated before shipping. 
    Recommended: cleaning
    the components of plunger 
    tube, and using lubricant 
    grease to re-lubricate its 
    parts on at least a yearly 
    basis.

2. Threaded mandrel
    replacement:
    life span of threaded mandrel varies with usage 
    frequency and the uses of different rivet nut 
    sizes/types. Recommended: replacing the threaded 
    mandrel with new spare and its nosepiece before it 
    is worn-out.

WARNING: WEAR WORK GLOVES (RUBBER COATED 
PREFERRED) FOR GRIPPING THE ADAPTER
IMPORTANT

: Ensure the threads on mandrels are clean 

and the loaded rivet nut has full thread engagement with 
threaded mandrel during riveting. It is strongly 
recommended to clean and lubricate (ex. silicone spray, 
dry lube) the threads on mandrels before and after use. 

CRITICAL

: Before using the tool on your intended work 

piece, it is REQUIRED that you test the tool with a rivet nut 
on a test piece to determine the adequate torque needed 
for your rivet nut size, rivet nut material, and sheet metal 
thickness and material.

• Ensure drill is in "driver" mode and not drill mode. 

  Different drills will require different torque, limiting 
  settings for the same material. 

• On the test piece, set your drill to a low clutch setting and 

  work up to higher settings until the torque level is enough 

  to fully set the rivet nut but not over set. WARNING: Over 

  setting rivet nuts may permanently damage the mandrel 
  or tool.

• Once the torque level is determined, test again on a new 

  hole at your intended setting to confirm. The knurled part
  of the rivet nut should look mushroomed, starting to 
  become flat on the other side of the work piece and 
  should not rotate when you install a bolt. 

2.4 Ensure the rivet nut has adequate engaged thread
      and that there is no cross threading. Check and 
      confirm the objects to be riveted are SECURE.
2.5 Some small amount of clearance between nose 
      piece and the flange of rivet nut may be beneficial to 
      operation, but keep adequate thread engagement on 
      the nut.
2.6 Refer to Section III. for determining the proper drill 
      torque settings (REQUIRED).
2.7 Put the fully threaded rivet nut onto the tools    
      mandrel into the proper size hole (see Sizing Chart 
      on page 2). 
2.8 Align the adapter with the hole angle as best you 
      can. While gripping the adapter firmly with one 
      hand (wear work gloves), operate the drill in the 
      FWD direction until you feel or hear the drills torque 
      clutch catching. The adapter should not rotate while 
      the drill is working. Release your grip on the adapter 
      and reverse the drill out of the rivet nut. Depending 
      on the material, you may need to manually help the 
      adapter thread out of the rivet nut with your off
      hand. 

Tip 1: If setting M10 or 3/8" and especially on stainless, 

high grip strength is required. Not all rivet nuts are the 

same--some require more force. 
Tip 2: Make a note of the torque setting of your 

application for future use.

1. Tool  Installation:

Install a new mandrel and nosepiece to match your 
intended rivet nut thread size. Use the included wrench to 
install the new mandrel into the #2 Plunger Tube. Ensure 
that the mandrel and other components are tightly fixed in 
position. After installing the front bushing cover and lock 
bushing, lightly tighten the new nosepiece onto the end of 
the tool. Install the hex shank drive end of the tool into 
your drill and affix tightly into its chuck.

2. Riveting:

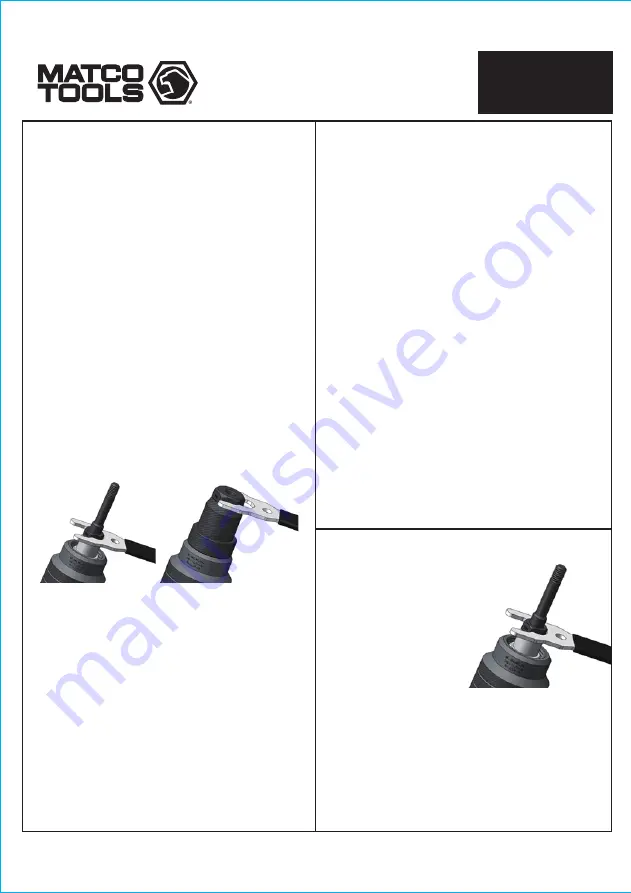
    2.1 While holding the adapter with your hand (

WEAR      

    GLOVES

), operate the drill in the REV direction until 

    you hear the adapter start to click. This means it has      
    fully exposed the mandrel.
    2.2 Switch the drill to the FWD setting.
    2.3 Manually thread the selected rivet nut onto threaded 
    mandrel or hold the rivet nut in one hand and use 
    another hand to pull the drill trigger slightly to have the 
    nut threaded on by the tool.

RIVET NUT

ADAPTER KIT

RN9

Página 3

1802030-14

Содержание RN9

Страница 1: ... stainless rivet nuts up to 3 8 10mm in sheet metal Do not use this tool outside of the designed intent Never modify the tool for any other purpose or use PRODUCT INFORMATION 1 YEAR LIMITED WARRANTY The manufacturer warrants this product to the original user against defective material or workmanship for a period of 1 year from the date of purchase The manufacturer reserves the right to determine w...

Страница 2: ... sizes in stainless steel WEAR GLOVES Clutch provides a felt and or audible indication of reaching max setting Adjustable torque setting Chuck capacity of 6 35mm 1 4 shank With maximum torque 190 in lbs for aluminum and steel rivet nuts in smaller sizes With maximum torque 400 in lbs for stainless steel rivet nuts Rivet Nut Size Nut Material SAE 10 24 SAE 1 4 20 SAE 5 16 18 SAE 3 8 16 M5 M6 M8 M10...

Страница 3: ...cts to be riveted are SECURE 2 5 Some small amount of clearance between nose piece and the flange of rivet nut may be beneficial to operation but keep adequate thread engagement on the nut 2 6 Refer to Section III for determining the proper drill torque settings REQUIRED 2 7 Put the fully threaded rivet nut onto the tools mandrel into the proper size hole see Sizing Chart on page 2 2 8 Align the a...

Страница 4: ... tool for any other purpose or use INFORMACIÓN DEL PRODUCTO El fabricante garantiza este producto al usuario original contra defectos de materiales o de mano de obra durante un periodo de un año a partir de la fecha de compra El fabricante se reserva el derecho a determinar si una pieza o piezas fallaron debido a material defectuoso mano de obra o por otras causas Esta garantía no cubre fallas cau...

Страница 5: ...uts Minimum 14 4V for steel rivet nuts in M6 M8 1 4 and 5 16 or stainless in M5 or 10 24 Minimum full size 18V for M10 and 3 8 rivet nuts and all other sizes in stainless steel WEAR GLOVES Clutch provides a felt and or audible indication of reaching max setting Adjustable torque setting Chuck capacity of 6 35mm 1 4 shank With maximum torque 190 in lbs for aluminum and steel rivet nuts in smaller s...

Страница 6: ...ts to be riveted are SECURE 2 5 Some small amount of clearance between nose piece and the flange of rivet nut may be beneficial to operation but keep adequate thread engagement on the nut 2 6 Refer to Section III for determining the proper drill torque settings REQUIRED 2 7 Put the fully threaded rivet nut onto the tools mandrel into the proper size hole see Sizing Chart on page 2 2 8 Align the ad...

Страница 7: ...etenir et de réparer cet outil Conserver ces instructions dans un endroit sécuritaire et accessible INFORMATIONS PRODUIT Le manufacturier garantit à l acheteur initial que ce produit est exempt de tout vice de matériau et de fabrication pendant une période de une année suivant la date de l achat Le fabricant se réserve le droit de déterminer si la pièce ou les pièces ont échoué en raison d un défa...

Страница 8: ...T BE SECURED BEFORE riveting in order to avoid possible injury Unsecured objects may rotate with the driving tool if not secured 5 The driving tool MUST be stopped if user releases the adapters body during riveting 6 During disassembly for mandrel changing or Maintenance take care as there are pre loaded springs within the tool Rivet Type Stroke Limit Working Torque Recommended RPM Requirements of...

Страница 9: ...cts to be riveted are SECURE 2 5 Some small amount of clearance between nose piece and the flange of rivet nut may be beneficial to operation but keep adequate thread engagement on the nut 2 6 Refer to Section III for determining the proper drill torque settings REQUIRED 2 7 Put the fully threaded rivet nut onto the tools mandrel into the proper size hole see Sizing Chart on page 2 2 8 Align the a...

Страница 10: ... SAE 5 16 18 Nosepiece SAE 1 4 20 Nosepiece SAE 10 24 Nosepiece M10 Nosepiece M8 Nosepiece M6 Nosepiece M5 Nosepiece SAE 3 8 16 Mandrel SAE 5 16 18 Mandrel SAE 1 4 20 Mandrel 1 1 1 1 1 1 1 1 1 1 1 1 1 1 1 1 1 1 1 1 1 1 1 1 1 1 1 1 2 1 1 Index Part No Description Qty 17 18 19 20 21 22 23 24 25 26 27 28 29 30 31 SAE 10 24 Mandrel M10 Mandrel M8 Mandrel M5 Mandrel M6 Mandrel Aluminum Handle Front Spr...

Отзывы: