Tanklevel Interface
– User and Installation Manual
3
2 INSTALLATION
Step 1. Mount the Tanklevel Interface to any flat surface. The Tanklevel Interface comes with a DIN
rail mount option. Alternatively, use the two mounting holes.
Step 2. Insert the MasterBus cable (included, 1m) to integrate the interface into the MasterBus
network. Make sure that the MasterBus network is properly terminated at the two ends with a
terminator.
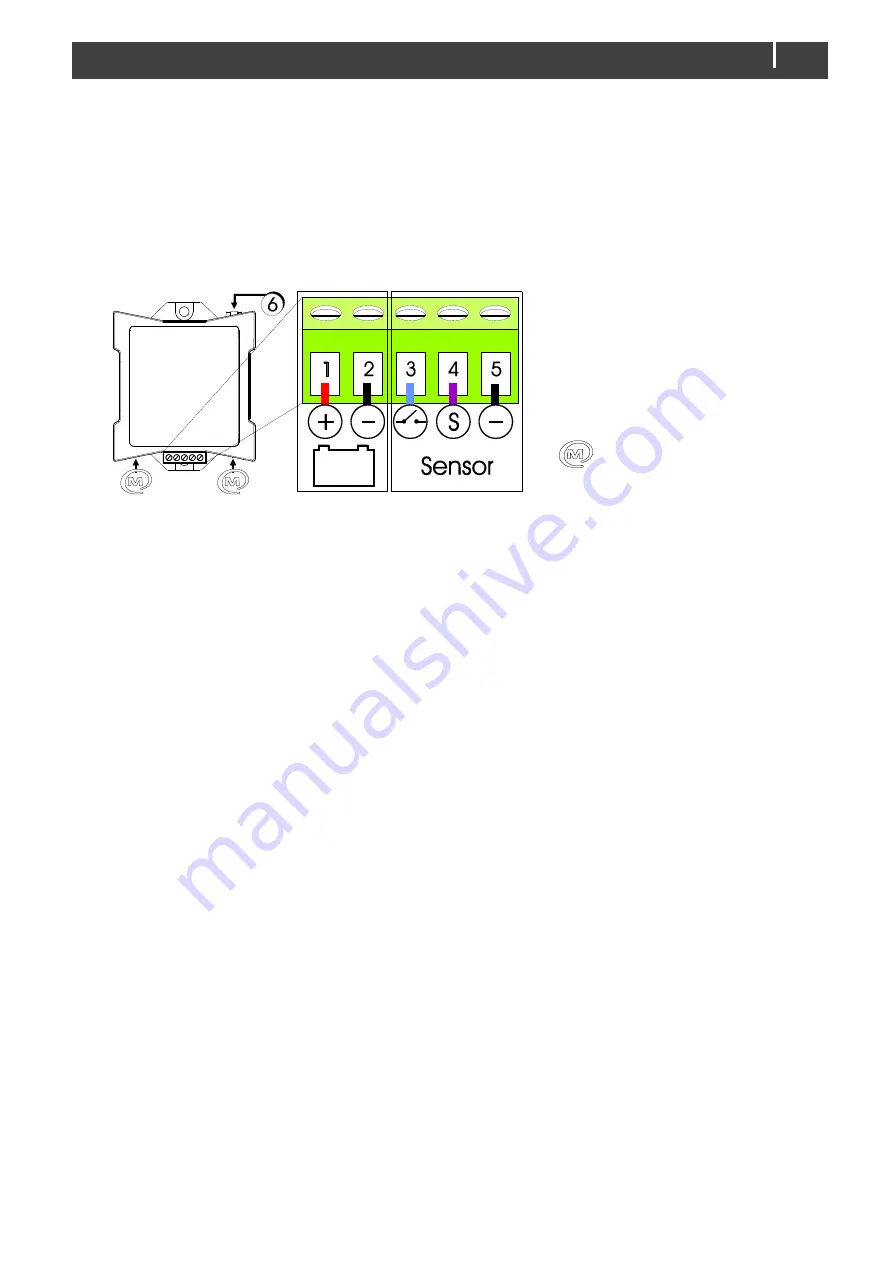
Step 3. Connect the sensor wires 3 (in case of a switchable sensor), 4 & 5 to the screw terminal.
1. Battery positive
2. Battery negative
3. Switched power positive
4. Sensor signal
5. Sensor negative
6. Communication led
MasterBus connector
Step 4. Connect the battery cables (1 & 2) in case of a powered sensor.
Step 5. A flashing LED (6) indicates that the MasterBus communication is working.
Step 6. Use a MasterBus USB Interface to connect a Windows PC (laptop or notebook) with
MasterAdjust software, to configure the Tanklevel Interface.


