MasterMechanic 622-2MM Скачать руководство пользователя страница 1

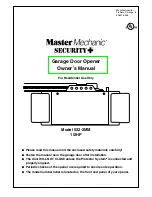
Garage Door Opener

Owner’s Manual

For Residential Use Only

Model 622-2MM

1/2HP

Please read this manual and the enclosed safety materials carefully!

Fasten the manual near the garage door after installation.

The door WILL NOT CLOSE unless the Protector System

®

is connected and

properly aligned.

Periodic checks of the opener are required to ensure safe operation.

The model number label is located on the front end panel of your opener.

Manufactured for
TruServ, Chicago, IL
60631-3505

®

Содержание 622-2MM

Страница 1: ...arefully Fasten the manual near the garage door after installation The door WILL NOT CLOSE unless the Protector System is connected and properly aligned Periodic checks of the opener are required to ensure safe operation The model number label is located on the front end panel of your opener Manufactured for TruServ Chicago IL 60631 3505 ...

Страница 2: ... arm to trolley sectional door 26 Connect door arm to trolley one piece door 27 Adjustment section pages 28 30 Travel limit adjustments 28 Force adjustments 29 Test the Protector System 30 Test the safety reversing sensor 30 Operation safety instructions 31 Care of your opener 31 Maintenance schedule 31 Operation of your opener 32 Receiver and remote control programming 33 Having a problem 34 35 R...

Страница 3: ...move or adjust them yourself Ropes left on a garage door could cause someone to become entangled and killed Remove all ropes connected to the door before installing and operating the opener To avoid damage to the garage door and opener disable locks before installing and operating the opener Use a wood screw or nail to hold locks in the open unlocked position Operation at other than 120V 60 Hz wil...

Страница 4: ...ecurely fastened to structural supports Step 5 page 17 Do you have a finished ceiling in your garage If so a support bracket and additional fastening hardware may be required Safety reversing sensor page 21 Depending upon garage construction extension brackets see Accessories or wood blocks may be needed to fasten sensors to mounting locations Step 10 page 22 Floor mounting of the safety reversing...

Страница 5: ... supplied may be required Safety reversing sensor page 21 Depending on garage construction extension brackets see Accessories or wood blocks may be needed to fasten to mounting locations Step 10 page 22 Floor mounting of the safety reversing sensor will require hardware that is not provided Step 11 page 25 Generally a one piece door does not require reinforcement If your door is lightweight you ca...

Страница 6: ... T Rail End Section 2 UP CEILING MOUNT ONLY Multi Function Door Control Panel LOCK LIGHT Safety Labels and Literature 2 Safety Reversing Sensors 1 Sending Eye and 1 Receiving Eye with 2 Conductor White White Black Bell Wire attached Safety Sensor Bracket 2 6 Carton Inventory Your garage door opener is packaged in one carton which contains all parts illustrated below If anything is missing carefull...

Страница 7: ...x1 1 Rope Lock Nut 1 4 20 x 7 16 12 Nut 5 16 18 5 Washered Screw 5 16 18 x 1 2 2 mounted in motor unit Carriage Bolts 1 4 20 x 1 2 12 Hex Screw 5 16 18 x 7 8 3 Master Link 2 Ring Fastener 3 Threaded Trolley Shaft 1 Lock Washer 5 16 4 Lag Screw 5 16 18 x 1 7 8 2 Wing Nut 1 4x20 2 Insulated Staples 30 RAIL GREASE Rail Grease Hex Screw 5 16 18 x 7 8 4 Carriage Bolts 1 4 20x1 2 2 Lag Screw 5 16 9 x 1 ...

Страница 8: ...or opener until instructed to do so Assembly Section Pages 8 11 When tightening the screws be sure to keep bracket parallel to the rail Otherwise the rail may bow when the opener is operated Right Wrong Align the 4 T rail sections on a flat surface exactly as shown Center sections are interchangeable Front and back sections are also interchangeable for ease of assembly Insert the carriage bolts so...

Страница 9: ... 2 USE ONLY THIS TYPE AND SIZE SCREW T Rail Back Section Cover Protection Bolt Hole Nut 5 16 18 Hex Screw 5 16 18x7 8 Lock Washer 5 16 9 Attach the threaded shaft to the trolley with the lock washer and nuts as shown As a temporary stop insert a screwdriver into the hole in the front end of the T rail Slide the trolley assembly along the rail to the screwdriver stop If trolley hits against any nut...

Страница 10: ...th engage the chain Continue forward to the trolley threaded shaft Figure 3 Use the second master link to connect the chain to the flat end of the shaft Check to make sure the chain is not twisted Remove the screwdriver eep Chain and Cable aut When Dispensing Cable Pulley Cable Loop Master Link Bar Master Link Clip On Spring Trolley T rail Pin Pin Notch Chain Flat End of Trolley Threaded Shaft Mas...

Страница 11: ...re injury or death Repairs to cables spring assemblies and other hardware must be made by a professional service person before installing opener 3 Disable all locks and remove all ropes connected to the garage door before installing the opener Ropes connected to a garage door can cause entanglement and death 4 If possible install door opener 7 feet or more above floor with the manual release handl...

Страница 12: ...earance is minimal It may be mounted on the wall upside down if necessary to gain approximately 1 2 If you need to install the header bracket on a 2x4 on wall or ceiling use lag screws not supplied to securely fasten the 2x4 to structural supports as shown here and on page 13 Installation Section Pages 12 27 Sectional door with curved track One piece door with horizontal track Installation Step 1 ...

Страница 13: ... Measure UP from top of CLOSED door Proceed to Step 2 page 14 13 Header Wall Highest Point of Travel Door Distance Jamb Hardware ONE PIECE Door Without Track Open your door to the highest point of travel as shown Measure the distance from the top of the door to the floor Subtract the actual height of the door Add 8 to the remainder See Example Close the door and draw an intersecting horizontal lin...

Страница 14: ... ceiling mount Drill 3 16 pilot holes and fasten the bracket securely to a structural support with the hardware provided Extend the vertical guideline onto the ceiling as shown Center the bracket on the vertical mark no more than 6 from the wall Make sure the arrow is pointing toward the wall The bracket can be mounted flush against the ceiling when clearance is minimal Mark holes designated for c...

Страница 15: ...e packing material as a protective base If the door spring is in the way you ll need help Have someone hold the opener securely on a temporary support to allow the T rail to clear the spring Position the cable pulley bracket against the header bracket Align the bracket holes and join with a clevis pin as shown Insert a ring fastener to secure 15 Installation Step 3 Attach the T rail to the Header ...

Страница 16: ...the T rail If the top panel hits the trolley when you raise the door pull down on the trolley release arm to disconnect inner and outer sections The trolley can remain disconnected until Step 12 is completed T Rail 2x4 Door Stepladder ONE PIECE Door without Track With the door fully open and parallel to the floor measure the distance from the floor to the top of the door Using a stepladder as a su...

Страница 17: ...o make sure the T rail is centered over the door or in line with the header bracket if the bracket is not centered above the door Remove the 2x4 Operate the door manually If the door hits the rail raise the header bracket Measure Distance Lag Screws 5 16 18x1 7 8 Bracket Not Supplied Lag Screws 5 16 18x1 7 8 Not Supplied 5 16 18x7 8 Screw 5 16 Lock Washer 5 16 18 Nut FINISHED CEILING 5 16 18x7 8 S...

Страница 18: ...om one end of the bell wire Connect the wire to the two screw terminals on the back of the door control as follows white wire to 2 and white red wire to 1 NOTE After installation a green indicator light behind the white translucent cover will indicate proper connection If not lit the Lock and Light features will not function reverse wires to correct Before mounting remove the white cover by gently...

Страница 19: ...lose inadvertently if it is not properly balanced Serious injury may result to persons under the door Make sure the doorway is clear of persons and obstructions before pulling handle when door is open Thread one end of the rope through the hole in the top of the red handle so NOTICE reads right side up as shown Secure with an overhand knot at least 1 from the end of the rope to prevent slipping Th...

Страница 20: ... the opener cover screws and set the cover aside Remove the attached 3 prong cord Connect the black line wire to the screw on the brass terminal the white neutral wire to the screw on the silver terminal and the ground wire to the green ground screw The opener must be grounded Reinstall the cover To avoid installation difficulties do not run the opener at this time 20 To prevent electrocution or f...

Страница 21: ...icator light transmits an invisible light beam to the receiving eye with a green indicator light If an obstruction breaks the light beam while the door is closing the door will stop and reverse to full open position and the door control will flash for 5 seconds The units must be installed inside the garage so that the sending and receiving eyes face each other across the door between 4 6 above the...

Страница 22: ... curved arms facing the door Snap into place against the side of the track It should lie flush with the lip hugging the back edge of the track as shown in Figure 2 If your door track will not support the bracket securely wall installation is recommended Wall installation Place the bracket against the wall with curved arms facing the door Be sure there is enough clearance for the sensor beam to be ...

Страница 23: ...orrect The sending eye orange indicator light will glow regardless of alignment or obstruction If the green indicator light in the receiving eye is off dim or flickering and the invisible light beam path is not obstructed alignment is required Loosen the sending eye wing nut and readjust aiming directly at the receiving eye Lock in place Loosen the receiving eye wing nut and adjust sensor until it...

Страница 24: ...drill holes and install as follows depending on your door s construction Metal or light weight doors using a vertical angle iron brace between the door panel support and the door bracket Drill 3 16 fastening holes Secure the door bracket using the two 1 4 14x5 8 self threading screws Figure 2A Alternately use two 5 16 bolts lock washers and nuts not provided Figure 2B Metal insulated or light weig...

Страница 25: ...the door if required for your installation Refer to the dotted line optional placement drawing Self Threading Screw 1 4 14x5 8 HARDWARE SHOWN ACTUAL SIZE Header Wall Vertical Centerline of Garage Door Finished Ceiling Optional Placement of Door Bracket Header Bracket Door Bracket 2x4 Support For a door with no exposed framing or for the optional installation use 5 16 x1 1 2 lag screws not provided...

Страница 26: ...5 16 Nuts 5 16 18 Screws 5 16 18x7 8 Cut This End Inner Trolley Outer Trolley Figure 3 If holes in curved arm are above holes in straight arm disconnect straight arm Cut about 6 from the solid end Reconnect to trolley with cut end down as shown Bring arm sections together Find two pairs of holes that line up and join with screws lock washers and nuts Proceed to Adjustment Step 1 page 28 Trolley wi...

Страница 27: ...tion parallel to the floor and lift the door arm to the trolley The arm should touch the trolley just in back of the door arm connector hole Refer to the fully open trolley door arm positions in the illustration If the arm does not extend far enough adjust the limit further One full turn equals 2 of trolley travel Closed Door Adjustment Decrease DOWN limit Turn the DOWN limit adjustment screw cloc...

Страница 28: ...e system The door might not reverse properly when required and could seriously injure or kill someone under it Test the safety reverse system following all adjustments to the travel limits See page 30 WARNING If the door does not open completely but opens at least five feet Increase up travel Turn the UP limit adjustment screw clockwise One turn equals 2 of travel NOTE To prevent the trolley from ...

Страница 29: ...erclockwise Make 10 degree turn adjustments until the door stops easily After each adjustment run the opener through a complete travel cycle If the door doesn t open at least 5 feet Increase UP Open force by turning the control clockwise Make 10 degree turn adjustments until door opens completely Re adjust the UP limit if necessary After each adjustment run the opener through a complete travel cyc...

Страница 30: ... month and adjust as needed 30 Adjustment Step 3 Test The Protector System Press the remote control push button to open the door Place the opener carton in the path of the door Press the remote control push button to close the door The door will not move more than an inch and the opener lights will flash for 5 seconds Professional service is required if the opener closes the door when the safety r...

Страница 31: ...her force or limits of travel the other control may need to be adjusted also and the safety reversal system must be checked Failure to properly adjust the opener may result in severe injury or death 5 If possible use the manual release only when the door is in a closed position Caution should be taken whenever the disconnect cord is actuated with the door open Weak or broken springs may cause the ...

Страница 32: ...ure prevents the trolley from reconnecting automat ically Pull the manual release handle down and back toward the opener The door can then be raised and lowered manually as often as necessary To disengage the lockout feature pull the manual release handle straight down The trolley will reconnect on the next UP or DOWN operation Trolley Trolley Release Arm NOTICE Manual Release Handle Pull Down Tro...

Страница 33: ...itional remotes you may purchase See Accessories on page 38 To Add A Remote Control If you have a Multi Function door control 1 With the door closed press and hold a button on the remote to be programmed See Figure 1 2 Press and hold the Light button on the door control 3 Press and hold the door control push bar 4 After the opener lights flash release all buttons Test by pressing the remote push b...

Страница 34: ...r programming procedure with all remote controls The remote control has short range The garage door opens and closes by itself 1 Be sure that all remote control push buttons are off 2 Remove the bell wire from the door control terminals and operate from the remote control only If this solves the problem the door control is faulty replace or there is an intermittent short on the wire between the do...

Страница 35: ...l for the chain to droop slightly in the closed door position Use the manual release rope and handle to disconnect the trolley If the chain returns to the normal height when the trolley is disengaged and the door reverses on a one inch board or a 2x4 laid flat no adjustments are needed See page 11 35 The door opens but won t close The door reverses for no apparent reason and opener lights don t bl...

Страница 36: ...age 7 KEY PART NO NO DESCRIPTION 1 41A5273 2 Multi function door control panel 2 41A5056 12 Remote control housing only no circuit board 3 10A20 3V2032 Lithium battery 4 29B137 Transmitter visor clip 5 41A2828 Manual release rope handle assy 6 217A238 2 conductor bell wire white white red 7 41A4353 Header bracket w clevis pin fastener 8 41A5047 Door bracket w clevis pin fastener 9 178B35 Curved do...

Страница 37: ...eplacement motor bracket assembly Complete with motor worm bracket bearing assembly RPM sensor 12 41A3896 3 Cover 13 41A2818 Helical gear retainer w grease 14 41D3452 Limit switch assembly 15 41C4398A RPM sensor assembly 16 41C4246 Wire harness assembly w plug 17 41A2826 Shaft bearing kit 18 41A2822A Interrupter cup assy 19 41A5021 E Receiver logic board assy Complete with Logic board End panel w ...

Страница 38: ...k three times Release the button 2 Press the temporary 4 digit password you have chosen then press Enter The opener light will blink four times 3 To set the number of hours this temporary password will work press the number of hours up to 255 then press OR 3 To set the number of times this temporary password will work press the number of times up to 255 then press The opener light will blink once ...

Страница 39: ...ngs 28 31 Manual Release Rope Handle Lockout Feature 32 Manual Disconnect 32 Safety Warnings 11 19 31 32 Opener Terminals Door Control Connections 18 Safety Reversing Sensor Connections 23 Outside Keylock Accessory Connections 18 Operational Noise Sprocket noise 11 Vibration noise isolator kit 34 Protector System 21 30 Receiver and Remote Controls Programming the receiver 33 Erasing all codes 33 A...

Страница 40: ...will be advised of shipping instructions when you call the toll free service number Please include a brief description of the problem and a dated proof of purchase receipt with any product that is returned for warranty repair Products returned to Seller for warranty repair which upon receipt by Seller are confirmed to be defective and covered by this limited warranty will be repaired or replaced a...

Отзывы: