SPRAY GUN HANDLING
Your new spray gun is exceptionally rugged in construction and is built to stand up under hard continuous
use. However, like any other fine precision instrument, its most efficient operation depends on knowledge
of its construction, operation, and maintenance. Properly handled and cared for, it will produce beautiful,
uniform finishing results long after other spray guns have worn out.
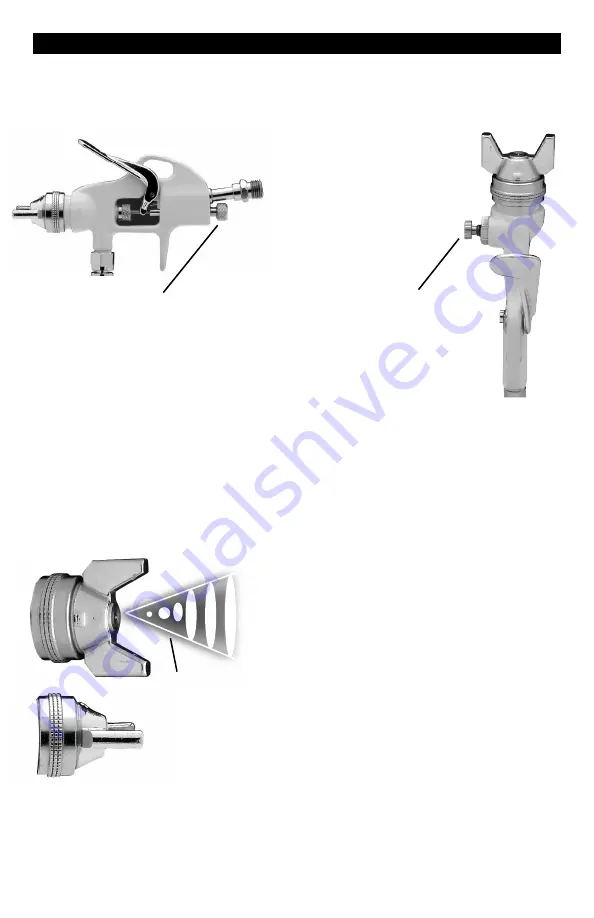
FLUID CONTROL KNOB:
Turn right to decrease flow and left to increase.
1. If a fluid pressure tank is used, the amount
of fluid can also be controlled by regulating
the pressure on the tank.
2. As width of spray is increased, more material
must be allowed to pass through the gun to
obtain the same coverage on the increased
area.
3. The direction of the fan spray, either horizontal
or vertical, is obtained by turning the air nozzle
to the desired position, then tightening the
retainer ring.
As width of spray gun is increased, more material must be allowed to pass through the gun to obtain
same coverage on the increased area.
SPRAYING
Spray pattern may be infinitely adjusted
from round to flat.
In normal use, the nozzle wings are horizontal as shown here.
This provides a vertical fan-shaped pattern which gives maximum,
even, material coverage as the gun is moved back and forth parallel
to the surface being finished.
SIPHON SPRAYING
Set atomization pressure at approximately 40 PSI for lacquer and 50 PSI for enamel. Try spray.
If spray is too fine, then decrease the air pressure or open fluid control screw. If the spray is
too thick, then close the fluid control screw. Regulate the pattern width and repeat adjustment
of spray as needed.
5
The spray pattern of the gun is variable
from round to flat with all patterns in between.
SPRAY PATTERN
ADJUSTMENT
KNOB:
Turn right for round
and left for fan.


