MasterCraft MX-1408 Скачать руководство пользователя страница 8

PROBLEM: Streaking, uneven or no spray from jets.

Possible Cause

Possible Solution 

1. Solution control knob in wrong

1. Correct knob position.

position (auxiliary).

2. Dirty or plugged spray jets.

2. Clean or replace spray jets.

3. Worn spray jets.

3. Replace spray jets.

4. Solution line filter plugged.

4. Clean or replace solution line filter.

5. Faulty pump.

5. Replace pump.

PROBLEM: Loss of vacuum.

Possible Cause 

Possible Solution

1. Drain valve open.

1. Close drain valve. 

2. Tank cover not properly seated or 

2. Reseat tank cover correctly or replace 

gasket on cover damaged.

damaged gasket.

3. Damaged vacuum hose or loose cuffs.

3. Replace hose or tighten cuffs.

4. Defective  vacuum motor.

4. Replace vacuum motor.

5. Vacuum shoe is clogged.

5. Clean with stiff wire.

PROBLEM: Motors (vacuum, brush & pump) will not run.

Possible Cause

Possible Solution

1. Fuse blown or circuit breaker tripped.

1. Replace fuse or re-set breaker.

2. Faulty

ON/OFF

switch.

2. Replace switch or switches.

3. Loose wiring.

3. Trace and repair.

4. Faulty motor. 

4. Replace motor.

T

ROUBLE

S

HOOTING

G

UIDE

Service and repairs should only be performed by 

an authorized service center.

MX1408 Manual - PN 350060 - Printed in USA 05/17/05

Address:

777 South Street 



P.O. Box 2310

Newburgh, New York 12550-0606

TEL: 

(800) 835-7812 



(845) 565-8850

FAX: 

(800) 752-6883 



(845) 565-9392

URL: 

www.mastercraftusa.com

E-Mail: 

techsupport

@

mastercraftusa.com

W

ARNING

:

P

AGE

8

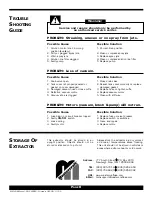
This extractor should be stored in an
upright position. Objects should not be
stored or stacked on top of unit.

Always store the extractor in a dry, protect-
ed area at temperatures above freezing.
This unit should not be stored in vehicles or
areas where extreme heat or cold occurs.

S

TORAGE

O

F

E

XTRACTOR

Содержание MX-1408

Страница 1: ...ctor is protectively packed to prevent damage in shipment We rec ommend that upon delivery unpack the unit and inspect it for any possible damage Only a visual examination will reveal damage that may have occurred If damage is discovered immediately notify the transportation company that delivered your extractor As the shipper we cannot file a claim for any damage You must originate any claim with...

Страница 2: ...ything that may reduce air flow 11 Keep hair loose clothing fingers and all parts of body away from openings and moving parts 12 DO NOT pick up anything that is burning or smoking such as cigarettes matches or hot ashes 13 DO NOT use extractor for totally dry vacuuming This machine is not fitted with a fine dust filter 14 Turn OFF all the controls before unplugging 15 DO NOT use to pick up flammab...

Страница 3: ...until a properly grounded outlet Fig A can be installed by a qualified electri cian The green color rigid ear lug or the like extending from the adaptor must be connected to a permanent ground such as a properly grounded outlet box cover Whenever the adaptor is used it must be held in place by a metal screw Fig C Improper connection of the equipment grounding conductor can result in a risk of elec...

Страница 4: ...n when cleaning fitted carpets with a jute backing It may shrink and be come discolored from over saturation of liquids Brush Switch Vacuum Switch Solution Tank Cover PAGE 4 Backward Forward Lever Solution Switch Folding Handle Adjustment Lever Brush Pressure Lever Power Cord Drain Hose Accessory Disconnect Vacuum Shoe Vacuum Hose Recovery Hose Solution Hose Solution Tank Knob GENERAL INFORMATION ...

Страница 5: ...ght side of handle to reverse brush action 5 Clean slowly and evenly in the forward and backward direction 6 Turn OFF the solution switch approximately 12 inches before com pleting each pass This allows dis pensed solution to be recovered 7 Each pass should overlap the previous pass by 21 2 to 5 After operating the extractor for a while some streaking may occur See Trouble Shooting Guide Pg 8 8 Th...

Страница 6: ...nisms holder should be replaced after operating 700 hours or when carbon brushes are worn down to 3 8 in length Replace both brushes at the same time To Replace and Install Brush 1 Remove the screw next to the brush pressure lever 2 Remove the brush holder and brush 3 When installing the brush make sure the centering pins on the brush are properly placed in the holes of the drive pulley 4 Re inser...

Страница 7: ...ry Tool Vacuum Hose Accessory Tool Solution Hose Accessory Tool Quick Connect Solution Control Knob Cleaning Tool and Wand PAGE 7 FREEZING TEMPERATURE PRE CAUTIONS 1 Remove the vacuum hose from the left side of the tank cover 2 Connect the accessory tool vacuum hose to the left fitting on tank cover and on to the end of the cleaning tool wand Note The hose must be connected tightly 3 Connect solut...

Страница 8: ...wire PROBLEM Motors vacuum brush pump will not run Possible Cause Possible Solution 1 Fuse blown or circuit breaker tripped 1 Replace fuse or re set breaker 2 Faulty ON OFF switch 2 Replace switch or switches 3 Loose wiring 3 Trace and repair 4 Faulty motor 4 Replace motor TROUBLE SHOOTING GUIDE Service and repairs should only be performed by an authorized service center MX1408 Manual PN 350060 Pr...

Отзывы: